
Photo by Ferhat Deniz Fors on Unsplash
Token Series: Build and Deploy ERC20 Token in 3 Steps
This post will teach us how to build and deploy the ERC20 token in 3 steps.
Approximately 90% of US and European banks have begun investigating blockchain's possibilities, with financial institutions investing $552 million in blockchain-based projects alone.
Besides documenting financial transactions, blockchain may also store medical information, reach binding agreements, trace the flow of commodities, keep personal credit records, track the provenance of artwork, verify payments across a supply chain, and much more.
Cryptocurrencies have recently gained popularity, providing limitless opportunities for businesses, individuals, and DAOs.
This post will teach us how to build and deploy the ERC20 token in 3 steps.
What is ERC20 Token?
The ERC-20 token is one of the essential Ethereum tokens. ERC-20 has emerged as the technical standard for token implementation on the Ethereum blockchain; it contains a set of rules that all Ethereum-based tokens must follow.
The ERC-20 introduces a standard for Fungible Tokens, which means they have a characteristic that makes each token identical to another in terms of type and value.
An ERC-20 token, for example, functions similarly to ETH, meaning that one token is and will always be equal to all other Tokens... Eth Org
Step 1: Build an ERC20 Token Smart Contract with Solidity using the remix IDE
We'll learn how to utilize https://remix.ethereum.org/, a free, easy-to-use IDE with a solidity-compatible IntelliJ feature and decent compile-time errors, to build and deploy an ERC20 Token Smart Contract.
Next, we will navigate to the Remix site and create a new file called MyToken.sol as shown below.
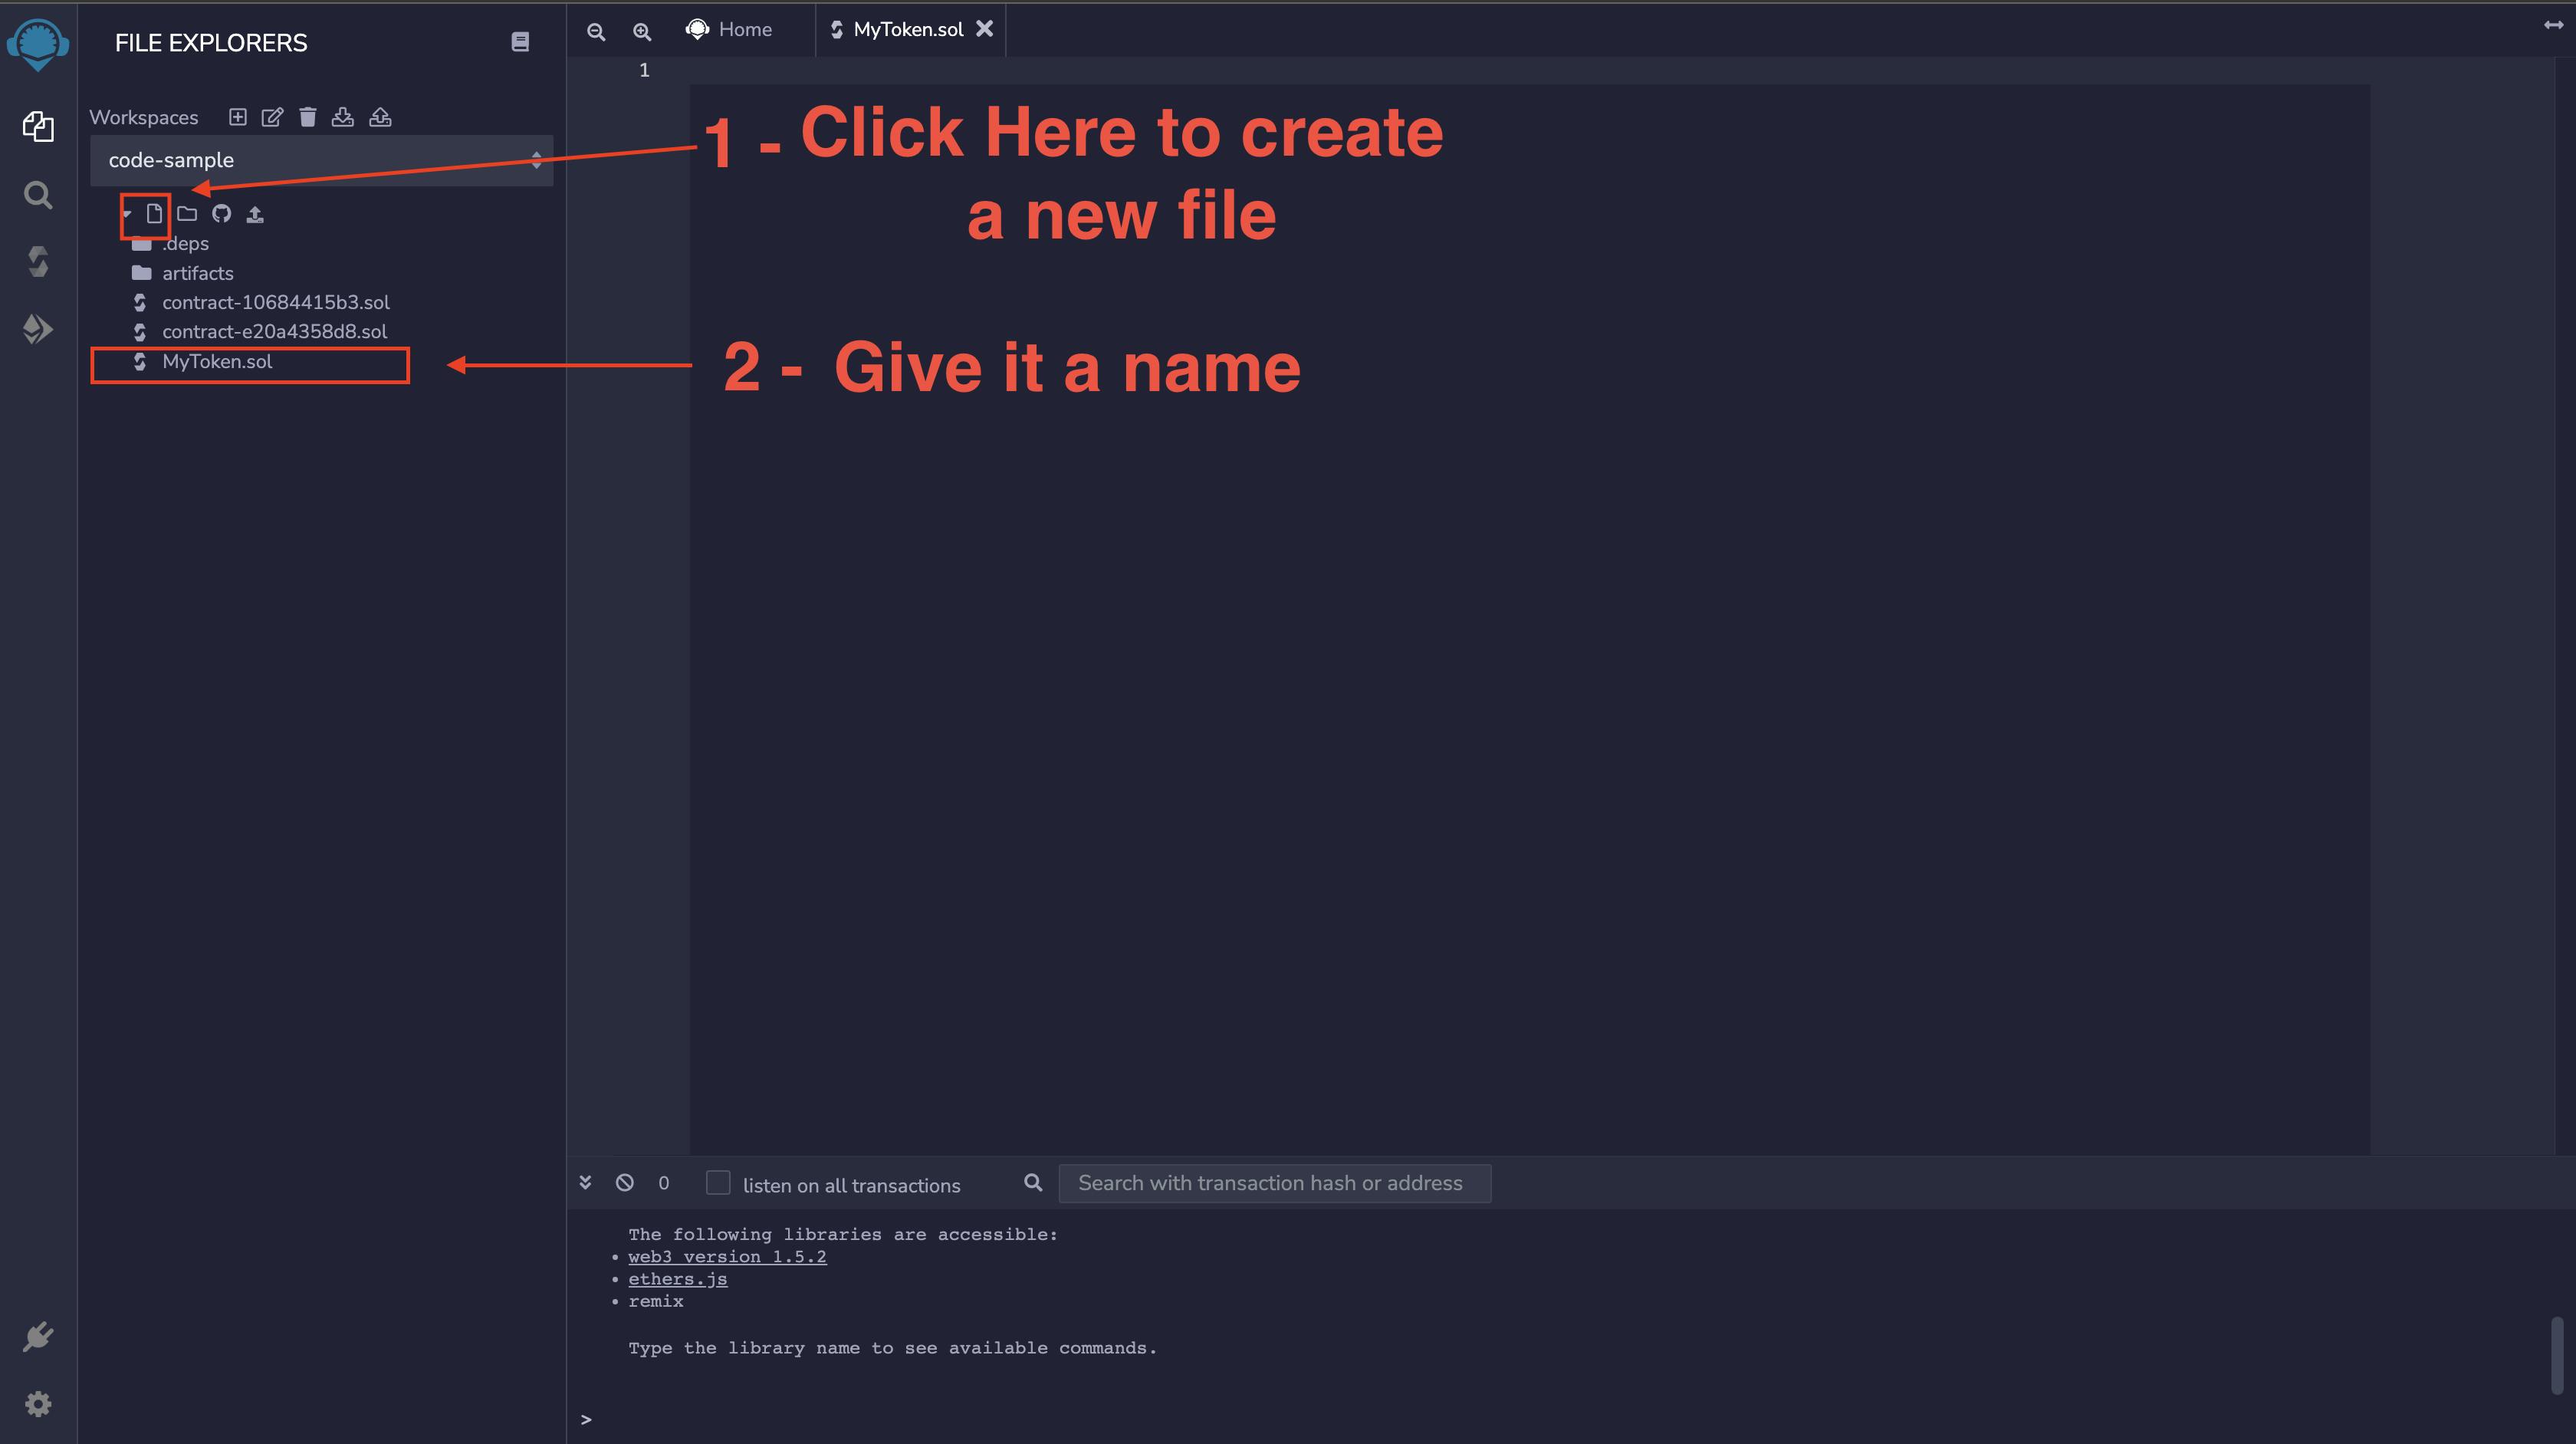
Let's update the MyToken.sol file with the following code snippet.
// SPDX-License-Identifier: MIT
pragma solidity ^0.8.4;

// Using the openzepplin contract standard
import "@openzeppelin/contracts/token/ERC20/ERC20.sol";
import "@openzeppelin/contracts/access/Ownable.sol";

// Token contract
contract OlanetsoftToken is ERC20, Ownable {
    constructor() ERC20("OlanetsoftToken", "OLT") {
        _mint(msg.sender, 500 * 10 ** decimals());
    }

    function mint(address to, uint256 amount) public onlyOwner {
        _mint(to, amount);
    }
}
In the code snippet above, we:
- Import the OpenZeppelin ERC20 contract
- Initialize the Token, inheriting from the ERC20.sol contract
- Declare a new contract called
OlanetsoftToken,using the Solidity keyword contract, while inheriting the ERC20 OpenZeppelin's contract using theiskeyword. - Create an initial amount of tokens
500for the deployer. - Give access to Privileged accounts to create more supply using the
mintfunction.
Next, we will compile our contract and get it ready for deployment.
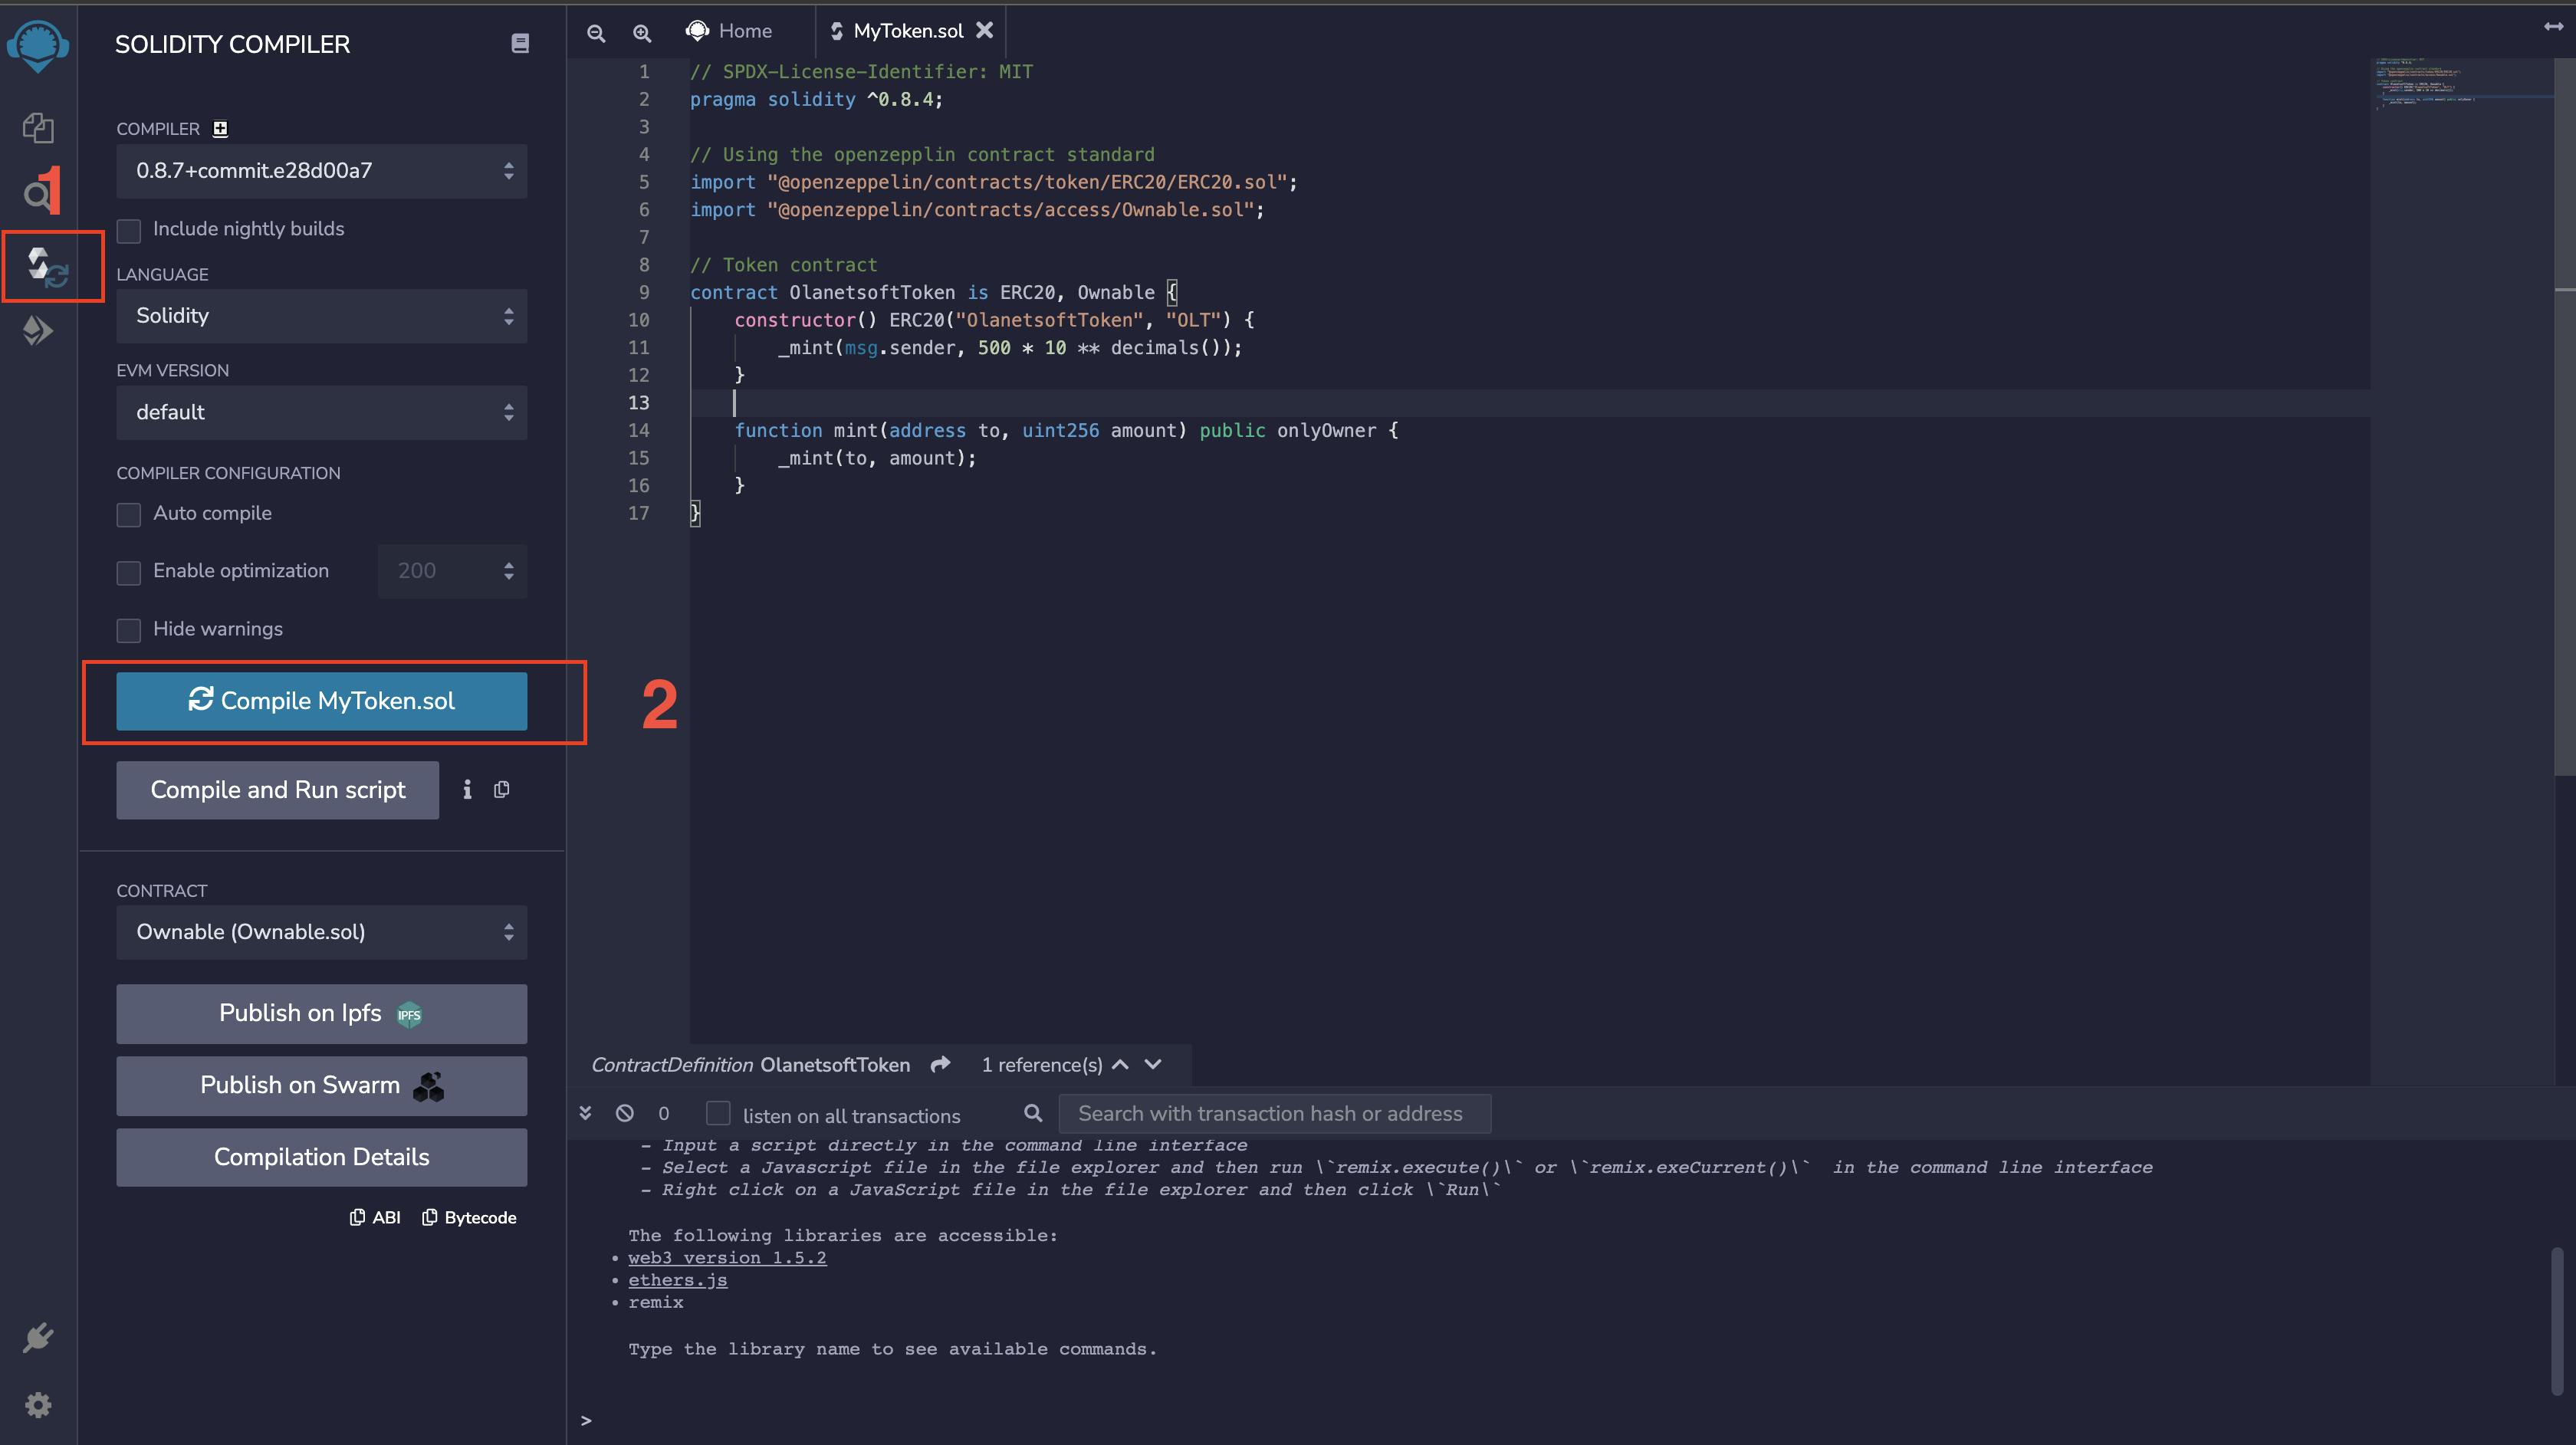
Step 2: Deploy ERC20 Token Smart Contract
In this step, we will deploy our smart contract to the Polygon Mumbai testnet. Deployment is not restricted to only Mumbai testnet, as we can deploy to any of our preferred chains.
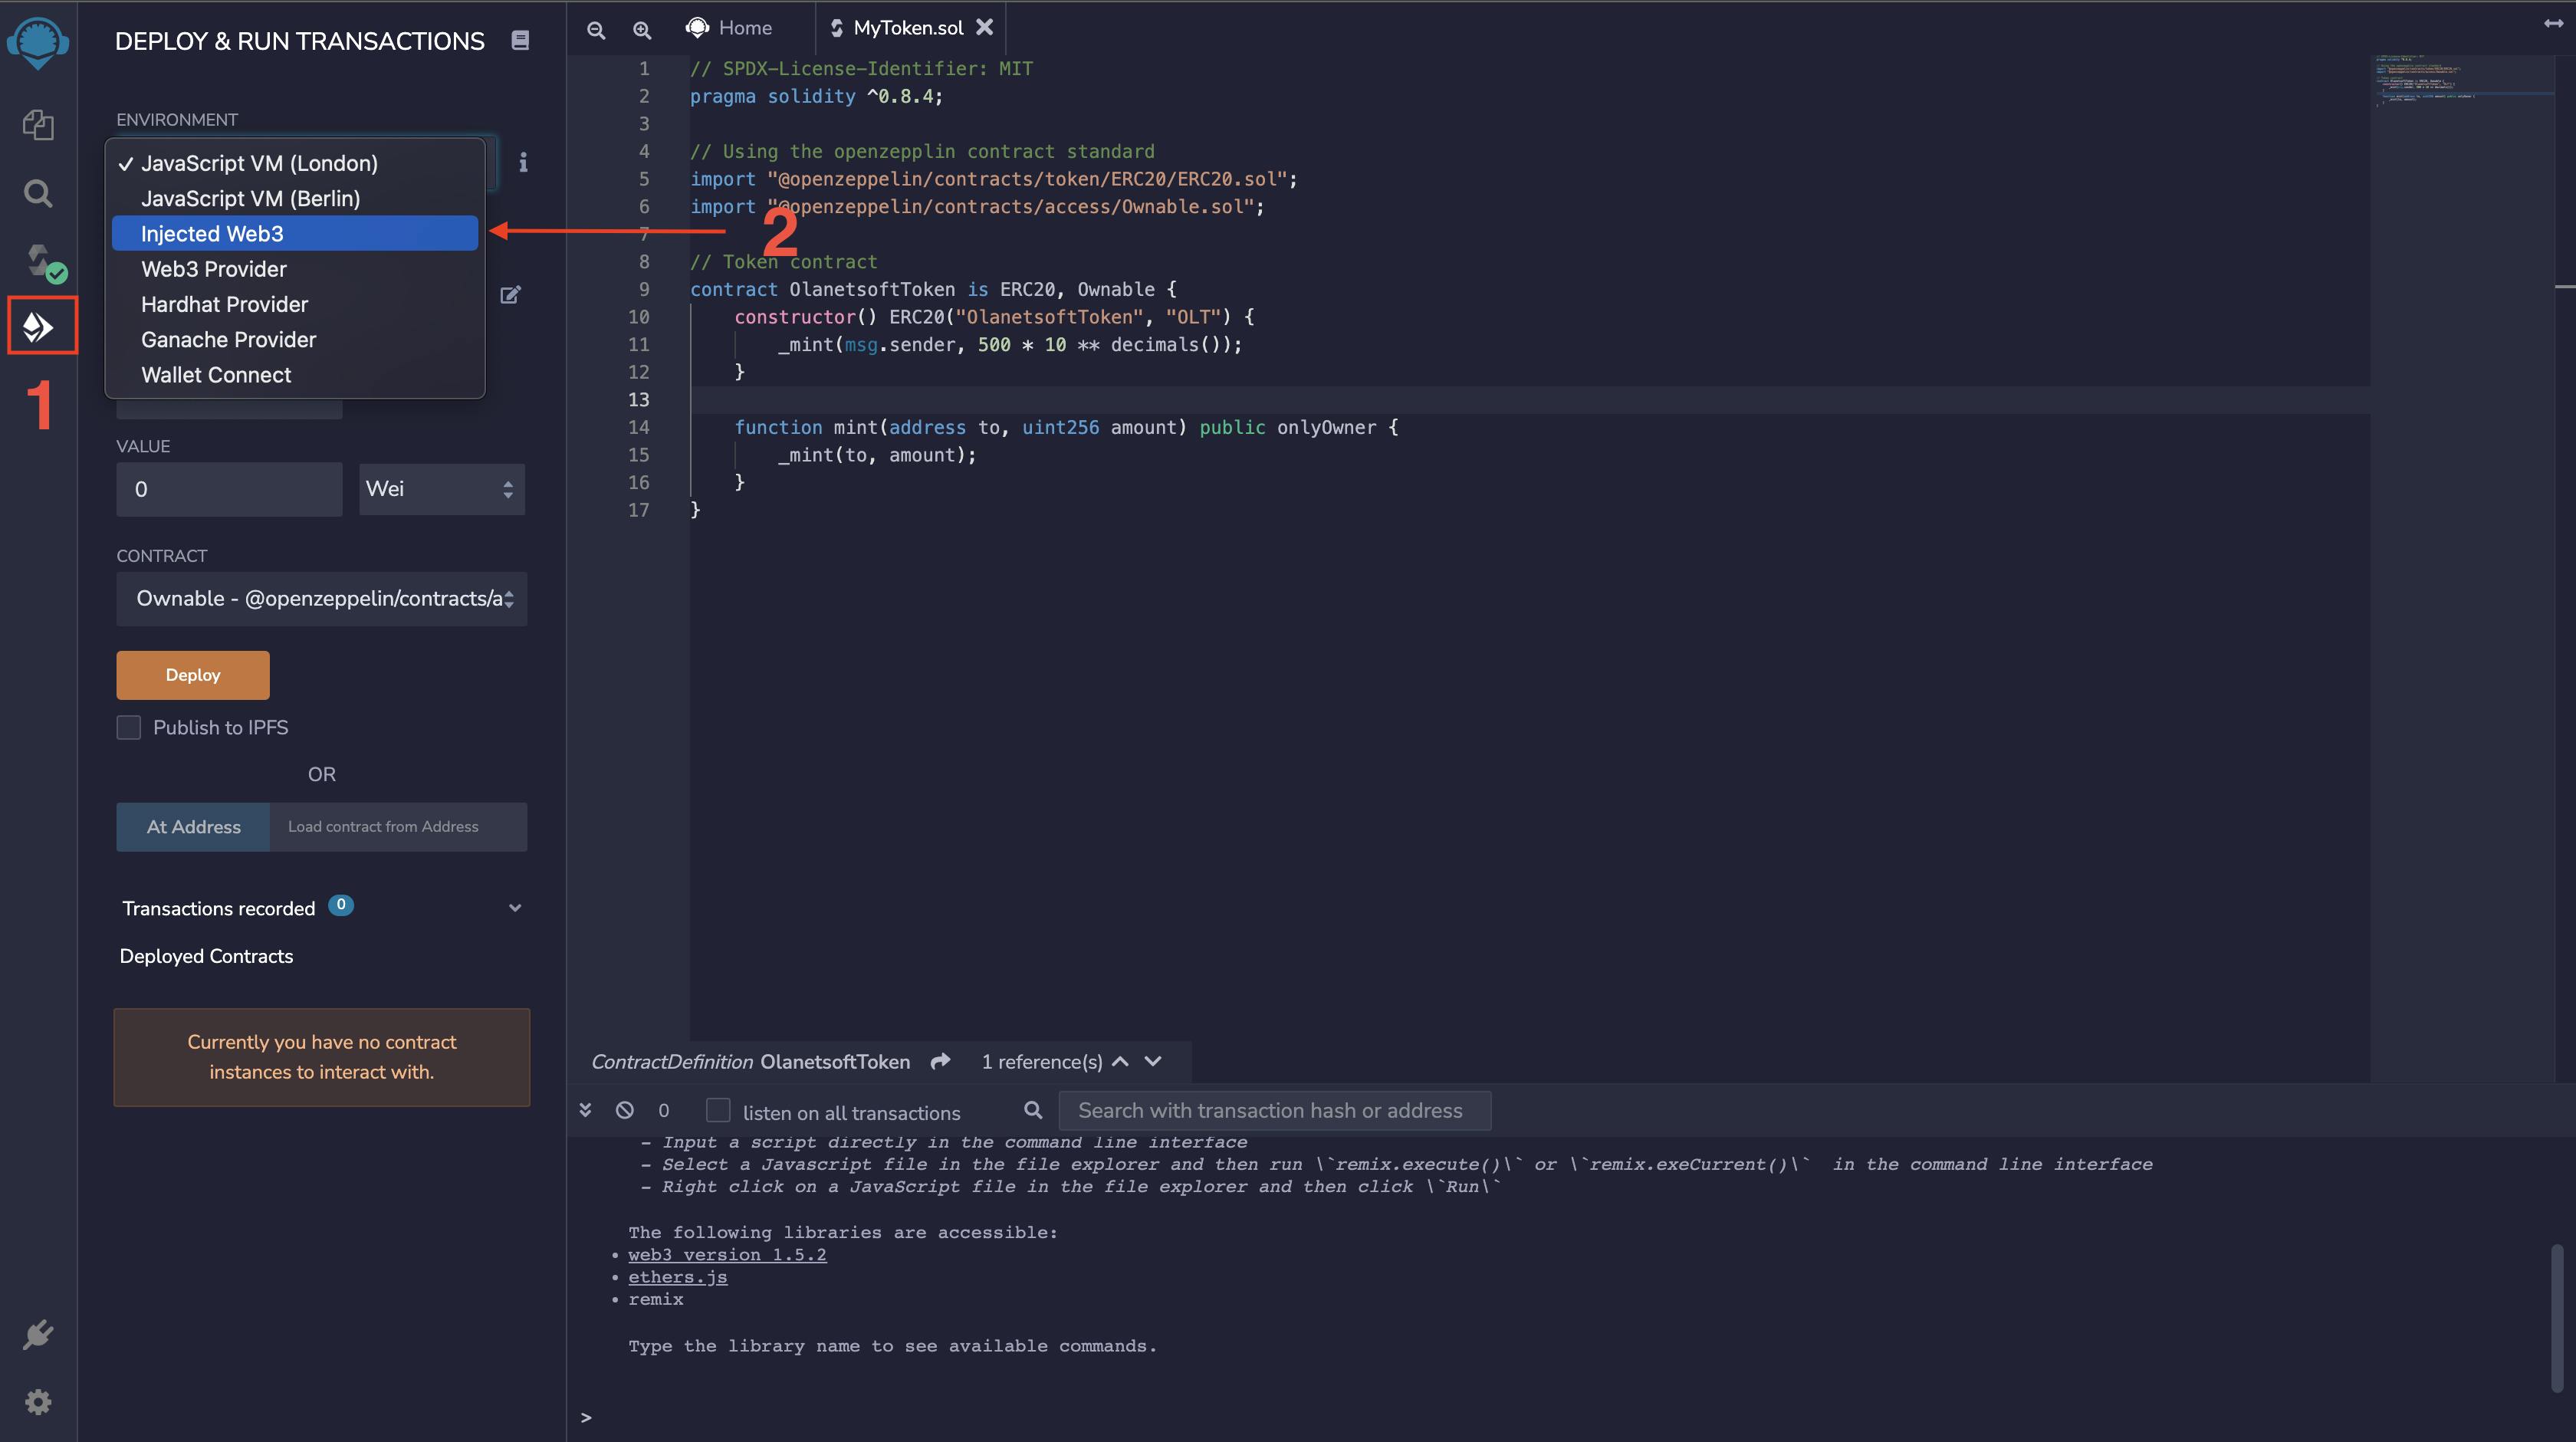
Next, we will select the contract to deploy.
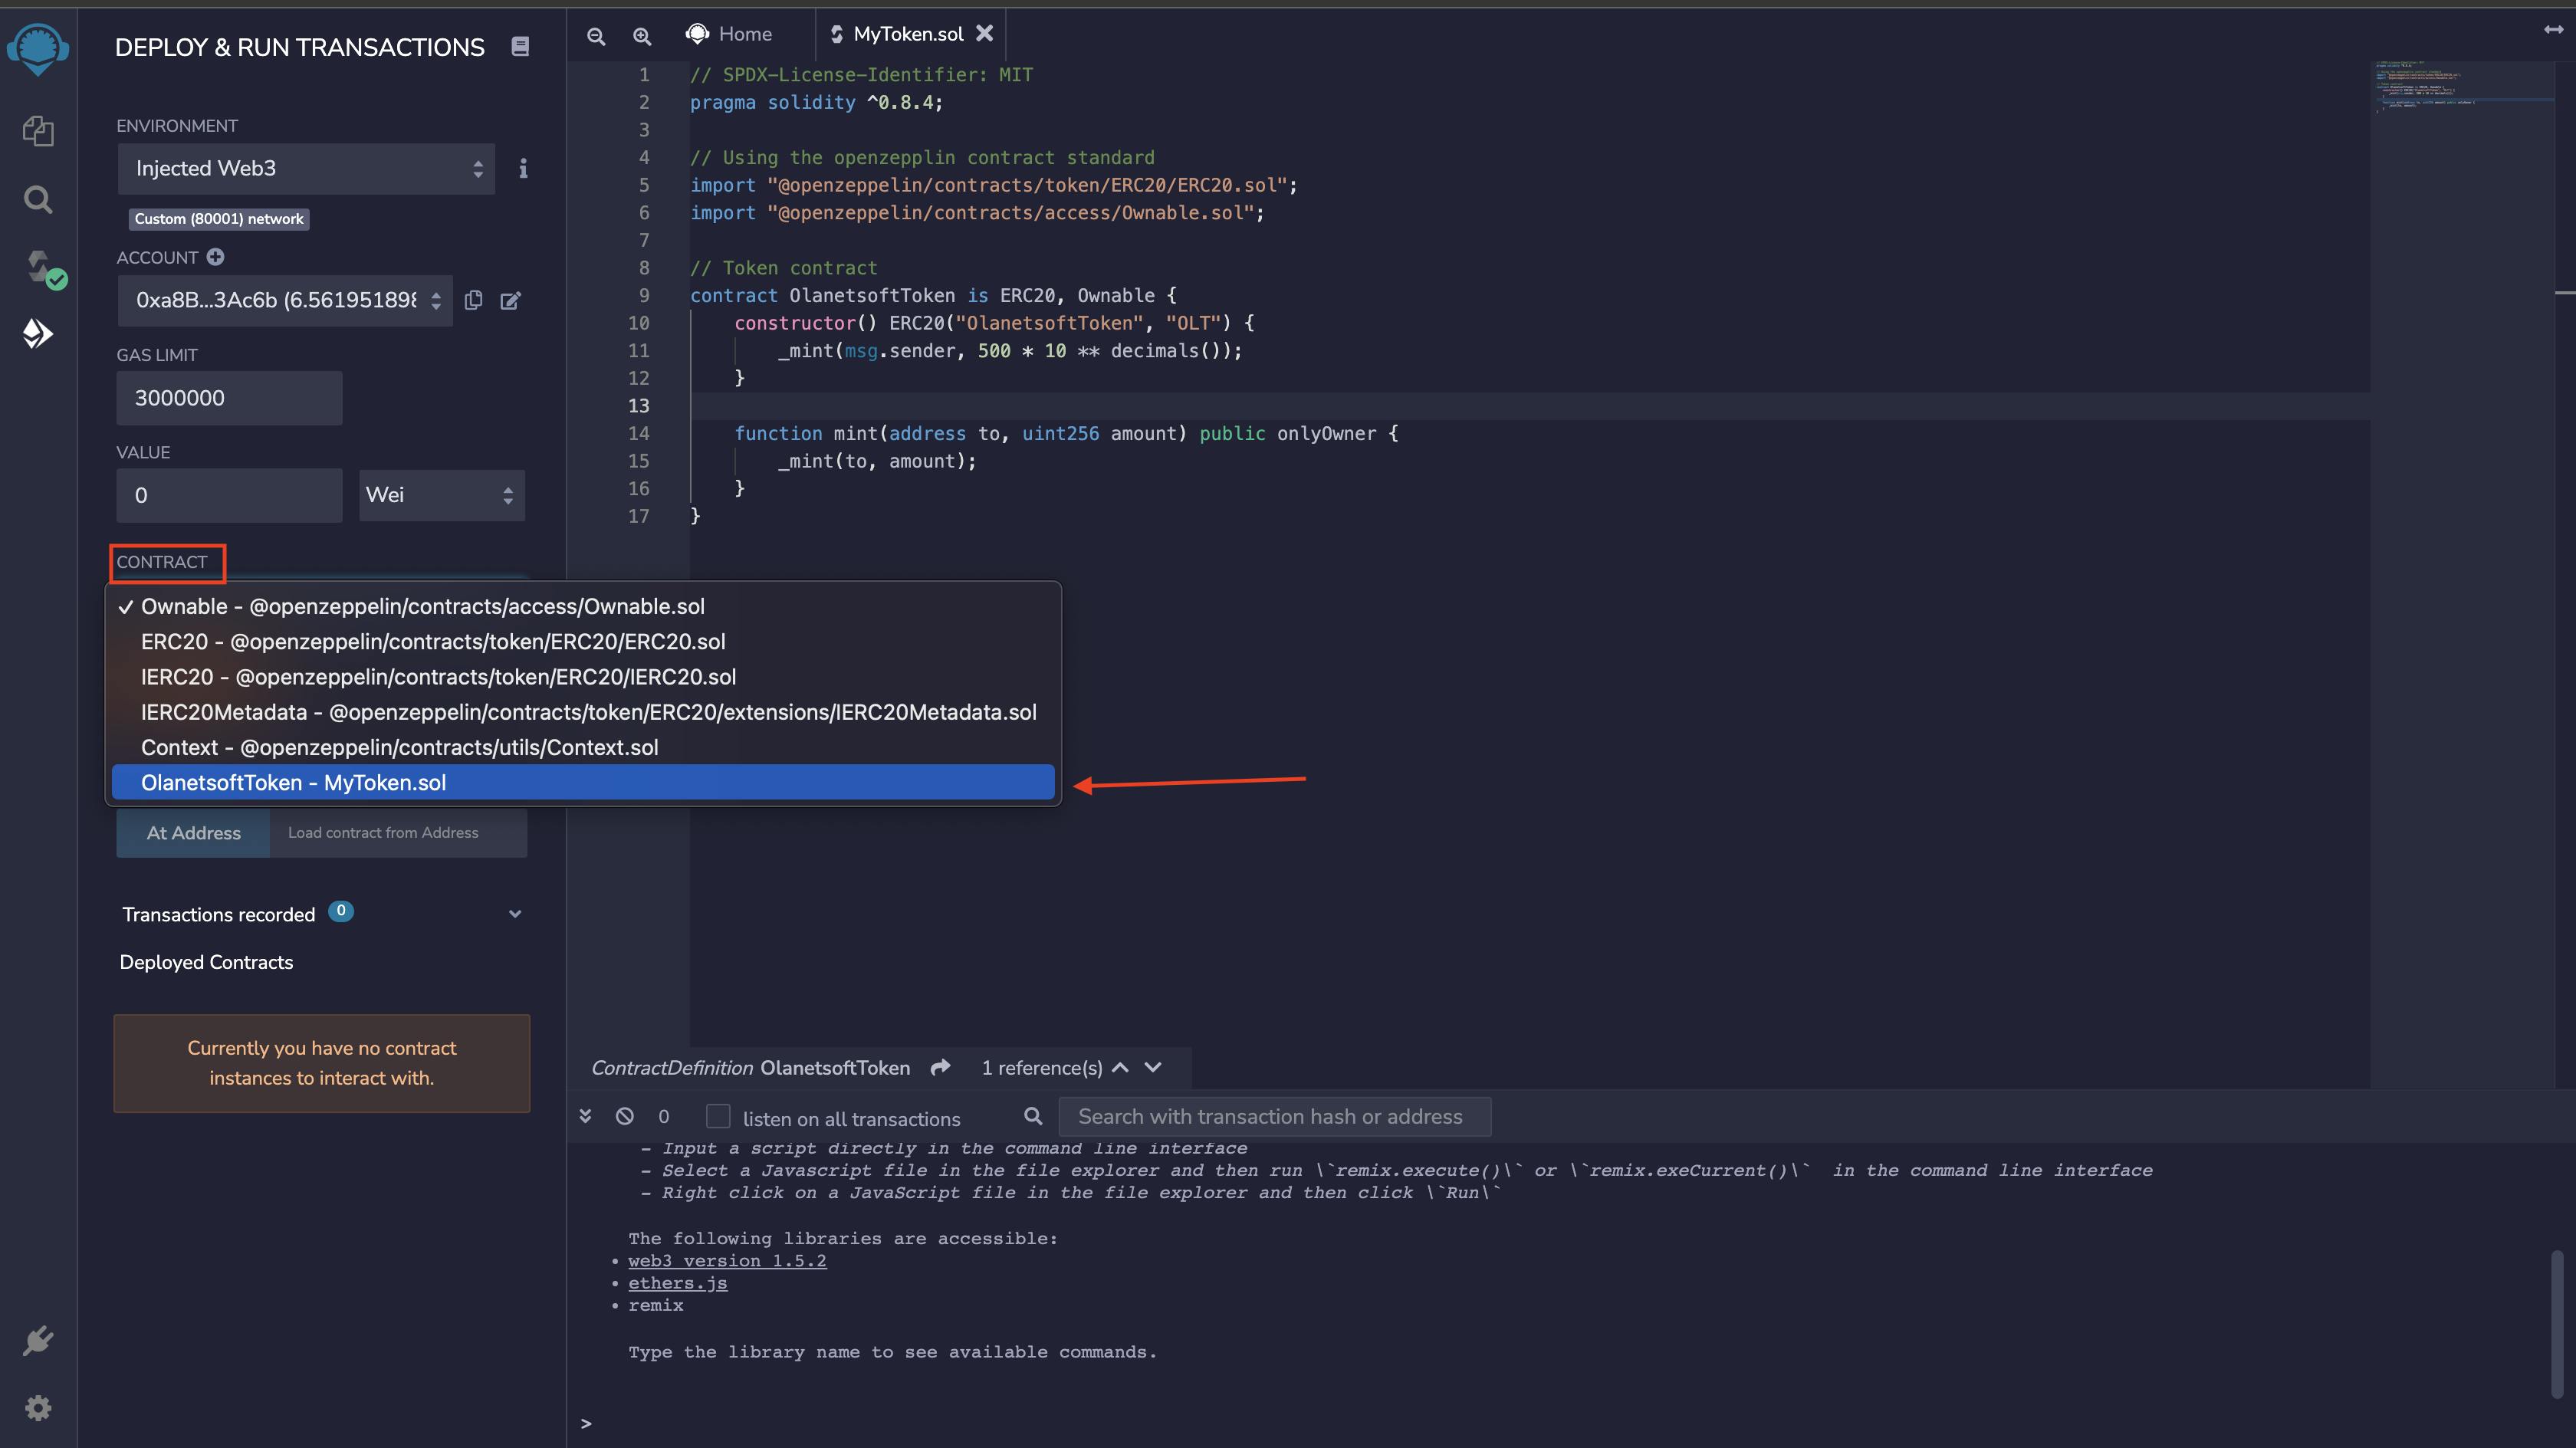
Finally, we can deploy our ERC20 token.
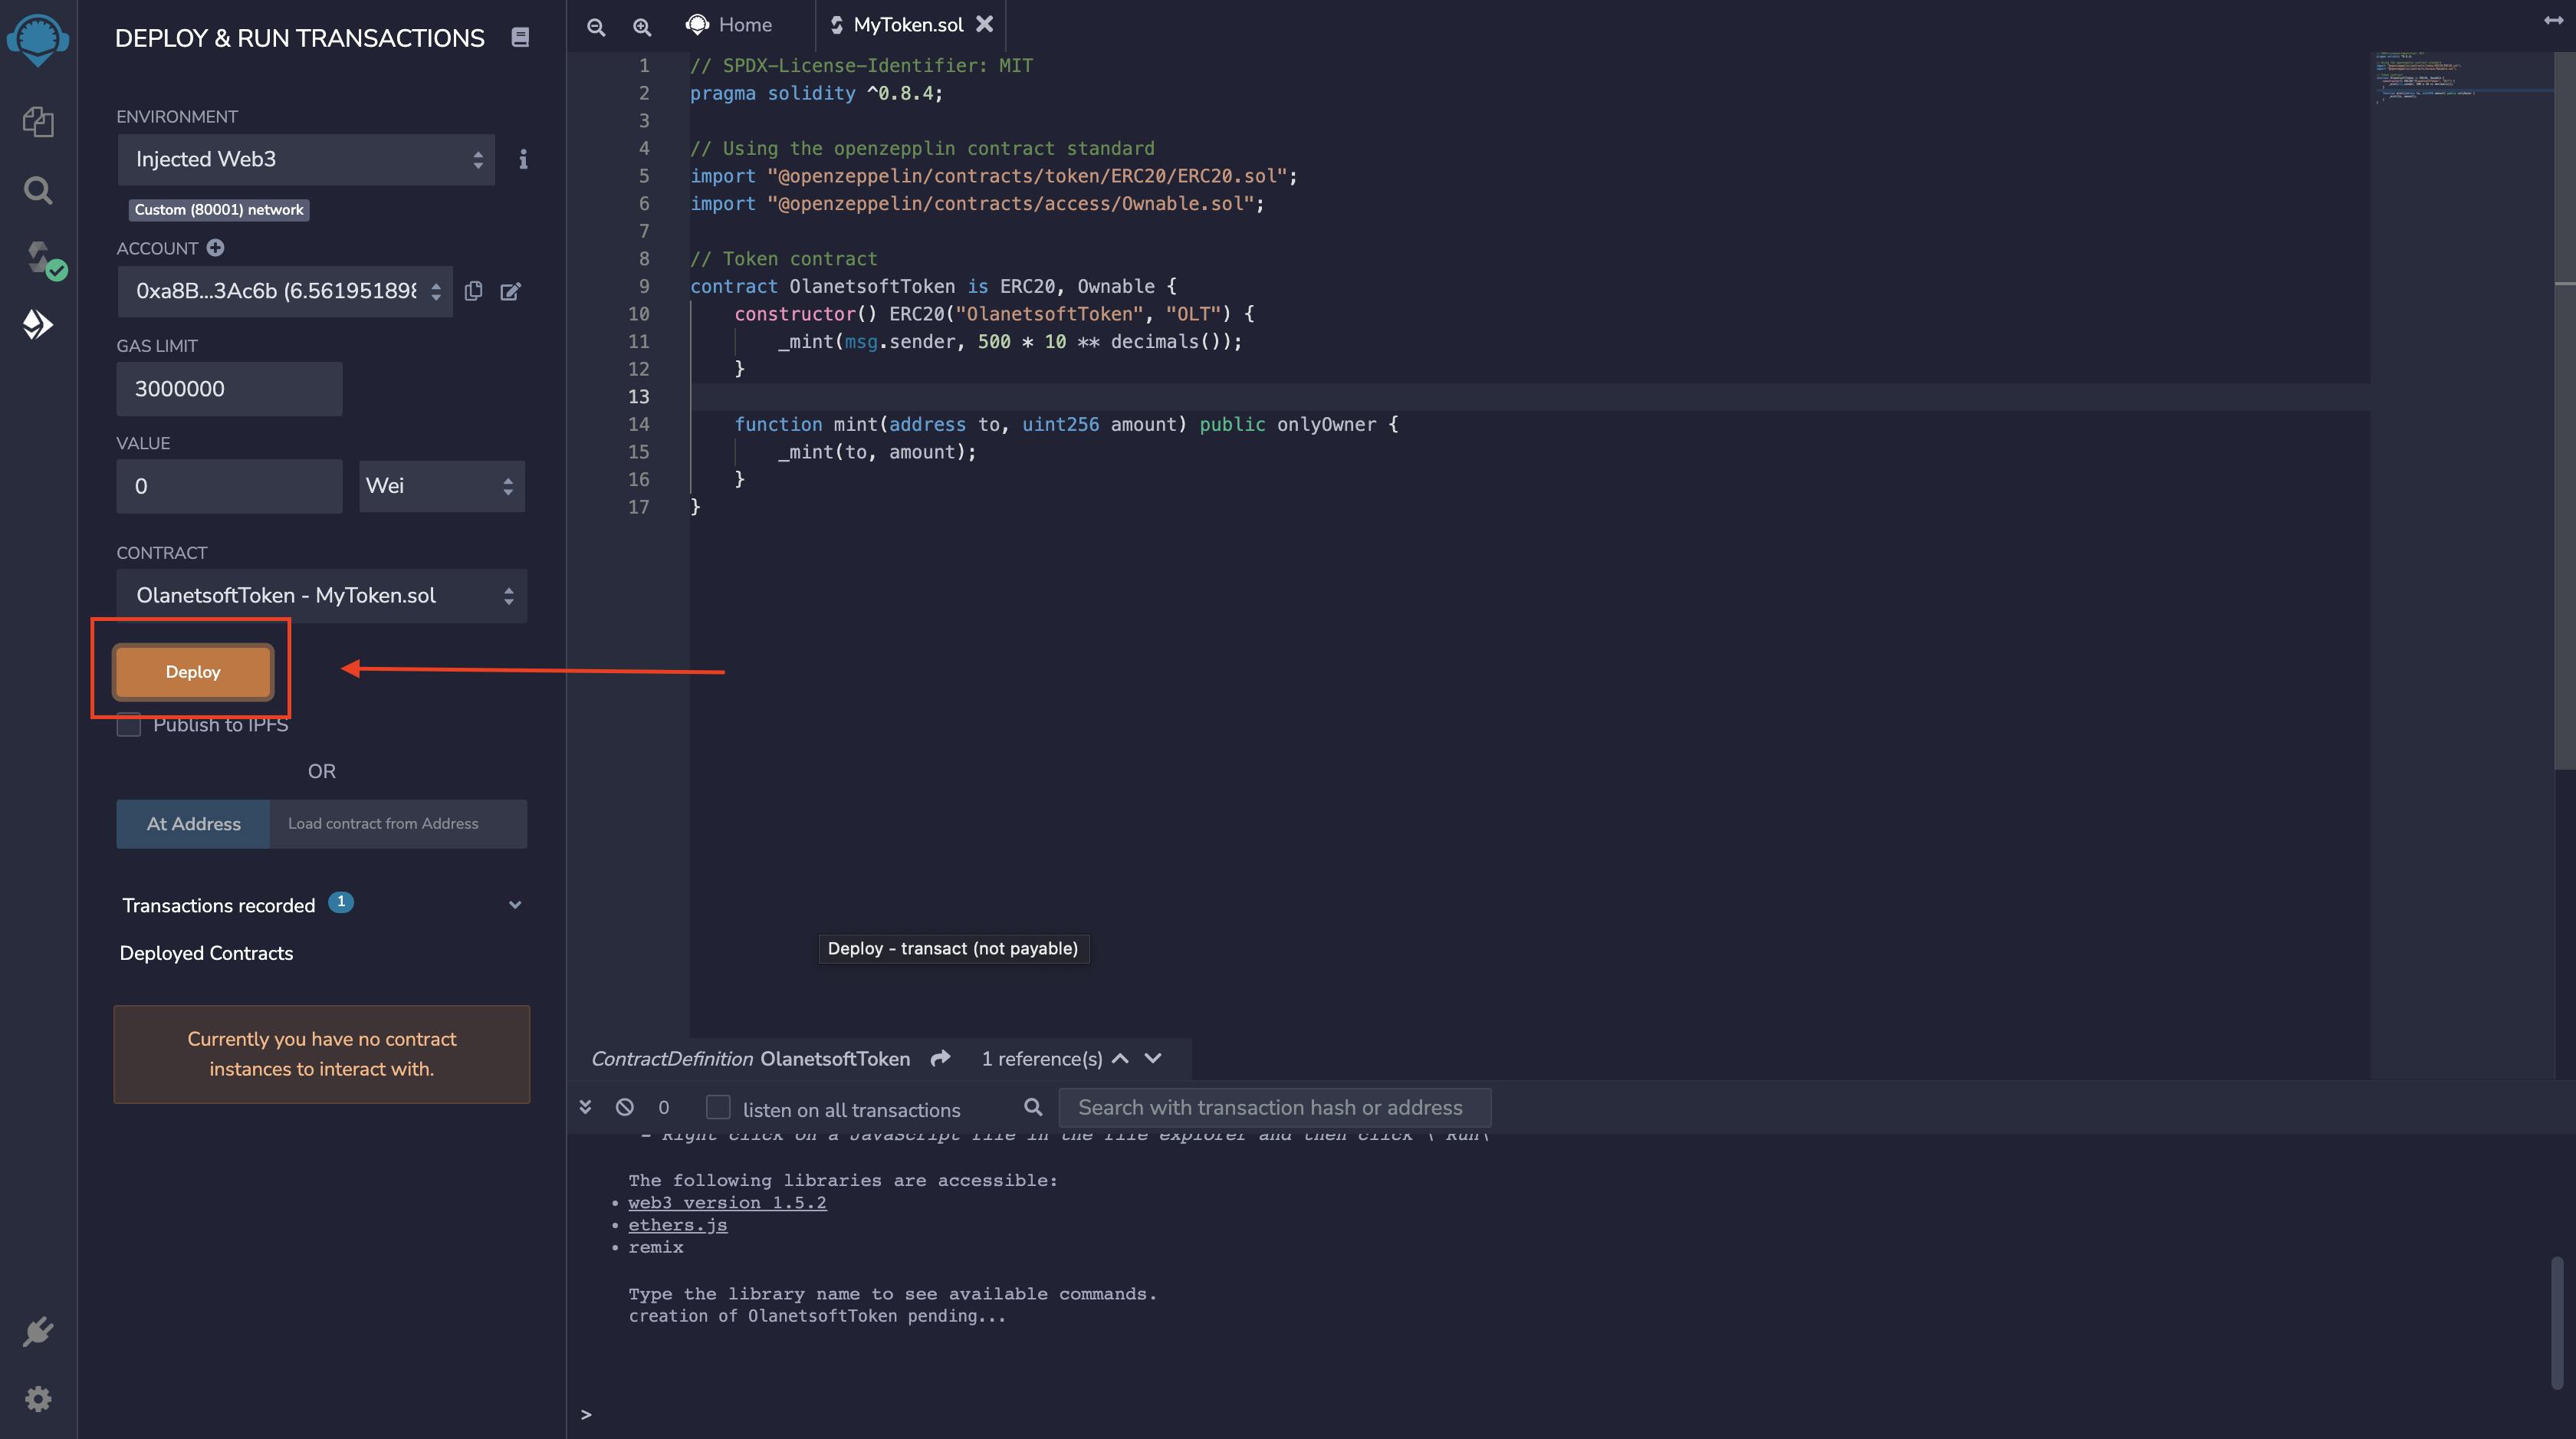
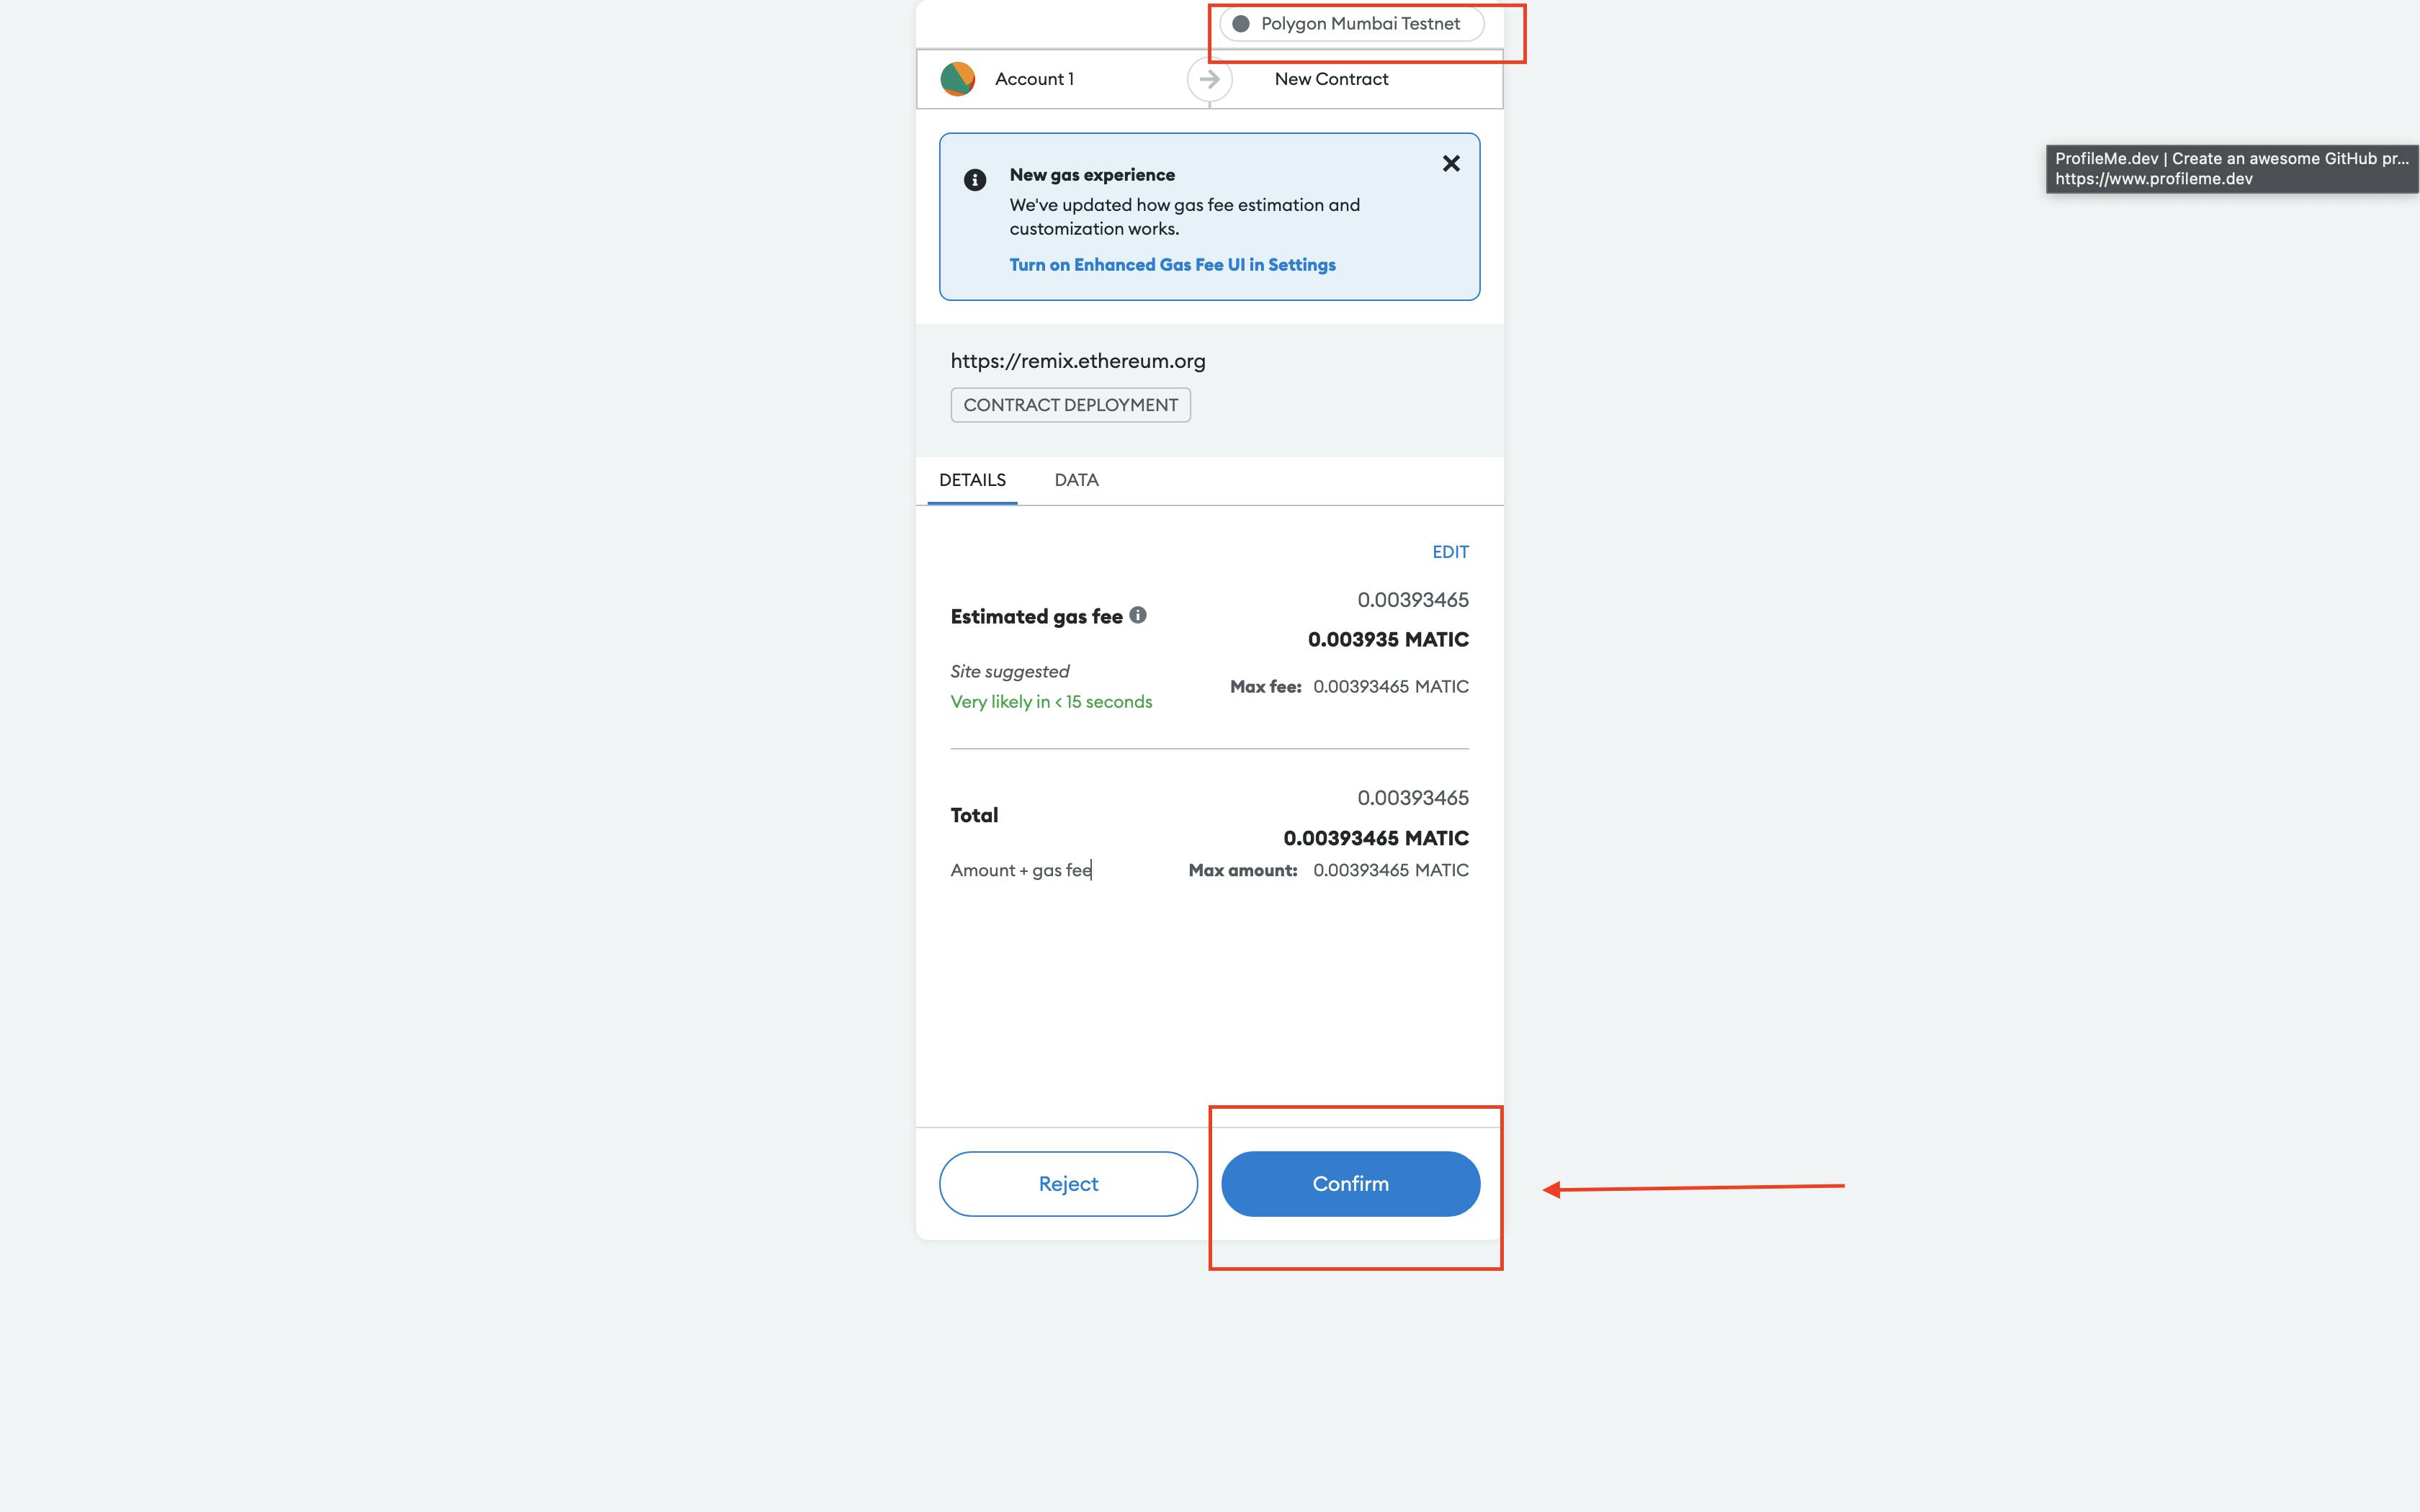
Voila 🥳
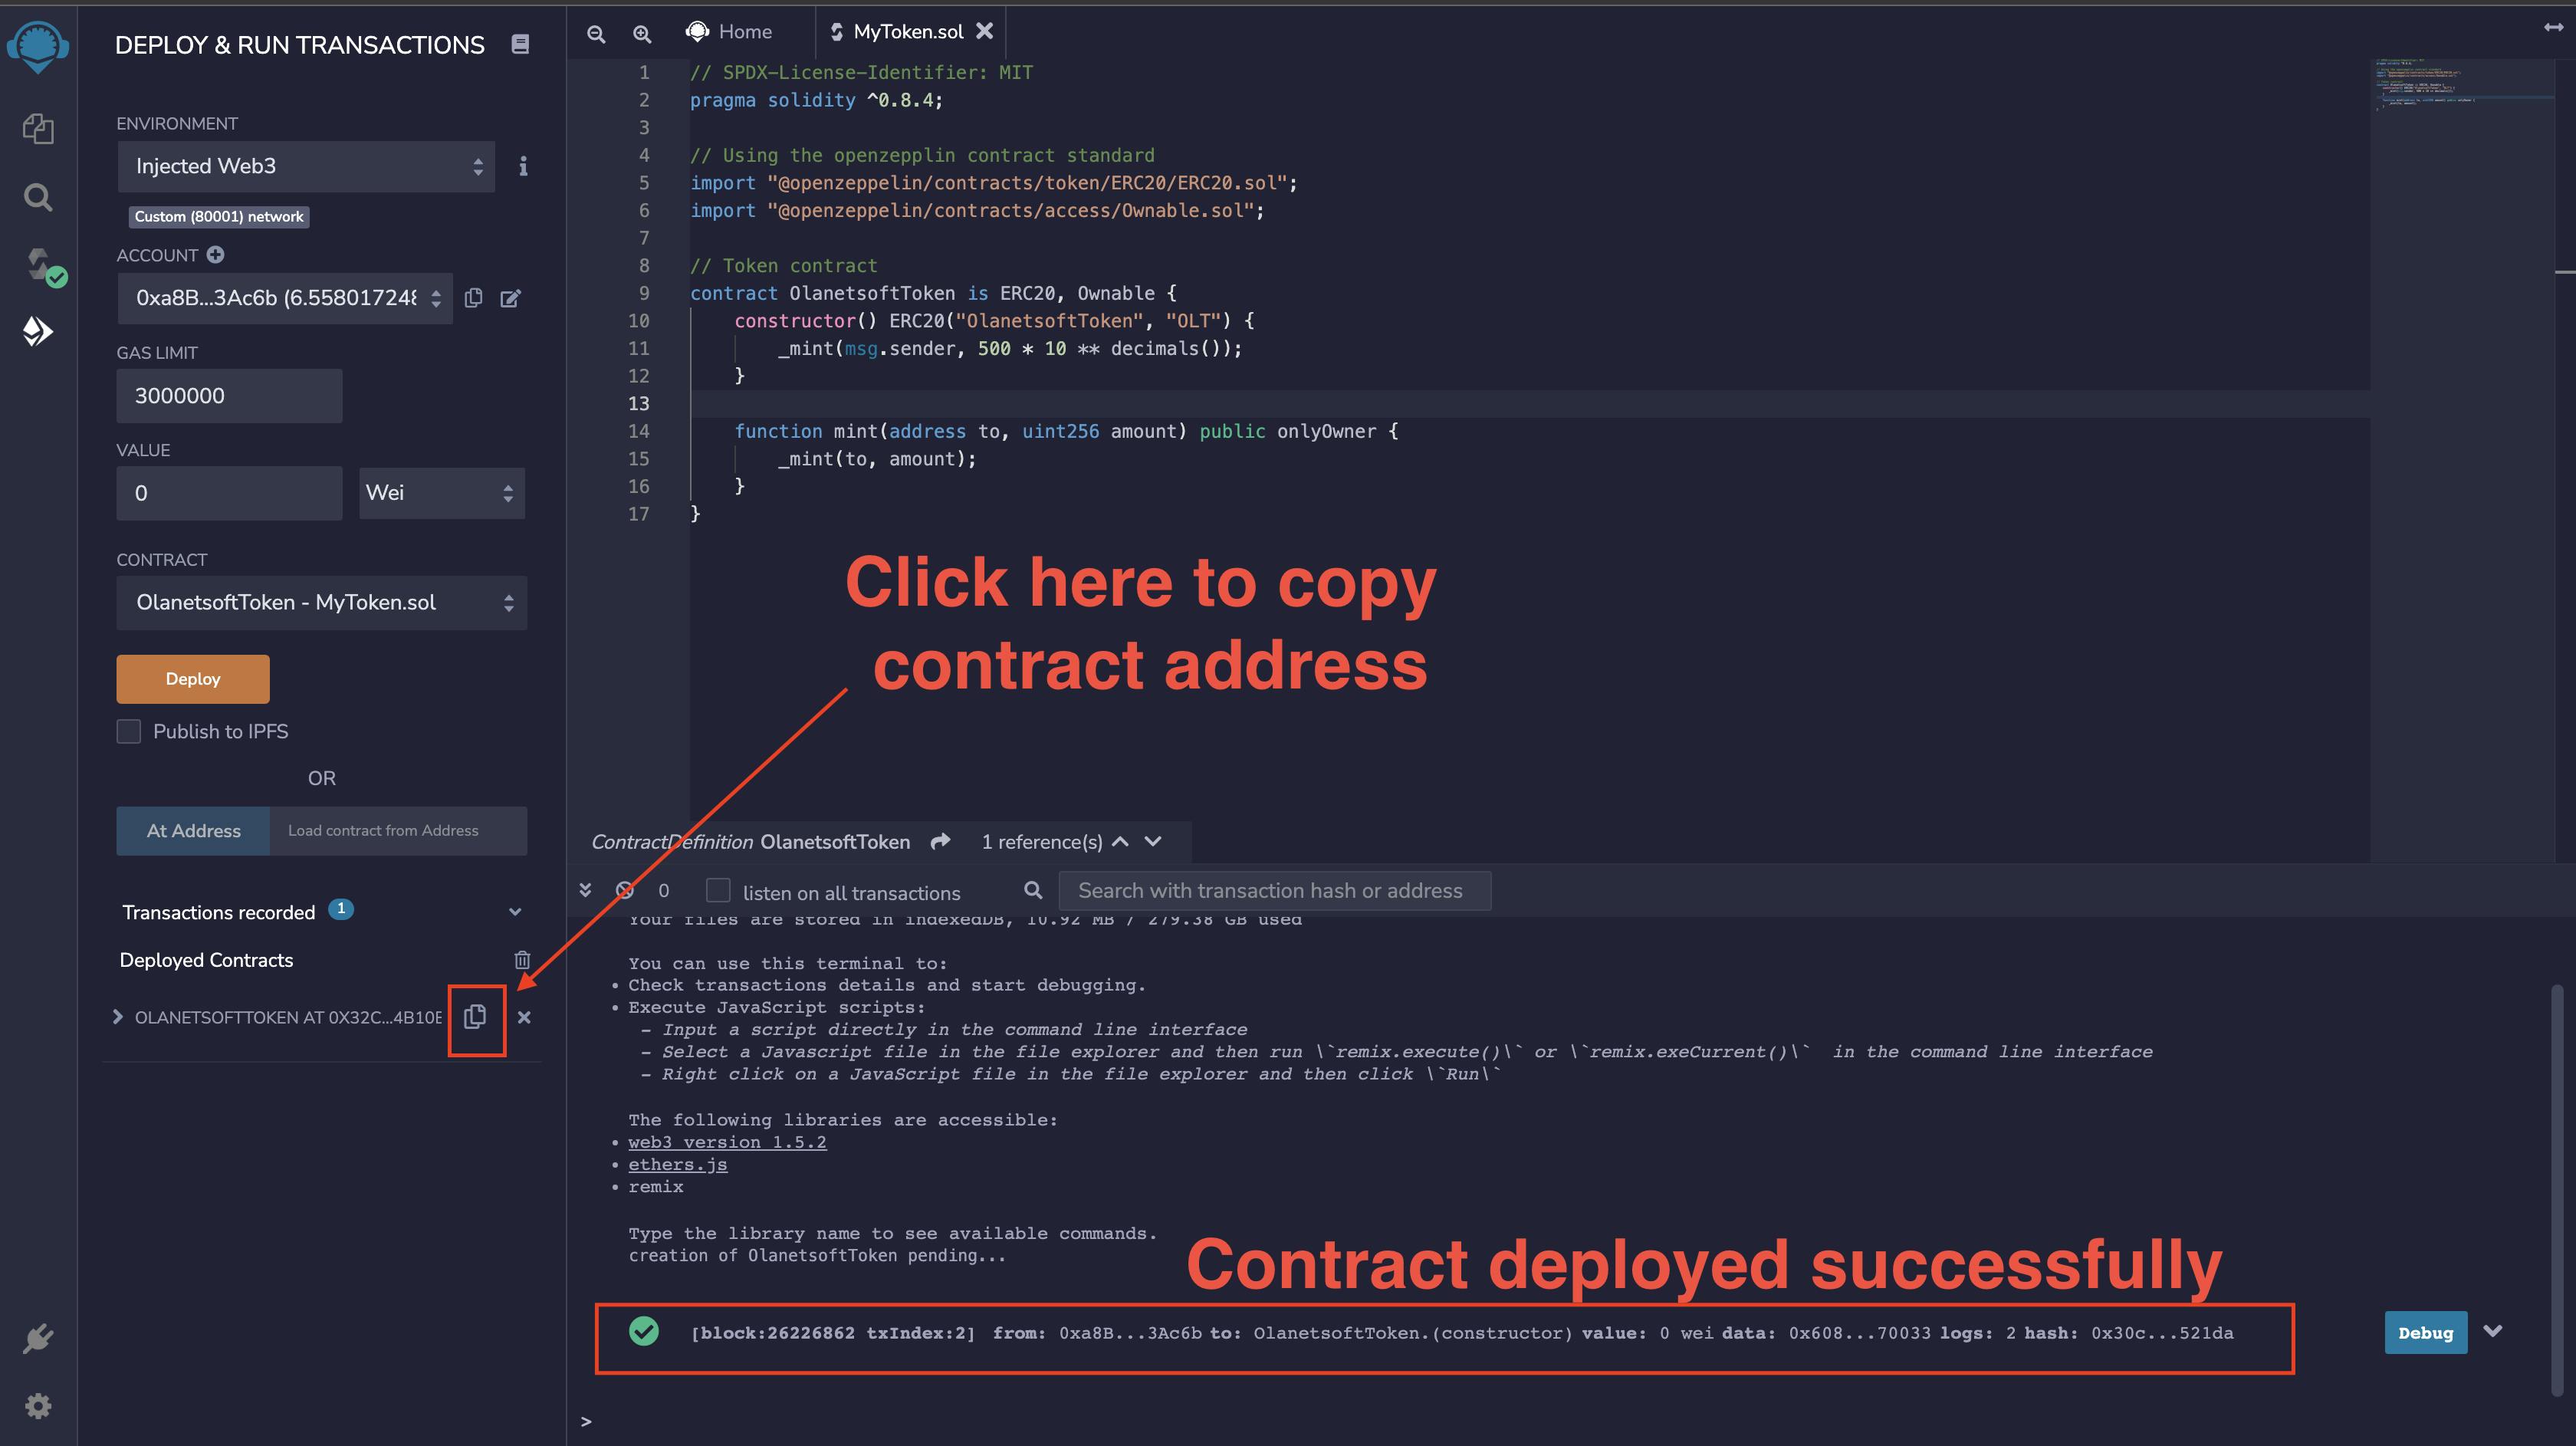
Step 3: Verify and Import Token using Metamask
Let us import and verify the token we just deployed. We will head over to Metamask or by just clicking on the icon as shown below.

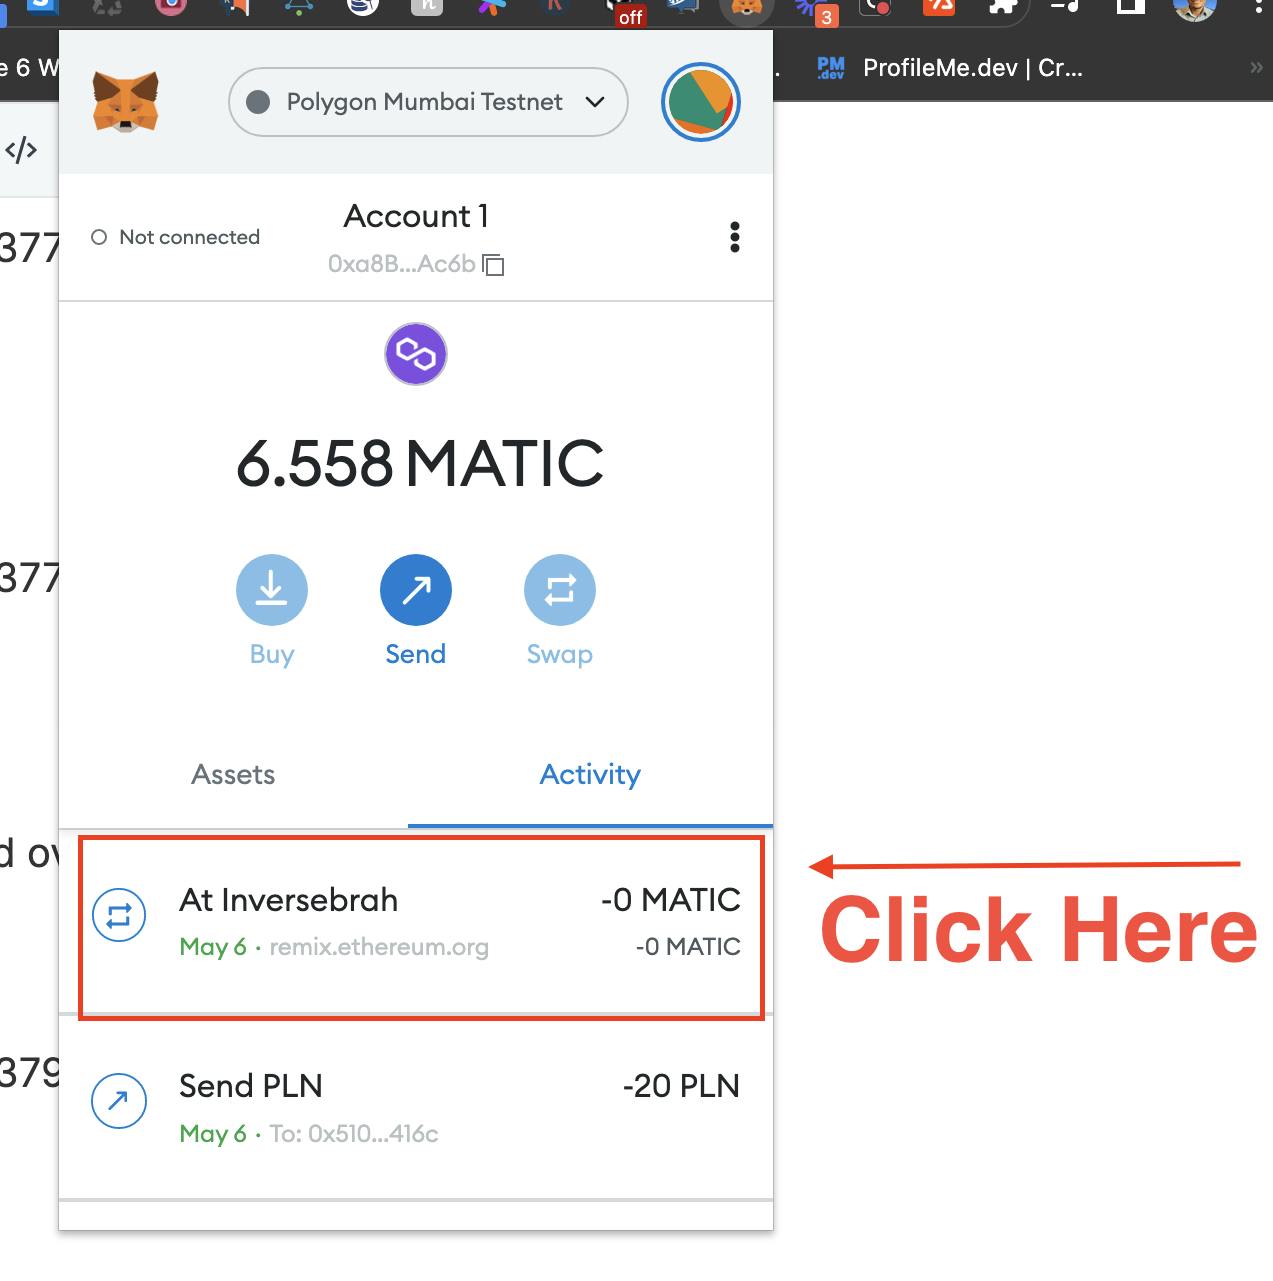
View on the block explorer.
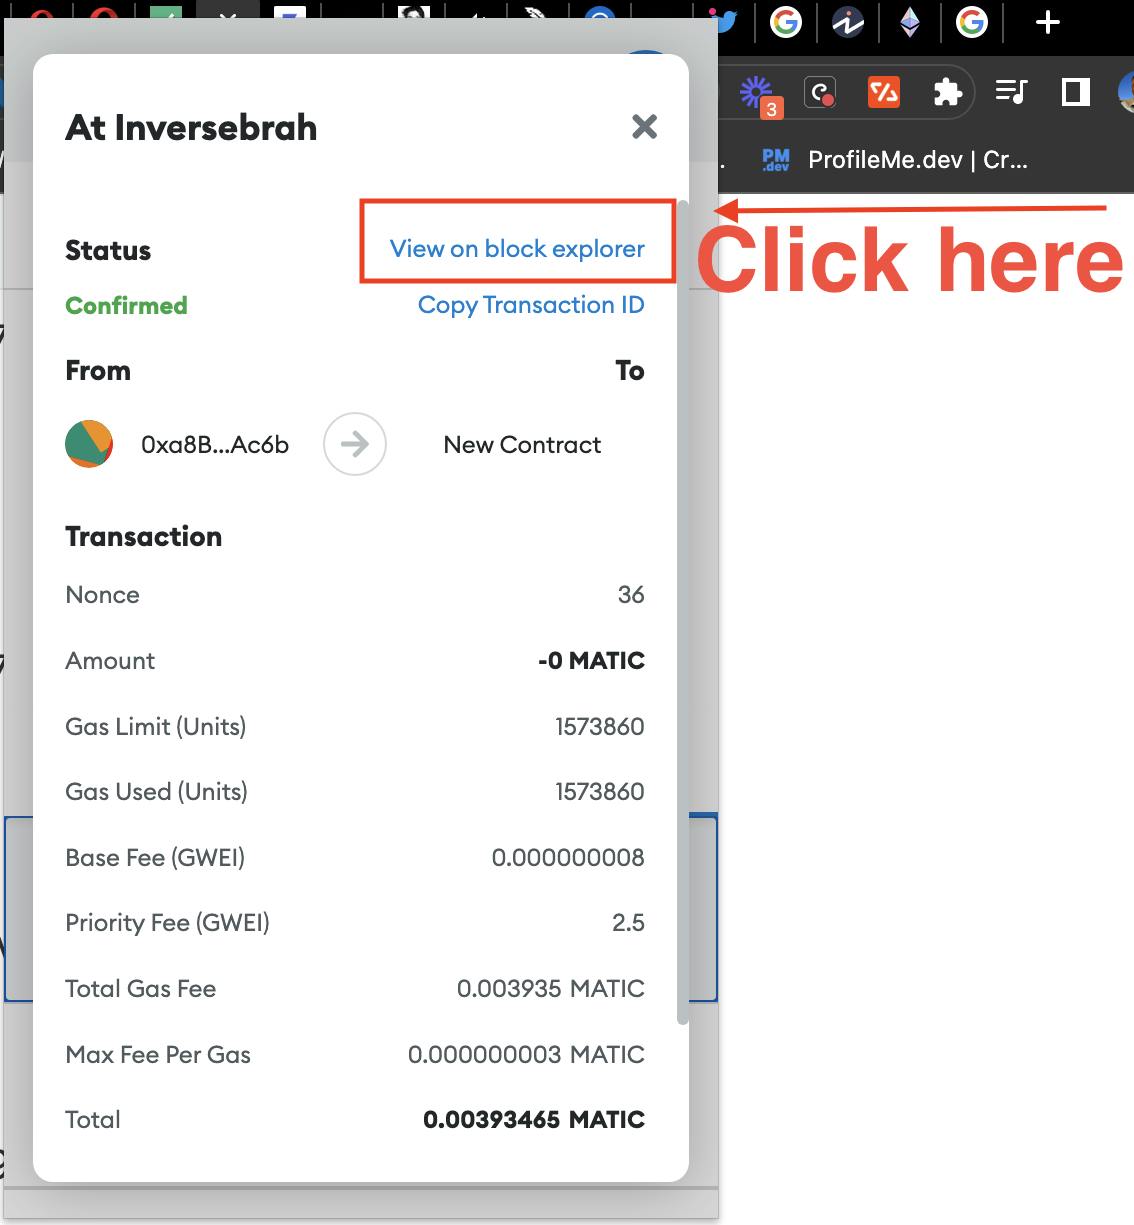
We will be redirected to the Mumbai Polygon site where we can verify the transaction with contract details.
Next, we will import our token.
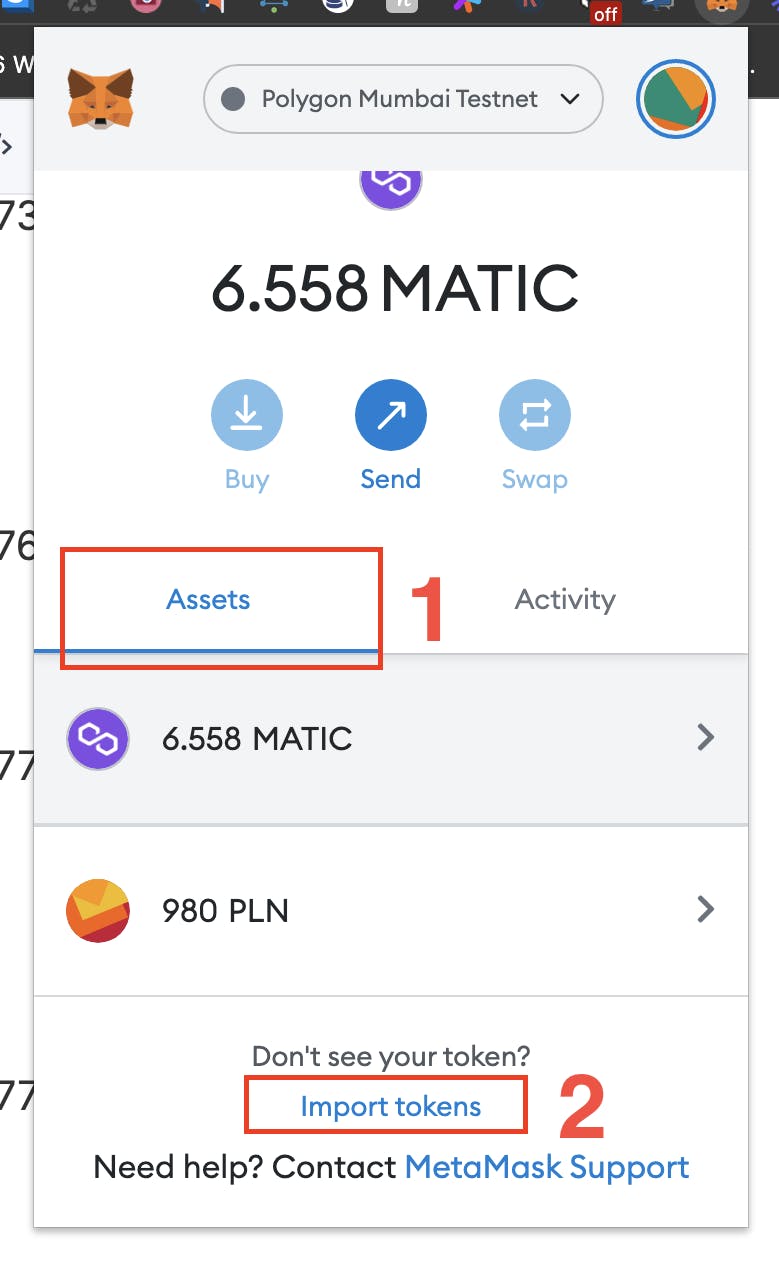
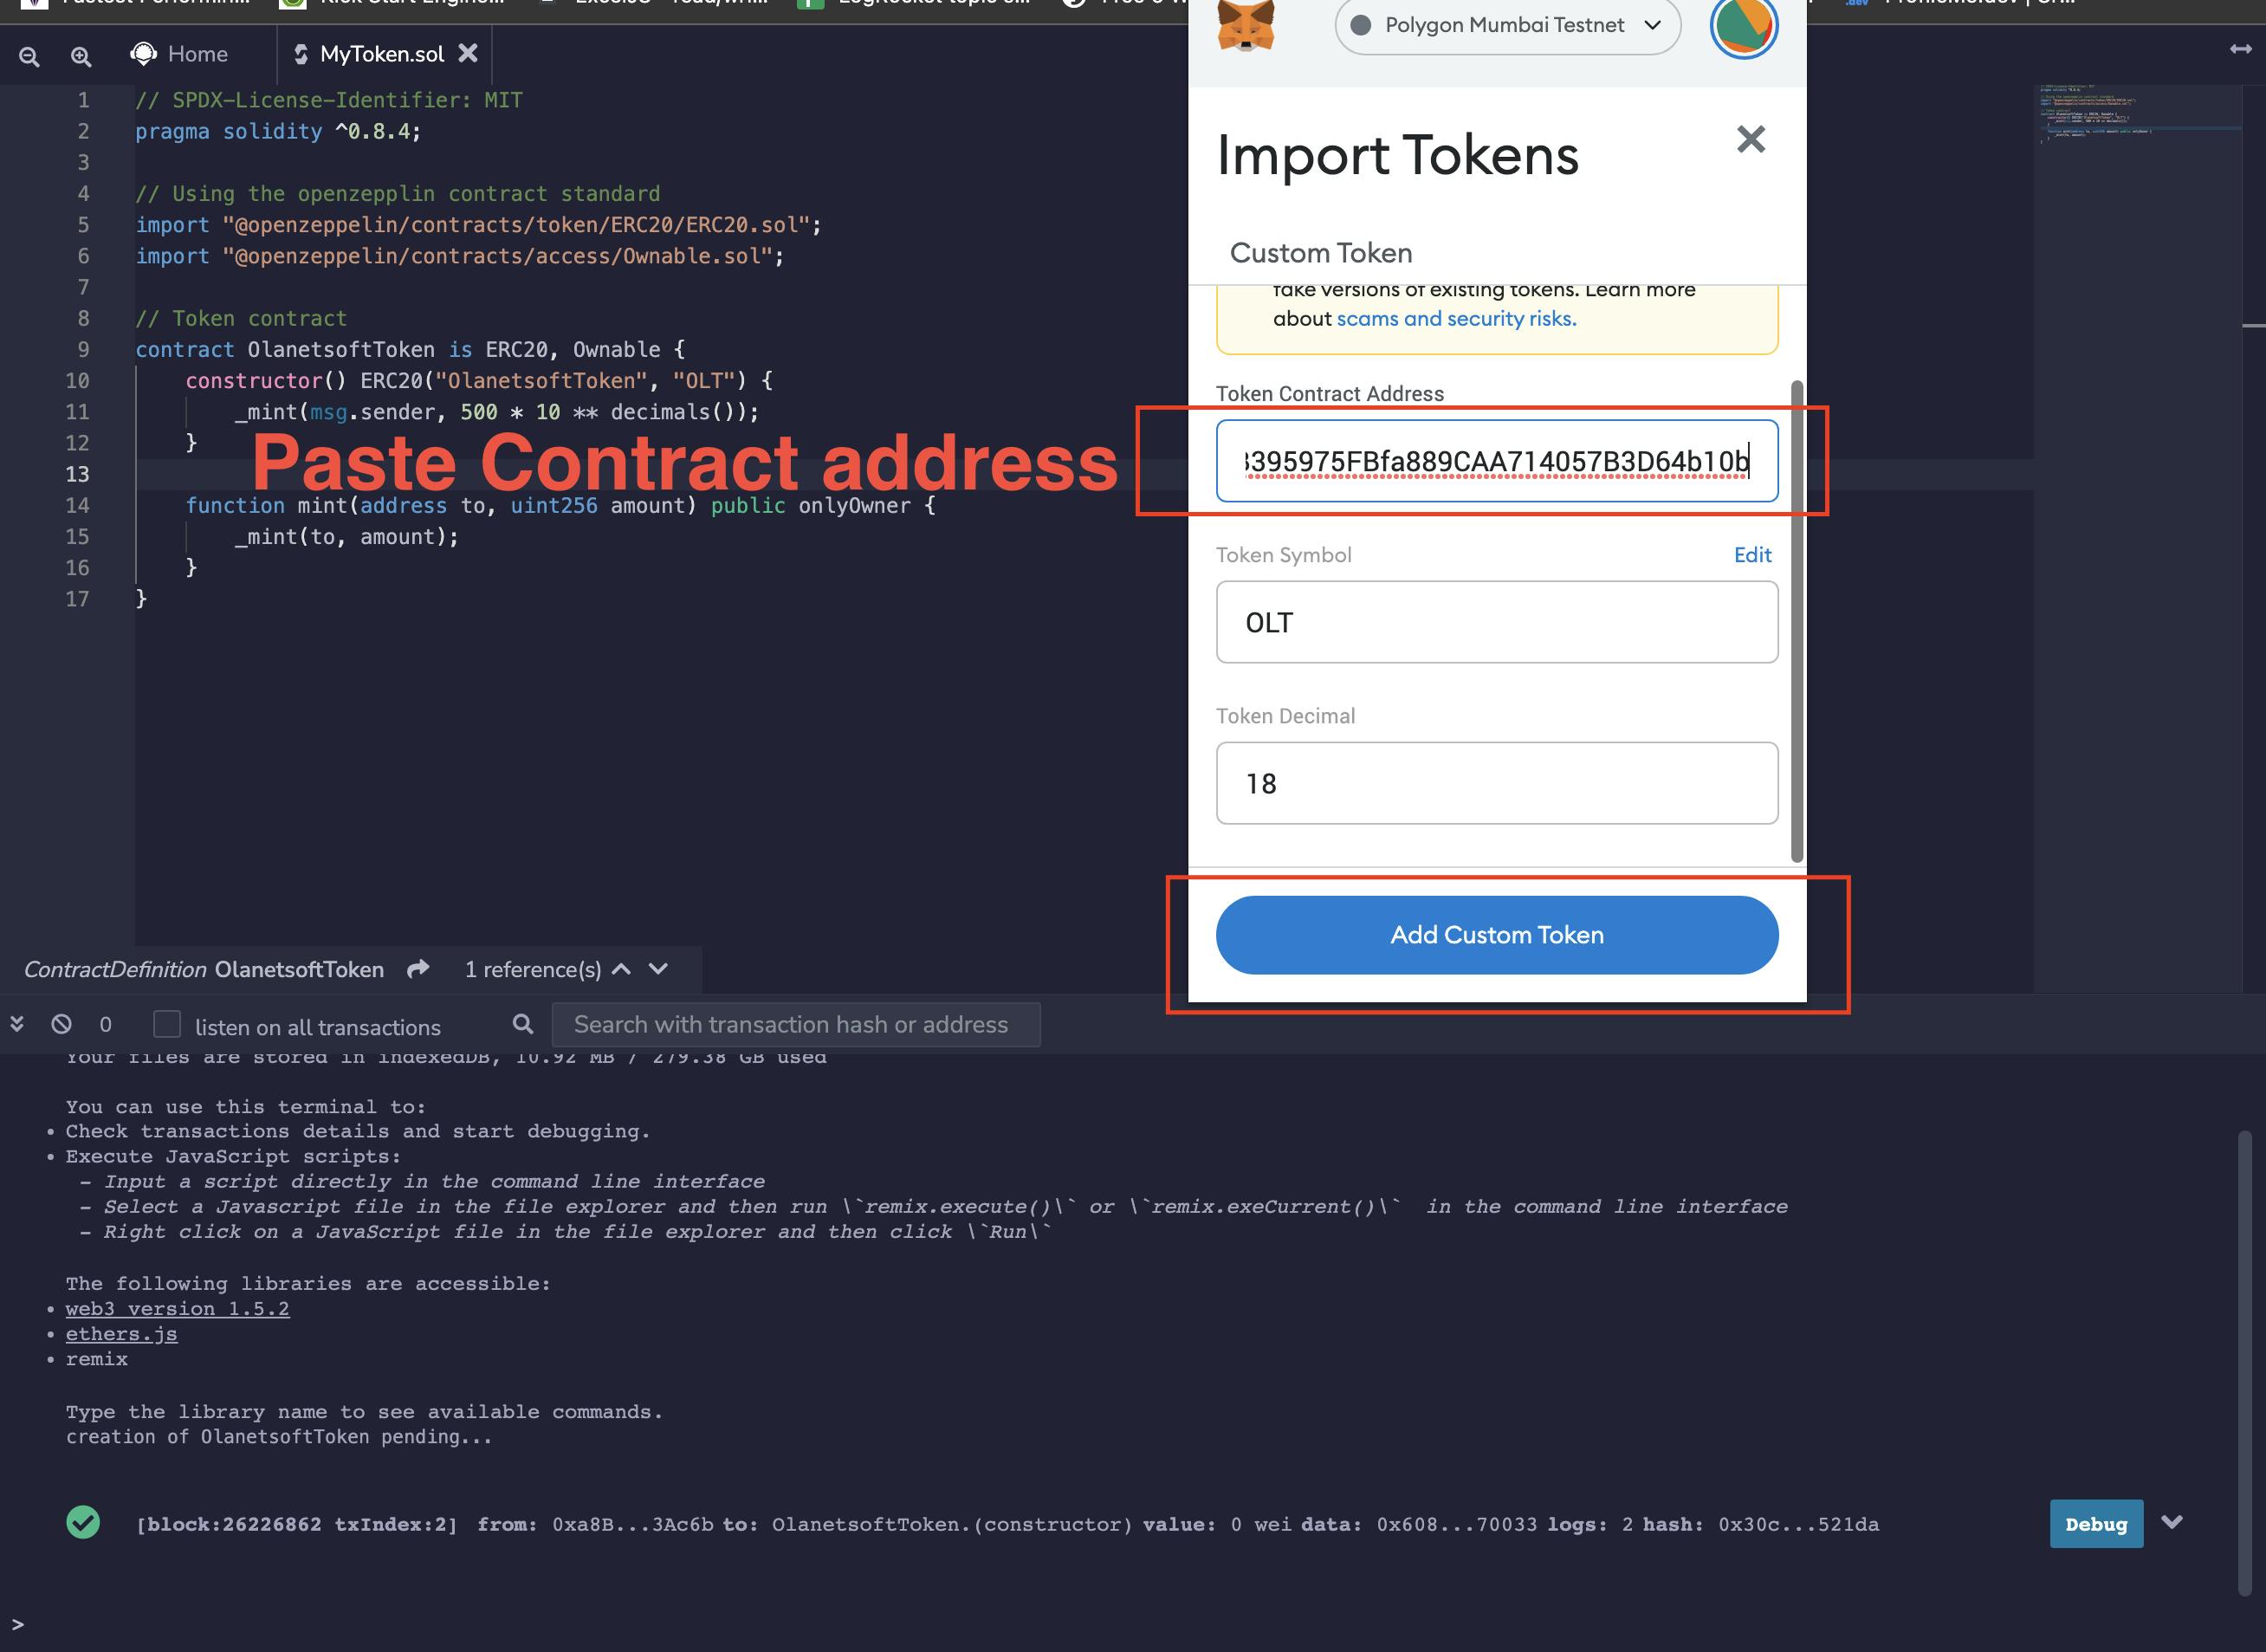
Import token.
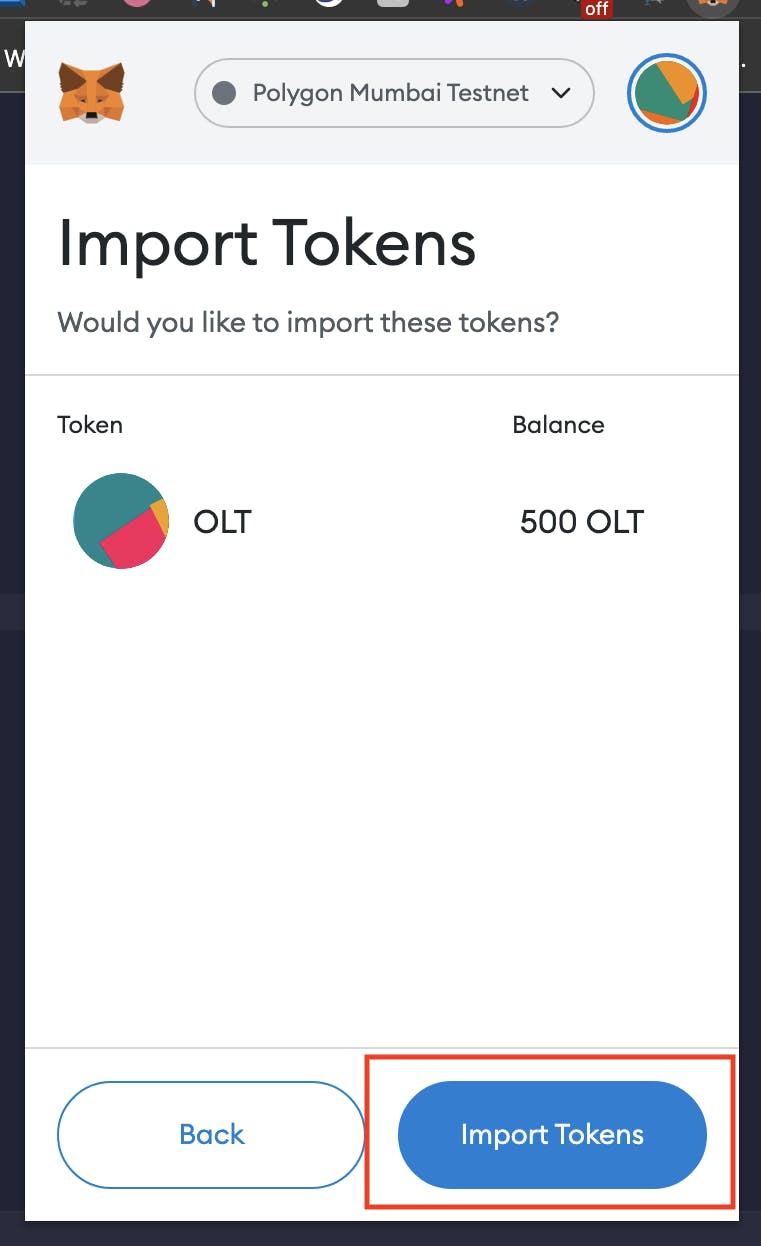
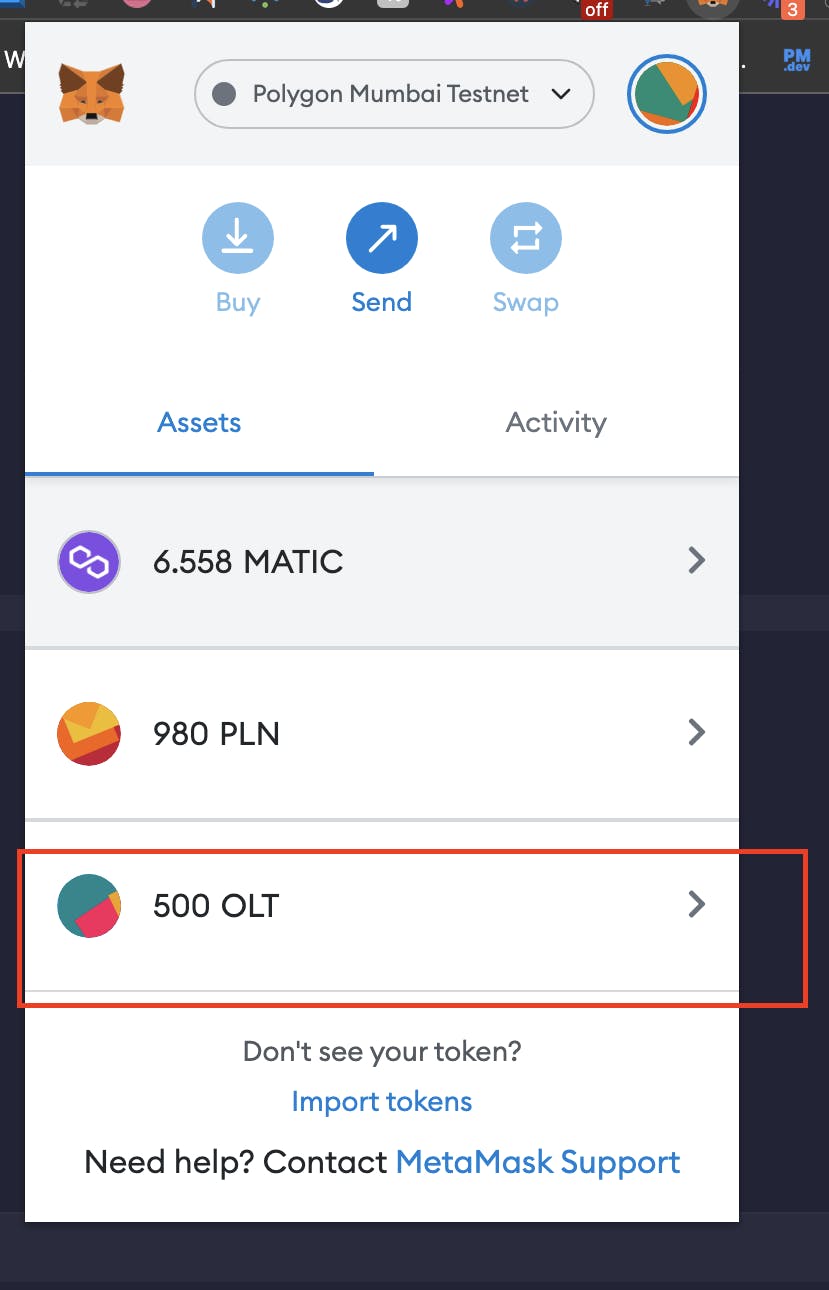
View token.
Conclusion
This post addresses how to build and deploy the ERC20 Token in 3 steps as part of the token series I created. Watch this space for the upcoming ones.
I'd love to connect with you at Twitter | LinkedIn | GitHub | Portfolio
See you in my next blog article. Take care!!!

