How to Integrate QR Code for Authentication Across Web & Mobile Applications in Nodejs
Advancements in technology have made it easier to connect through instant messaging apps & social media platforms and automating processes.
The QR Code authentication system is a security feature that allows a registered device to authenticate a user by scanning a QR Code. It provides a user authentication technique that is fundamentally different from using a password.
This tutorial will teach us to integrate QR codes into our nodeJs application for seamless authentication across the web and mobile applications.
Prerequisite
To follow along with this tutorial, we will need:
- A basic understanding of JavaScript.
- A depth understanding of Node.js.
- A working knowledge of MongoDB or any other database of our choice.
What is a QR Code?
In 1994, the Japanese company Denso Wave, a Toyota subsidiary, invented the first QR code, Quick Response Code. They required a better way to track vehicles and parts during the manufacturing process.
A quick response (QR) code is a barcode that encodes information as a series of pixels in a square-shaped grid and can be quickly read by a digital device.
Many smartphones have built-in QR readers, making it simple to track product information in a supply chain.
Learn more about QR codes here.
Benefits of Using a QR Code
QR codes are versatile because they can encode everything from simple business cards to complex touchless payment systems.
People may use a QR code to look for local companies. If appropriately placed, it will fit nicely into the behaviour pattern and generate engagement.
Creating and maintaining QR codes isn't expensive.
Scanning a QR code is as simple as pointing your camera at it.
QR-coded content can be saved directly to mobile phones.
QR codes are trackable.
Project Setup and Dependencies Installation
To begin, we would first set up our project by creating a directory with the following command:
mkdir qrcode-authentication-with-nodejs

cd qrcode-authentication-with-nodejs

npm init -y
We initialized npm with the command `npm init -y' in the previous step, which generated a package.json for us.
We'll create the model, config directory, and files, such as user.js, using the commands below.
mkdir model config

touch config/database.js model/user.js model/qrCode model/connectedDevice app.js index.js
As shown below:
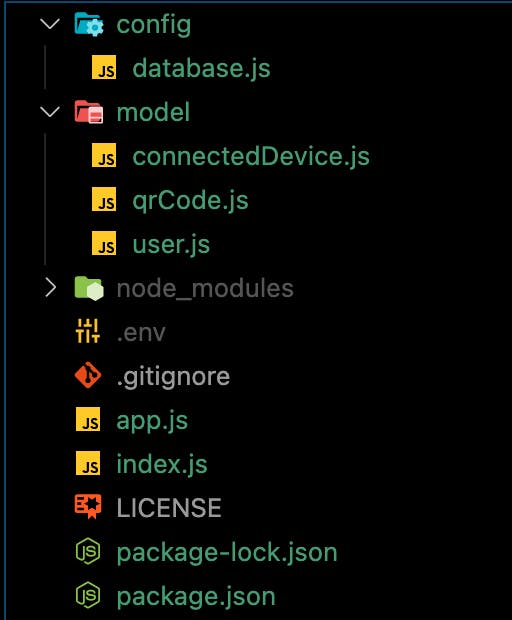
Next, we'll install mongoose, jsonwebtoken, express, dotenv, qrcode and bcryptjs and development dependencies like nodemon, which will automatically restart the server when we make any changes.
The credentials of the user will be compared to those in our database. As a result, the authentication process is not limited to the database we'll use in this tutorial.
npm install jsonwebtoken dotenv mongoose qrcode express bcryptjs

npm install nodemon -D
Server Setup and Database Connection
We can now create our Node.js server and connect it to our database by adding the following code snippets to our app.js, index.js, database.js, and .env file in that sequence.
Before we proceed, let us create .env file and add our environment variables with the following command:
touch .env
Next, we will add the following code snippet into the .env file we just created:
API_PORT=4001

MONGO_URI= //Your database URI here

TOKEN_KEY= //A random string
Next, our config/database.js:
const mongoose = require("mongoose");

const { MONGO_URI } = process.env;

exports.connect = () => {
  // Connecting to the database
  mongoose
    .connect(MONGO_URI, {
      useNewUrlParser: true,
      useUnifiedTopology: true,
    })
    .then(() => {
      console.log("Successfully connected to database");
    })
    .catch((error) => {
      console.log("database connection failed. exiting now...");
      console.error(error);
      process.exit(1);
    });
};
Inside qrcode-authentication-with-nodejs/app.js:
require("dotenv").config();
require("./config/database").connect();
const express = require("express");
const bcrypt = require("bcryptjs");
const jwt = require("jsonwebtoken");
const qrcode = require("qrcode");

const app = express();

app.use(express.json());

// Logic here

module.exports = app;
Inside our qrcode-authentication-with-nodejs/index.js:
const http = require("http");
const app = require("./app");
const server = http.createServer(app);

const { API_PORT } = process.env;
const port = process.env.PORT || API_PORT;

// server listening
server.listen(port, () => {
  console.log(`Server running on port ${port}`);
});
To start our server, we will edit the scripts object in our package.json to look like what we have below.
  "scripts": {
    "start": "node index.js",
    "dev": "nodemon index.js",
    "test": "echo \"Error: no test specified\" && exit 1"
  },
After updating our files with the code snippets, we can safely execute npm run dev to start our server.
Building Signup and Login Functionality
For the user record, we'll define our schema. When users signup for the first time, we'll create a user record, and when they log in, we'll check the credentials against the saved user credentials.
In the model folder, add the following snippet to user.js.
const mongoose = require("mongoose");

const userSchema = new mongoose.Schema({
  first_name: { type: String, default: null },
  last_name: { type: String, default: null },
  email: { type: String, unique: true },
  password: { type: String },
});

module.exports = mongoose.model("user", userSchema);
Let's now create the registration and login routes accordingly.
We'll add the following snippet for user registration and login to the root directory inside the app.js file.
// importing user context
const User = require("./model/user");

// Register
app.post("/register", (req, res) => {
// our register logic goes here...
});

// Login
app.post("/login", (req, res) => {
// our login logic goes here
});
The user registration mechanism will be implemented next. Before storing the credentials in our database, we'll use JWT to sign and bycrypt to encrypt.
Inside qrcode-authentication-with-nodejs/app.js, we will update the '/register' route we created previously.
// ...

app.post("/register", async (req, res) => {
  // Our register logic starts here

  try {
    // Get user input
    const { first_name, last_name, email, password } = req.body;

    // Validate user input
    if (!(email && password && first_name && last_name)) {
      res.status(400).send("All input is required");
    }

    // check if user already exist
    // Validate if user exist in our database
    const oldUser = await User.findOne({ email });

    if (oldUser) {
      return res.status(409).send("User Already Exist. Please Login");
    }

    // Encrypt user password
    encryptedPassword = await bcrypt.hash(password, 10);

    // Create user in our database
    const user = await User.create({
      first_name,
      last_name,
      email: email.toLowerCase(), // sanitize: convert email to lowercase
      password: encryptedPassword,
    });

    // Create token
    const token = jwt.sign(
      { user_id: user._id, email },
      process.env.TOKEN_KEY,
      {
        expiresIn: "2h",
      }
    );

    // return new user
    res.status(201).json({ token });
  } catch (err) {
    console.log(err);
  }
  // Our register logic ends here
});

// ...
In the /register route, we:
- Collected data from users.
- Verify the user's input.
- Check to see if the user has already been registered.
- Protect the user's password by encrypting it.
- Create a user account in our database.
- Finally, generate a JWT token that is signed.
After successfully registering, we'll get the response shown below by using Postman to test the endpoint.
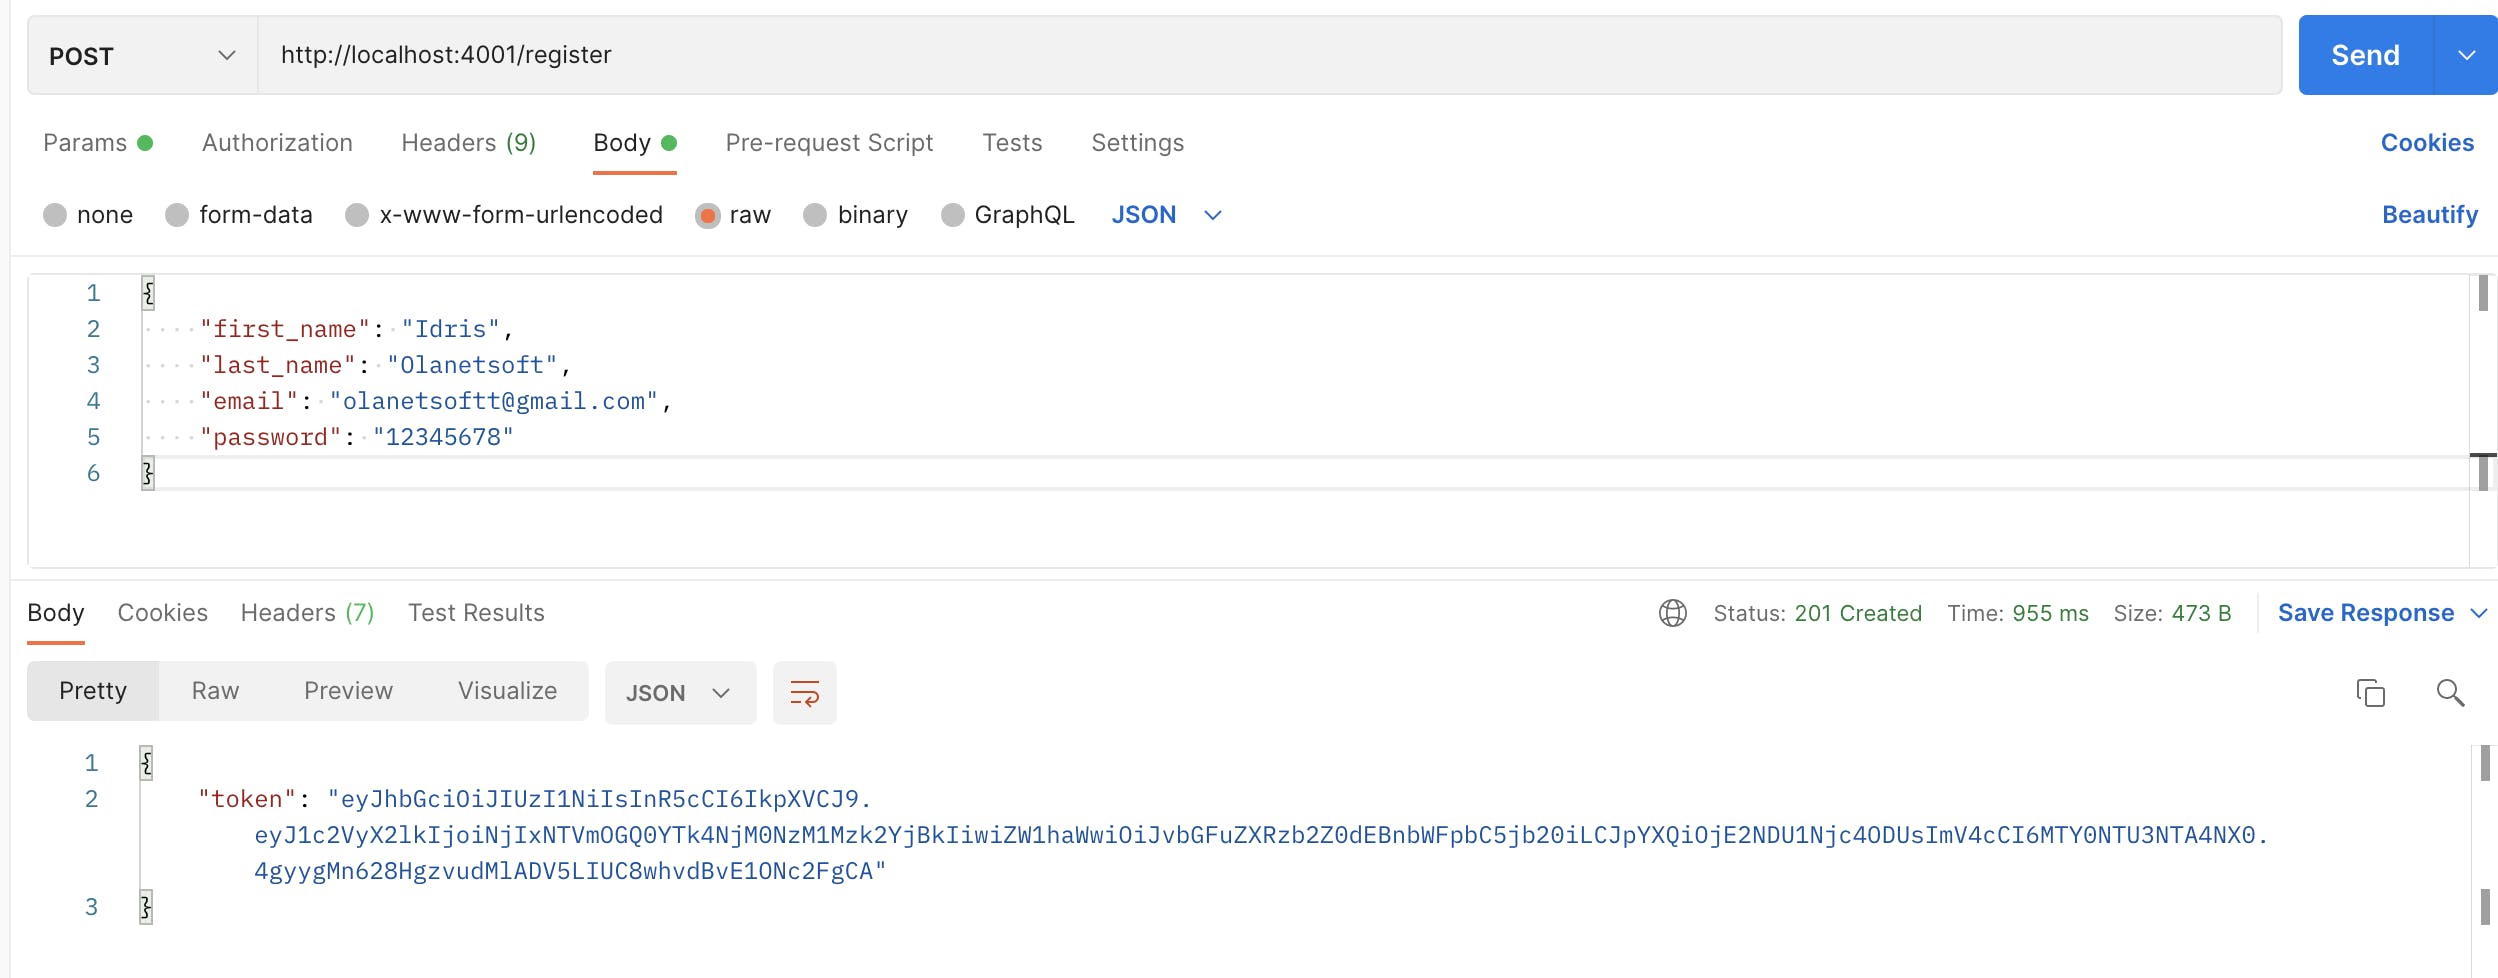
Updating the /login route with the following code snippet:
// ...

app.post("/login", async (req, res) => {
  // Our login logic starts here
  try {
    // Get user input
    const { email, password } = req.body;

    // Validate user input
    if (!(email && password)) {
      res.status(400).send("All input is required");
    }

    // Validate if user exist in our database
    const user = await User.findOne({ email });

    if (user && (await bcrypt.compare(password, user.password))) {
      // Create token
      const token = jwt.sign(
        { user_id: user._id, email },
        process.env.TOKEN_KEY,
        {
          expiresIn: "2h",
        }
      );

      // save user token
      user.token = token;

      // user
      return res.status(200).json({ token });
    }
    return res.status(400).send("Invalid Credentials");
  } catch (err) {
    console.log(err);
  }
  // Our login logic ends here
});

// ...
Testing our login endpoint, we should have something similar to what is shown below:
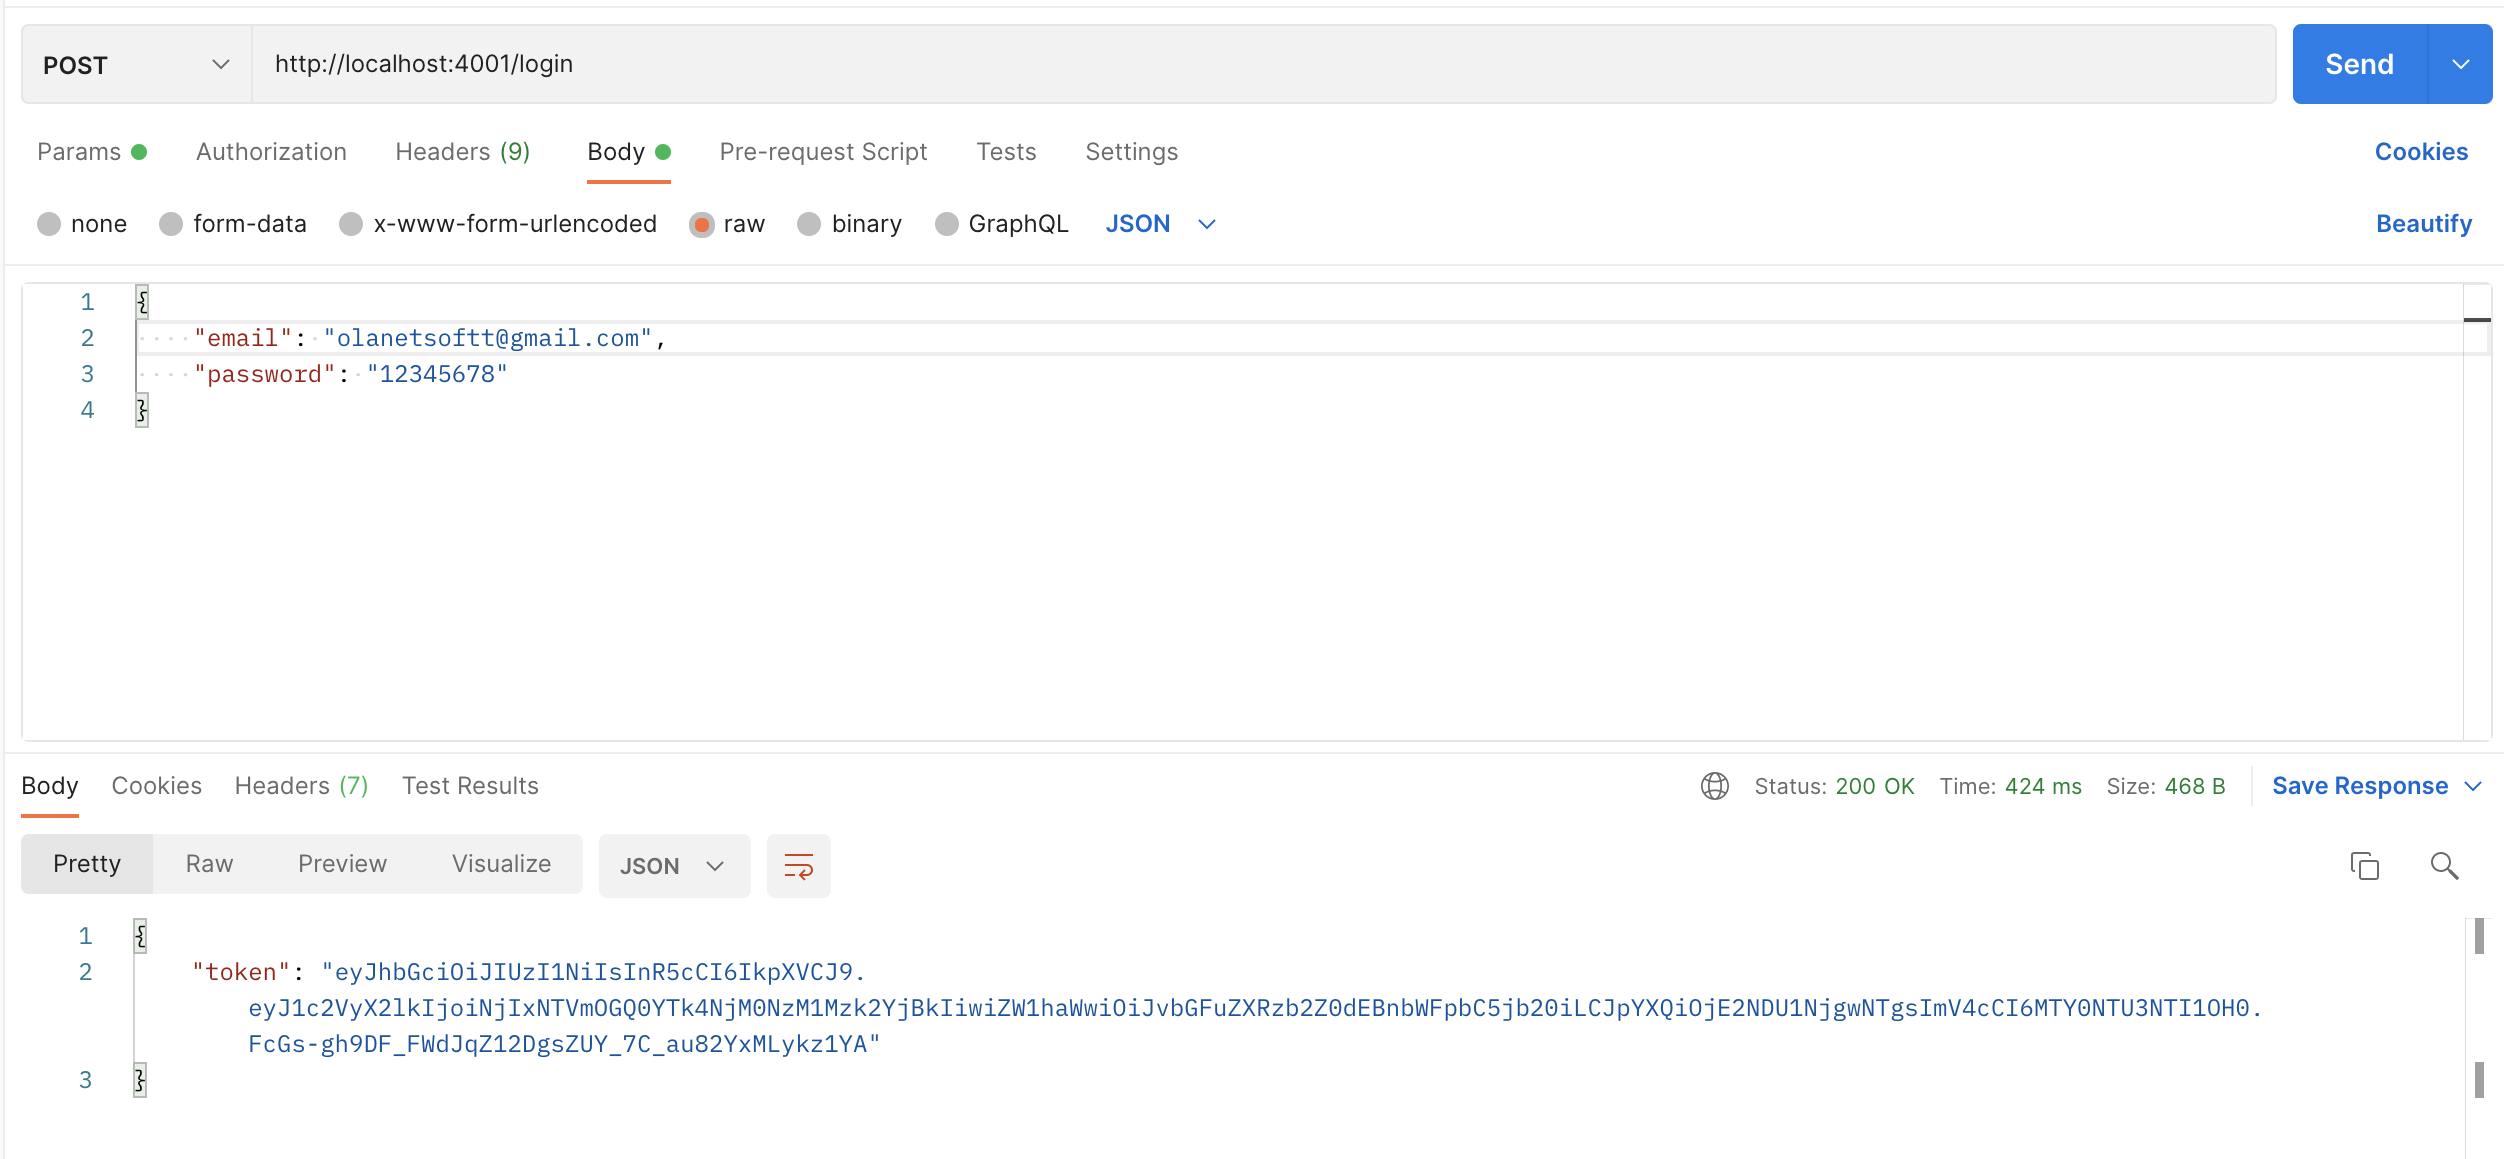
We can learn more about How to Build an Authentication API with JWT Token in Node.js here
Building and Integrating QR code for authentication
We have set up our application entirely and created register and /login routes, respectively. We will be updating the qrCode and connectedDevice we created earlier.
model/qrCode
const mongoose = require("mongoose");
const { Schema } = mongoose;

const qrCodeSchema = new mongoose.Schema({
  userId: {
    type: Schema.Types.ObjectId,
    required: true,
    ref: "users",
  },
  connectedDeviceId: {
    type: Schema.Types.ObjectId,
    ref: "connectedDevices",
  },
  lastUsedDate: { type: Date, default: null },
  isActive: { type: Boolean, default: false },
  disabled: { type: Boolean, default: false },
});

module.exports = mongoose.model("qrCode", qrCodeSchema);
Updating model/connectedDevice
const mongoose = require("mongoose");
const { Schema } = mongoose;

const connectedDeviceSchema = new mongoose.Schema({
  userId: {
    type: Schema.Types.ObjectId,
    required: true,
    ref: "users",
  },
  qrCodeId: {
    type: Schema.Types.ObjectId,
    required: true,
    ref: "qrCodes",
  },
  deviceName: { type: String, default: null },
  deviceModel: { type: String, default: null },
  deviceOS: { type: String, default: null },
  deviceVersion: { type: String, default: null },
  disabled: { type: Boolean, default: false },
});

module.exports = mongoose.model("connectedDevice", connectedDeviceSchema);
Let us proceed to implement the generating QR code functionality. We have our model set up. We will update the app.js file by creating a new endpoint qr/generate with the following snippet to create a QR code.
// ...

app.post("/qr/generate", async (req, res) => {
  try {
    const { userId } = req.body;

    // Validate user input
    if (!userId) {
      res.status(400).send("User Id is required");
    }

    const user = await User.findById(userId);

    // Validate is user exist
    if (!user) {
      res.status(400).send("User not found");
    }

    const qrExist = await QRCode.findOne({ userId });

    // If qr exist, update disable to true and then create a new qr record
    if (!qrExist) {
      await QRCode.create({ userId });
    } else {
      await QRCode.findOneAndUpdate({ userId }, { $set: { disabled: true } });
      await QRCode.create({ userId });
    }

    // Generate encrypted data
    const encryptedData = jwt.sign(
      { userId: user._id, email },
      process.env.TOKEN_KEY,
      {
        expiresIn: "1d",
      }
    );

    // Generate qr code
    const dataImage = await QR.toDataURL(encryptedData);

    // Return qr code
    return res.status(200).json({ dataImage });
  } catch (err) {
    console.log(err);
  }
});

// ...
In the code snippet above, we:
- Checked the input from the web.
- Check to see if the user is already in our database.
- If the user's QR code record already exists, we update the
disabledfield to true and create a new one; otherwise, we create a new record. - We encrypted the user's id, which will be decrypted when the QR code is validated to log users into our application.
- Finally, we send our generated QR code data image in base64 to the web, where it may be scanned.
Testing the /qr/generate endpoint.
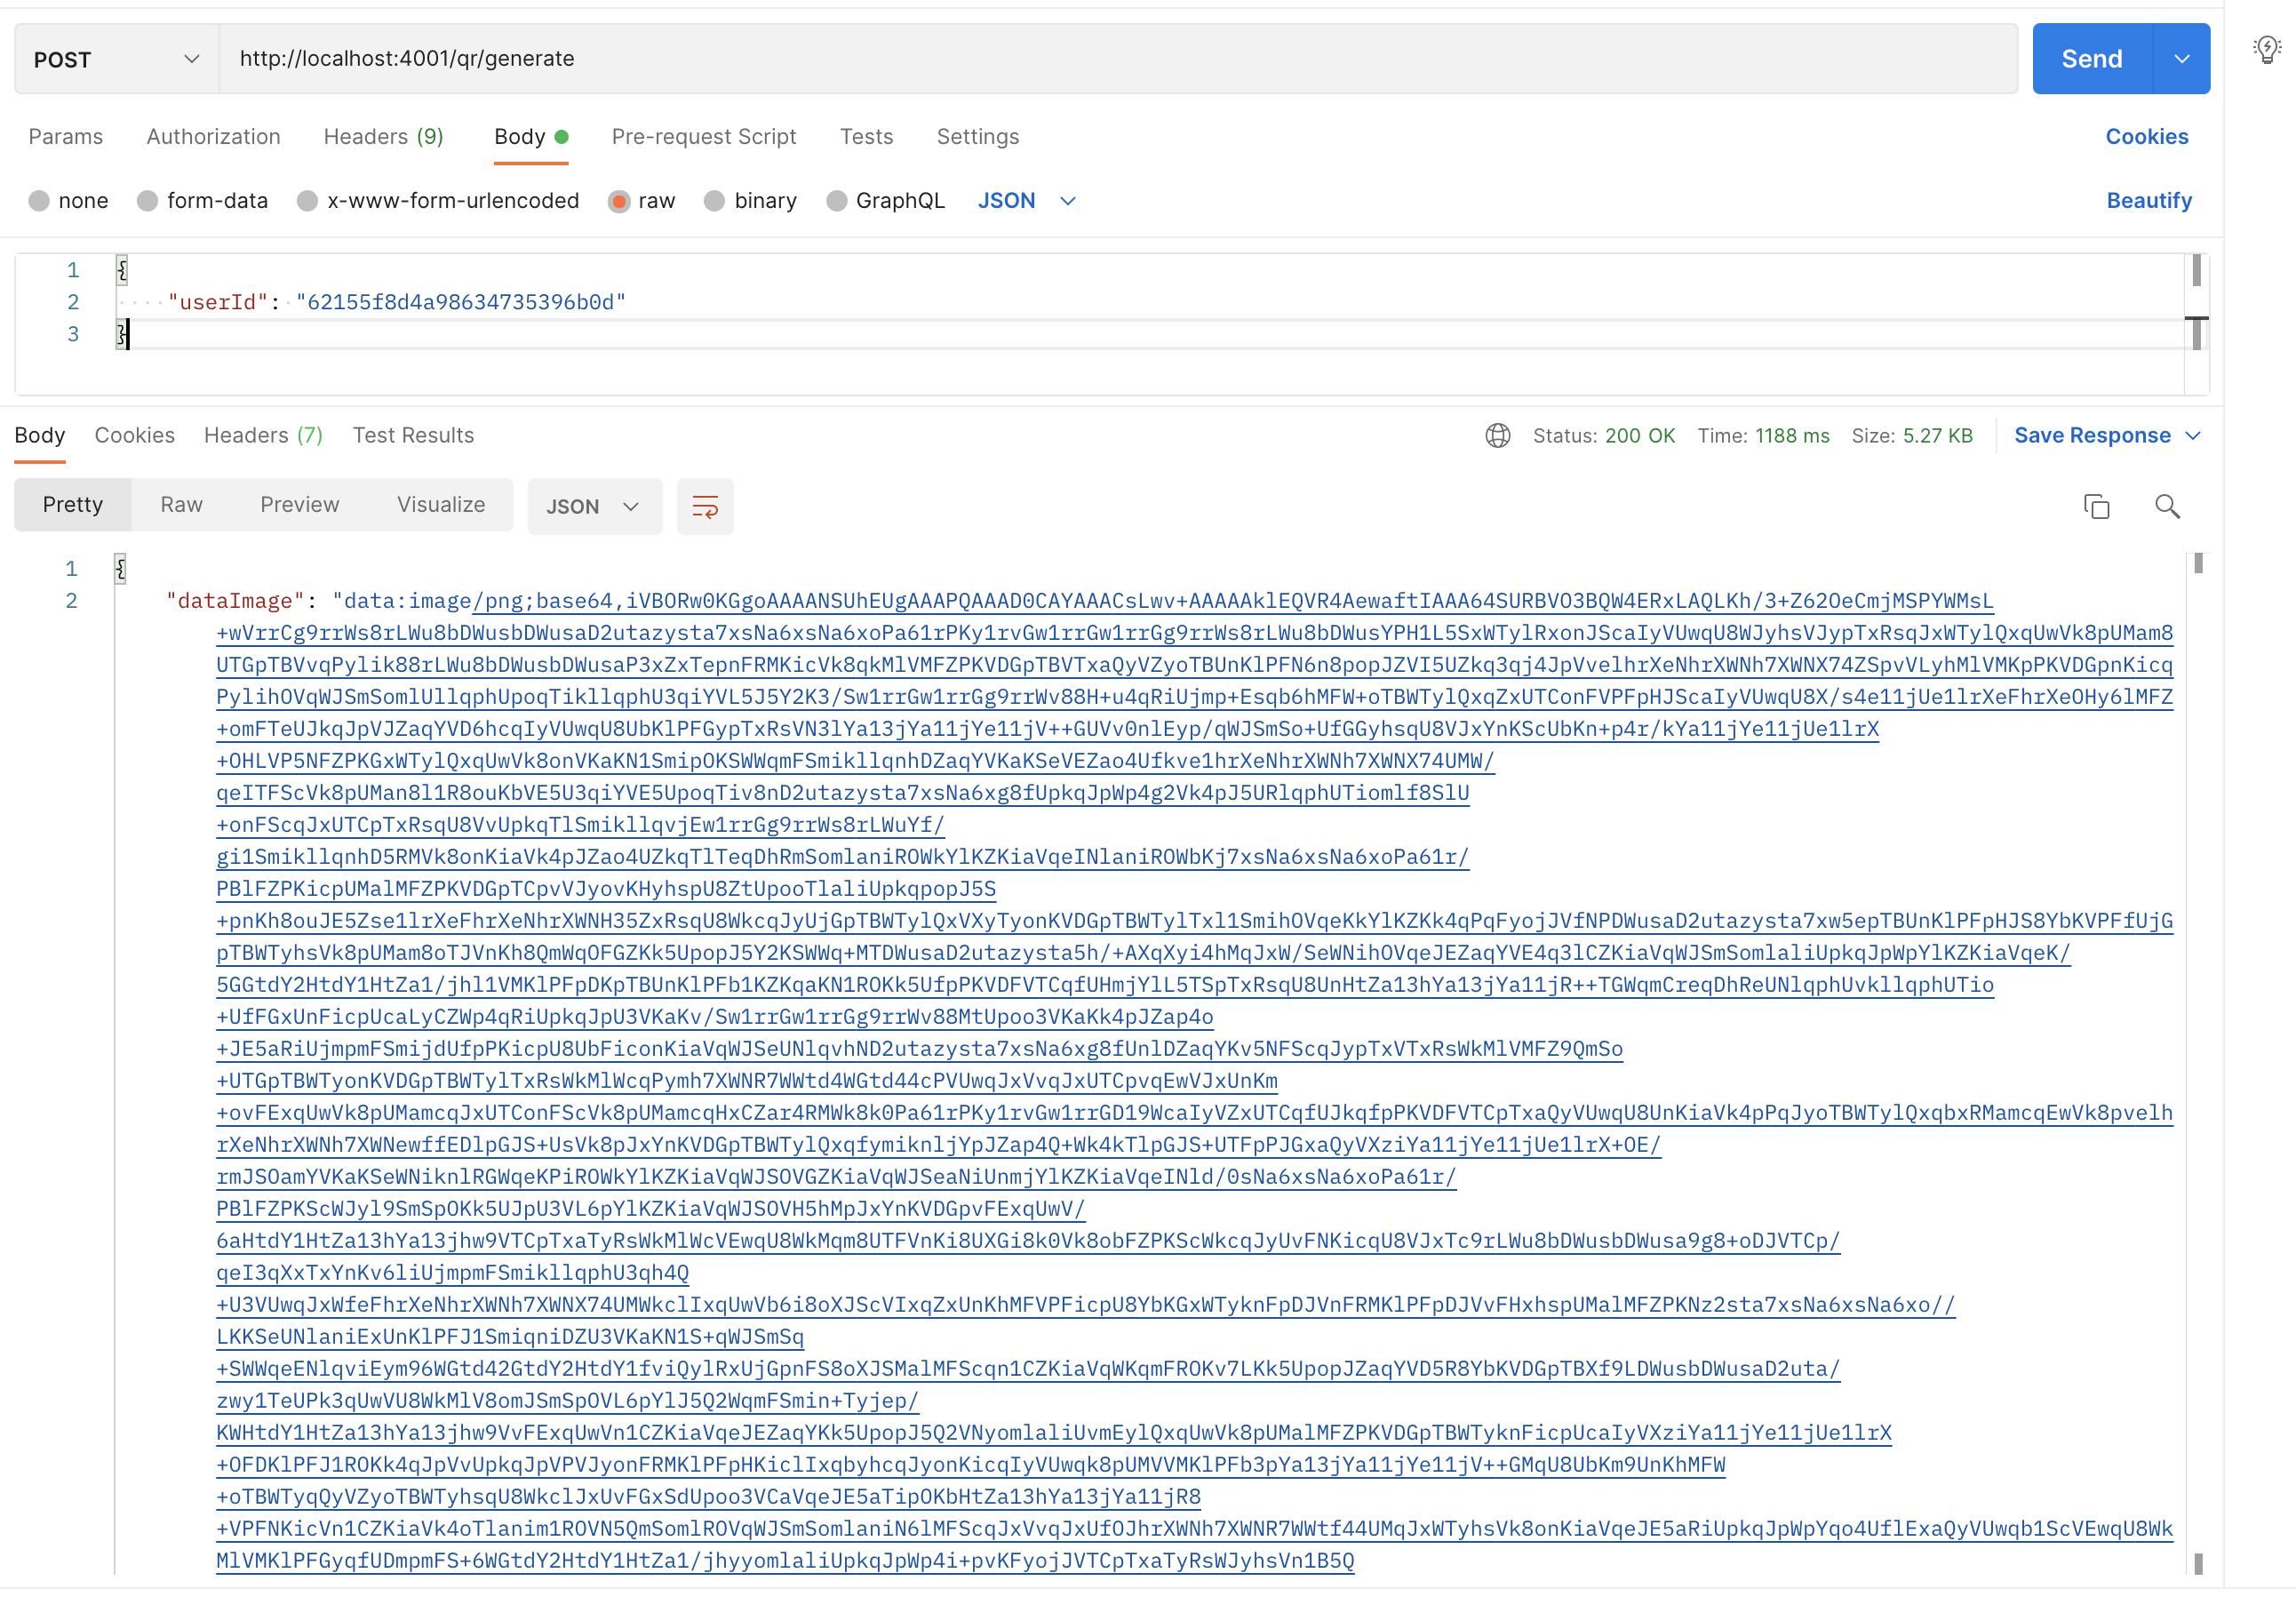
Let's have a look at our data image now. We can accomplish this by copying and pasting the data image onto this site, and we should end up with something like this:
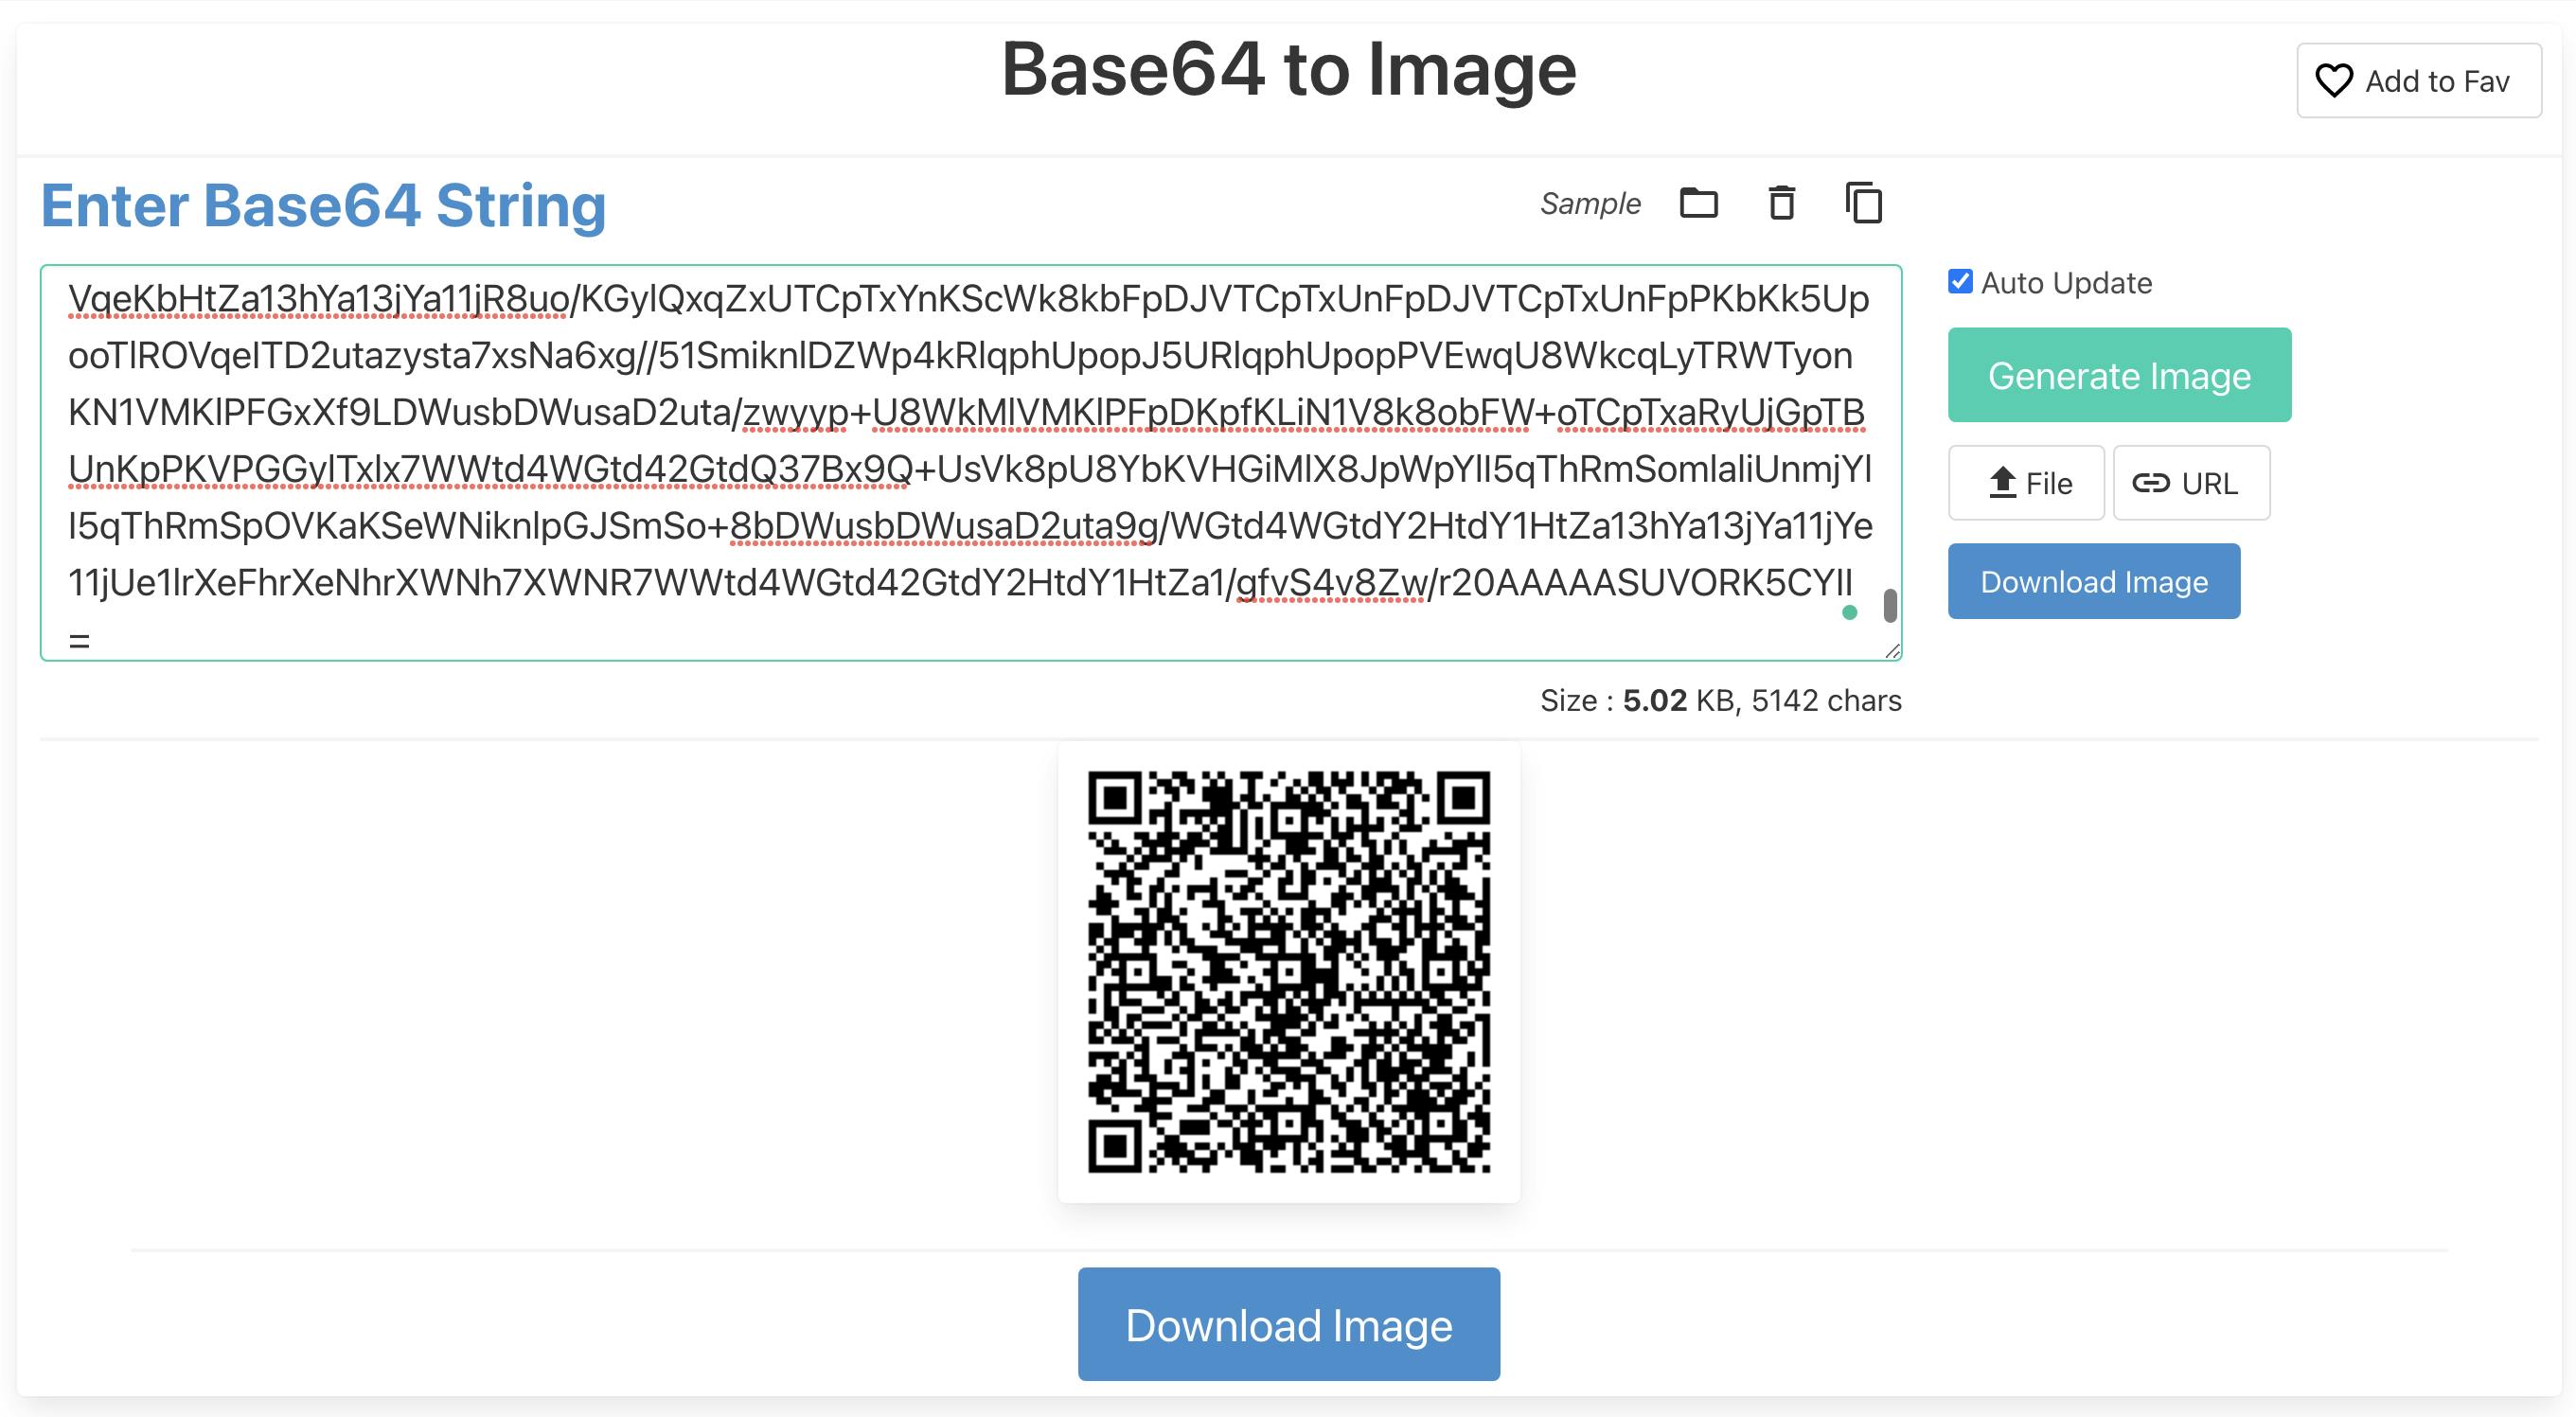
Next, we will scan the QR code using our mobile phone to see the encrypted data.
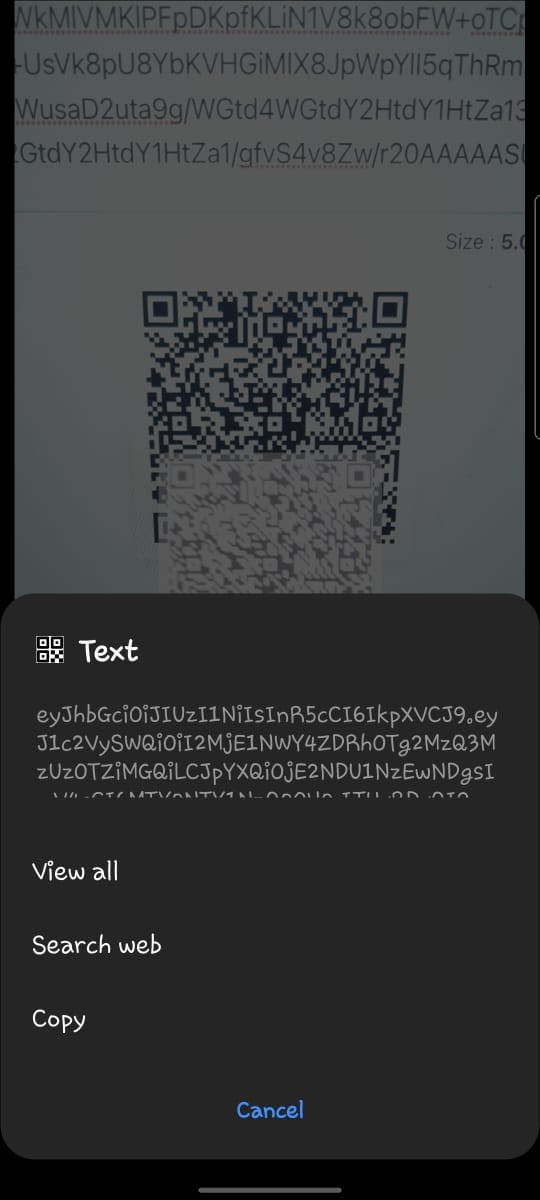
After a successful scan, we can see the encrypted data, the token we encrypted before, in the image above.
We can now create the endpoint to validate the QR code generated, which our mobile app will validate and log in to a user.
Let us create a /qr/scan endpoint in the app.js file and update it with the following code snippet:
app.js
app.post("/qr/scan", async (req, res) => {
  try {
    const { token, deviceInformation } = req.body;

    if (!token && !deviceInformation) {
      res.status(400).send("Token and deviceInformation is required");
    }

    const decoded = jwt.verify(token, process.env.TOKEN_KEY);

    const qrCode = await QRCode.findOne({
      userId: decoded.userId,
      disabled: false,
    });

    if (!qrCode) {
      res.status(400).send("QR Code not found");
    }

    const connectedDeviceData = {
      userId: decoded.userId,
      qrCodeId: qrCode._id,
      deviceName: deviceInformation.deviceName,
      deviceModel: deviceInformation.deviceModel,
      deviceOS: deviceInformation.deviceOS,
      deviceVersion: deviceInformation.deviceVersion,
    };

    const connectedDevice = await ConnectedDevice.create(connectedDeviceData);

    // Update qr code
    await QRCode.findOneAndUpdate(
      { _id: qrCode._id },
      {
        isActive: true,
        connectedDeviceId: connectedDevice._id,
        lastUsedDate: new Date(),
      }
    );

    // Find user
    const user = await User.findById(decoded.userId);

    // Create token
    const authToken = jwt.sign({ user_id: user._id }, process.env.TOKEN_KEY, {
      expiresIn: "2h",
    });

    // Return token
    return res.status(200).json({ token: authToken });
  } catch (err) {
    console.log(err);
  }
});
The result after testing QR code scan functionality is shown below:
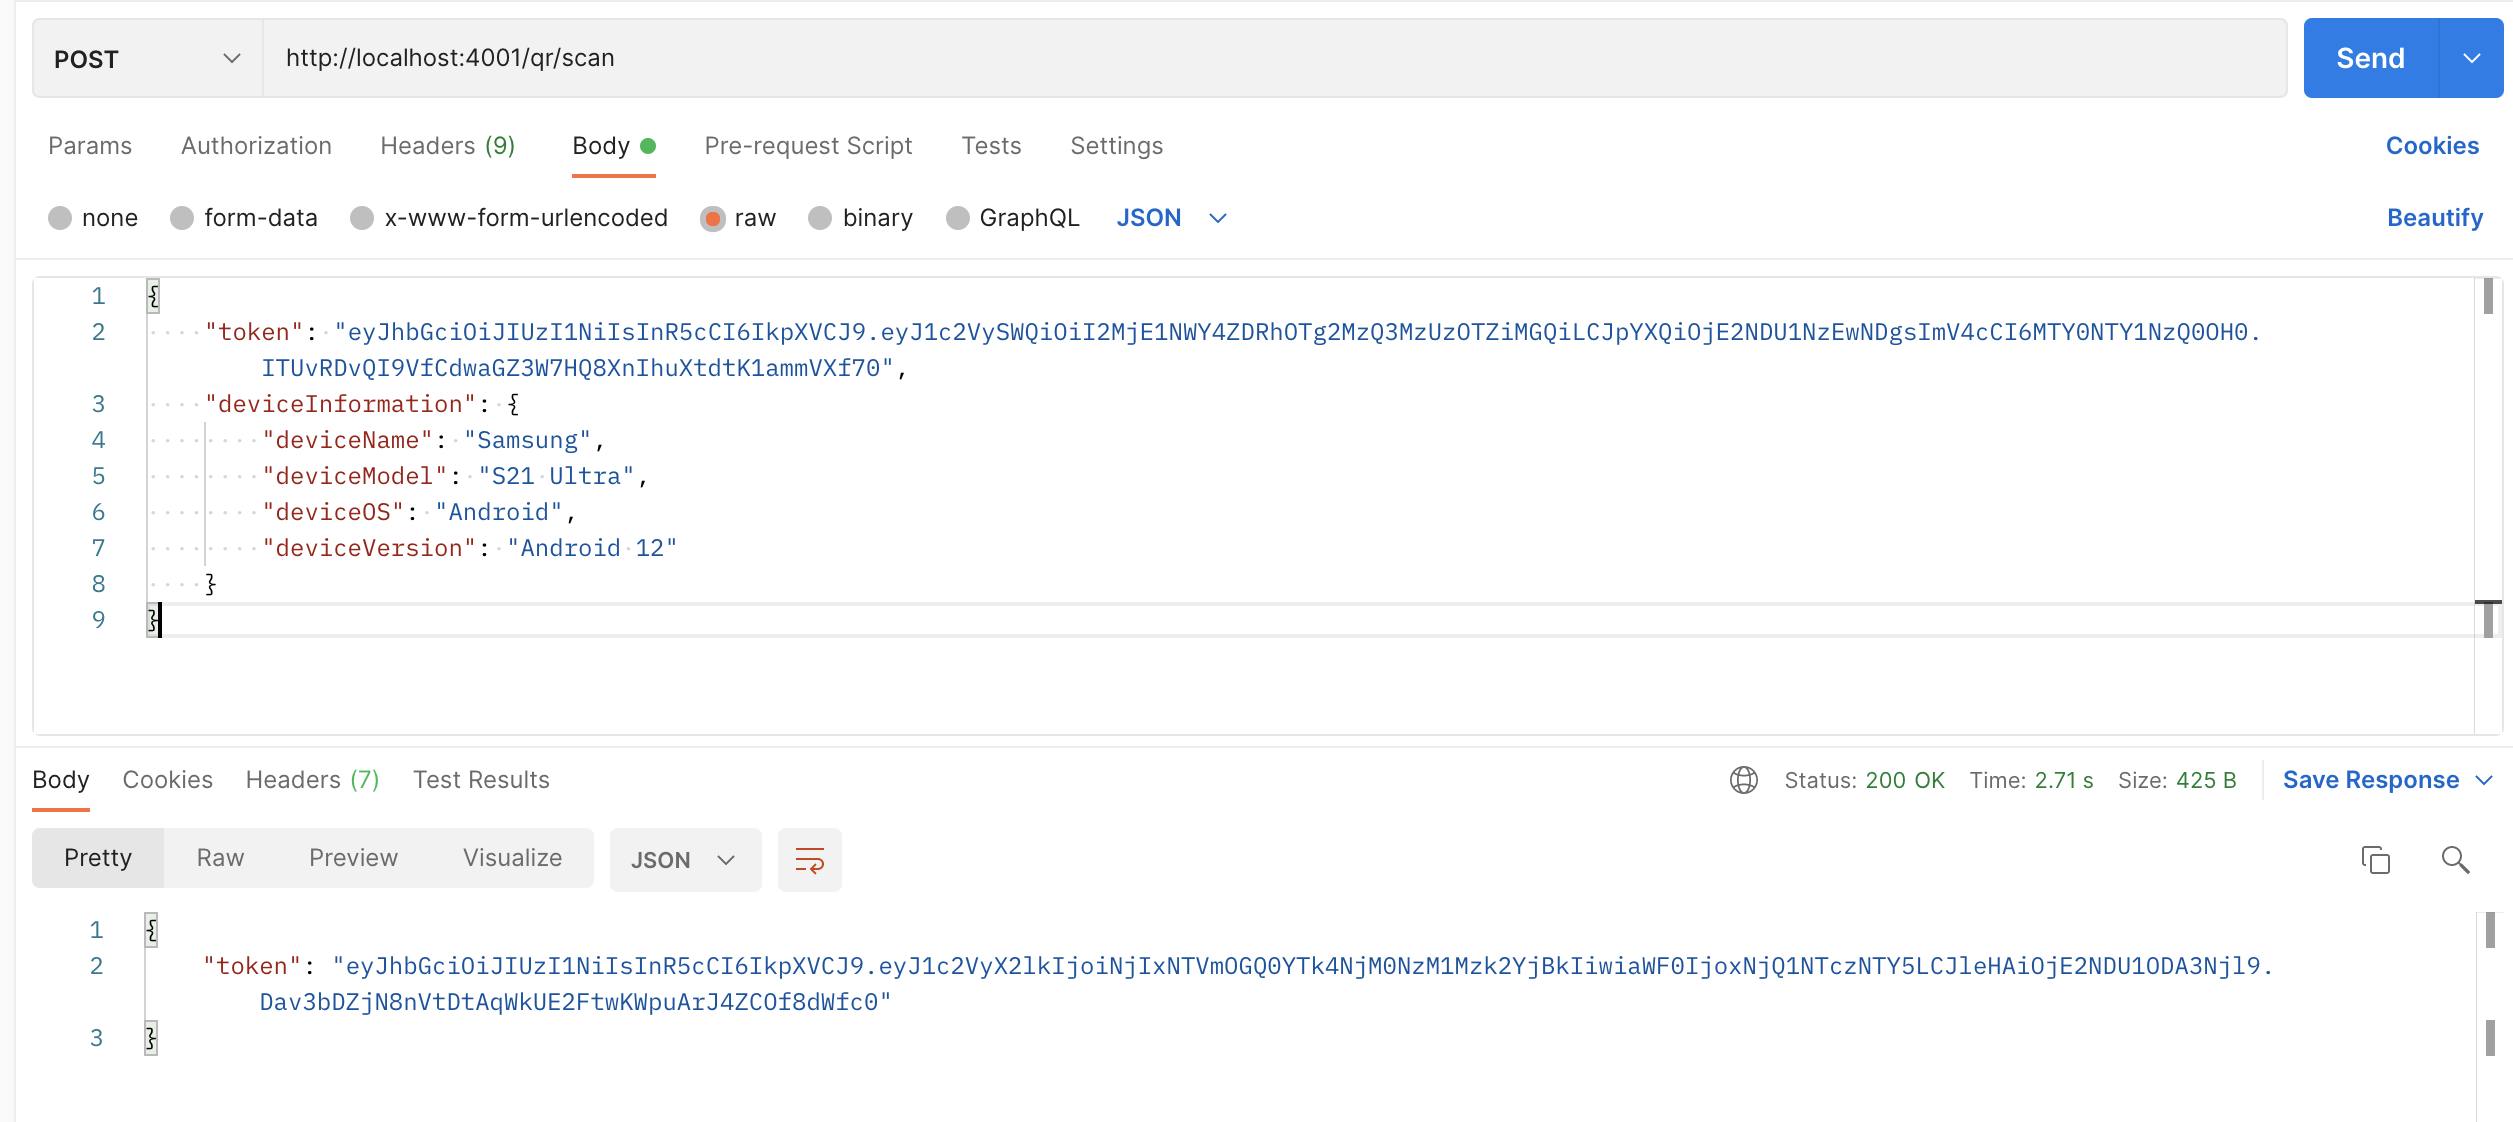
Yay 🥳 We did it !!!
We can find the link to the GitHub repository here
Conclusion
This article taught us how to integrate QR codes for authentication across web & mobile applications in Nodejs.
References
I'd love to connect with you at Twitter | LinkedIn | GitHub | Portfolio
See you in my next blog article. Take care!!!

