How to Integrate a Live Chat Feature to Your React Application with Chatwoot

Software Engineer | Developer Advocate | Technical Writer | Content Creator
Customers in different time zones are unable to make phone calls. The time it takes to react to emails is excessive. Self-service alternatives are impersonal and inadequate to address all potential scenarios.
Guess the alternatives? Live Chat.
In this tutorial, Integrate a Live Chat feature into our react application with Chatwoot.
This project was completed in a Codesandbox. To get started quickly, fork the Codesandbox or run the project.
GitHub Repository:
Live Youtube Demo
What is Live Chat?
Customers can communicate immediately with a company's employees via live chat software, mainly customer service, technical support, and other positions.
Live chat is a business messaging system that appears as a pop-up chat window on a company's website.
In some instances, customers must activate online chat features; in others, the chatbox may appear automatically as a proactive approach to communicate with customers.
Benefits of live chat
Your live chat software is more than just a means of communication. It's also an excellent method to start creating a contact database for future marketing campaigns.
- Your agents can build rapport with customers using live chat.
- Customers don't have to rely on external communication channels like email to convey their issues.
- Customers will spend more time on your website if you have a live chat since they will feel more at ease reaching out if they have a problem.
- Live chat increases the efficiency of your customer support personnel.
- Allows you to provide service 24 hours a day, seven days a week.
- Customer engagement sparks with live chat.
As previously stated, we will be integrating Chatwoot smoothly into our application.
What is Chatwoot ?
Chatwoot is an open-source customer engagement platform and a better way to talk to your customers, manage conversations, build relationships and delight your customers, all from one place.
Building our application
We use the npx create-react-app my-app command to scaffold a new project in a directory of our choice to create a new project.
Once the app is created and the dependencies automatically installed, we will see a message with instructions for navigating to our site and running it locally. We do this with the command.
cd <project name> && npm start
React will start a hot-reloading development environment accessible by default at http://localhost:3000
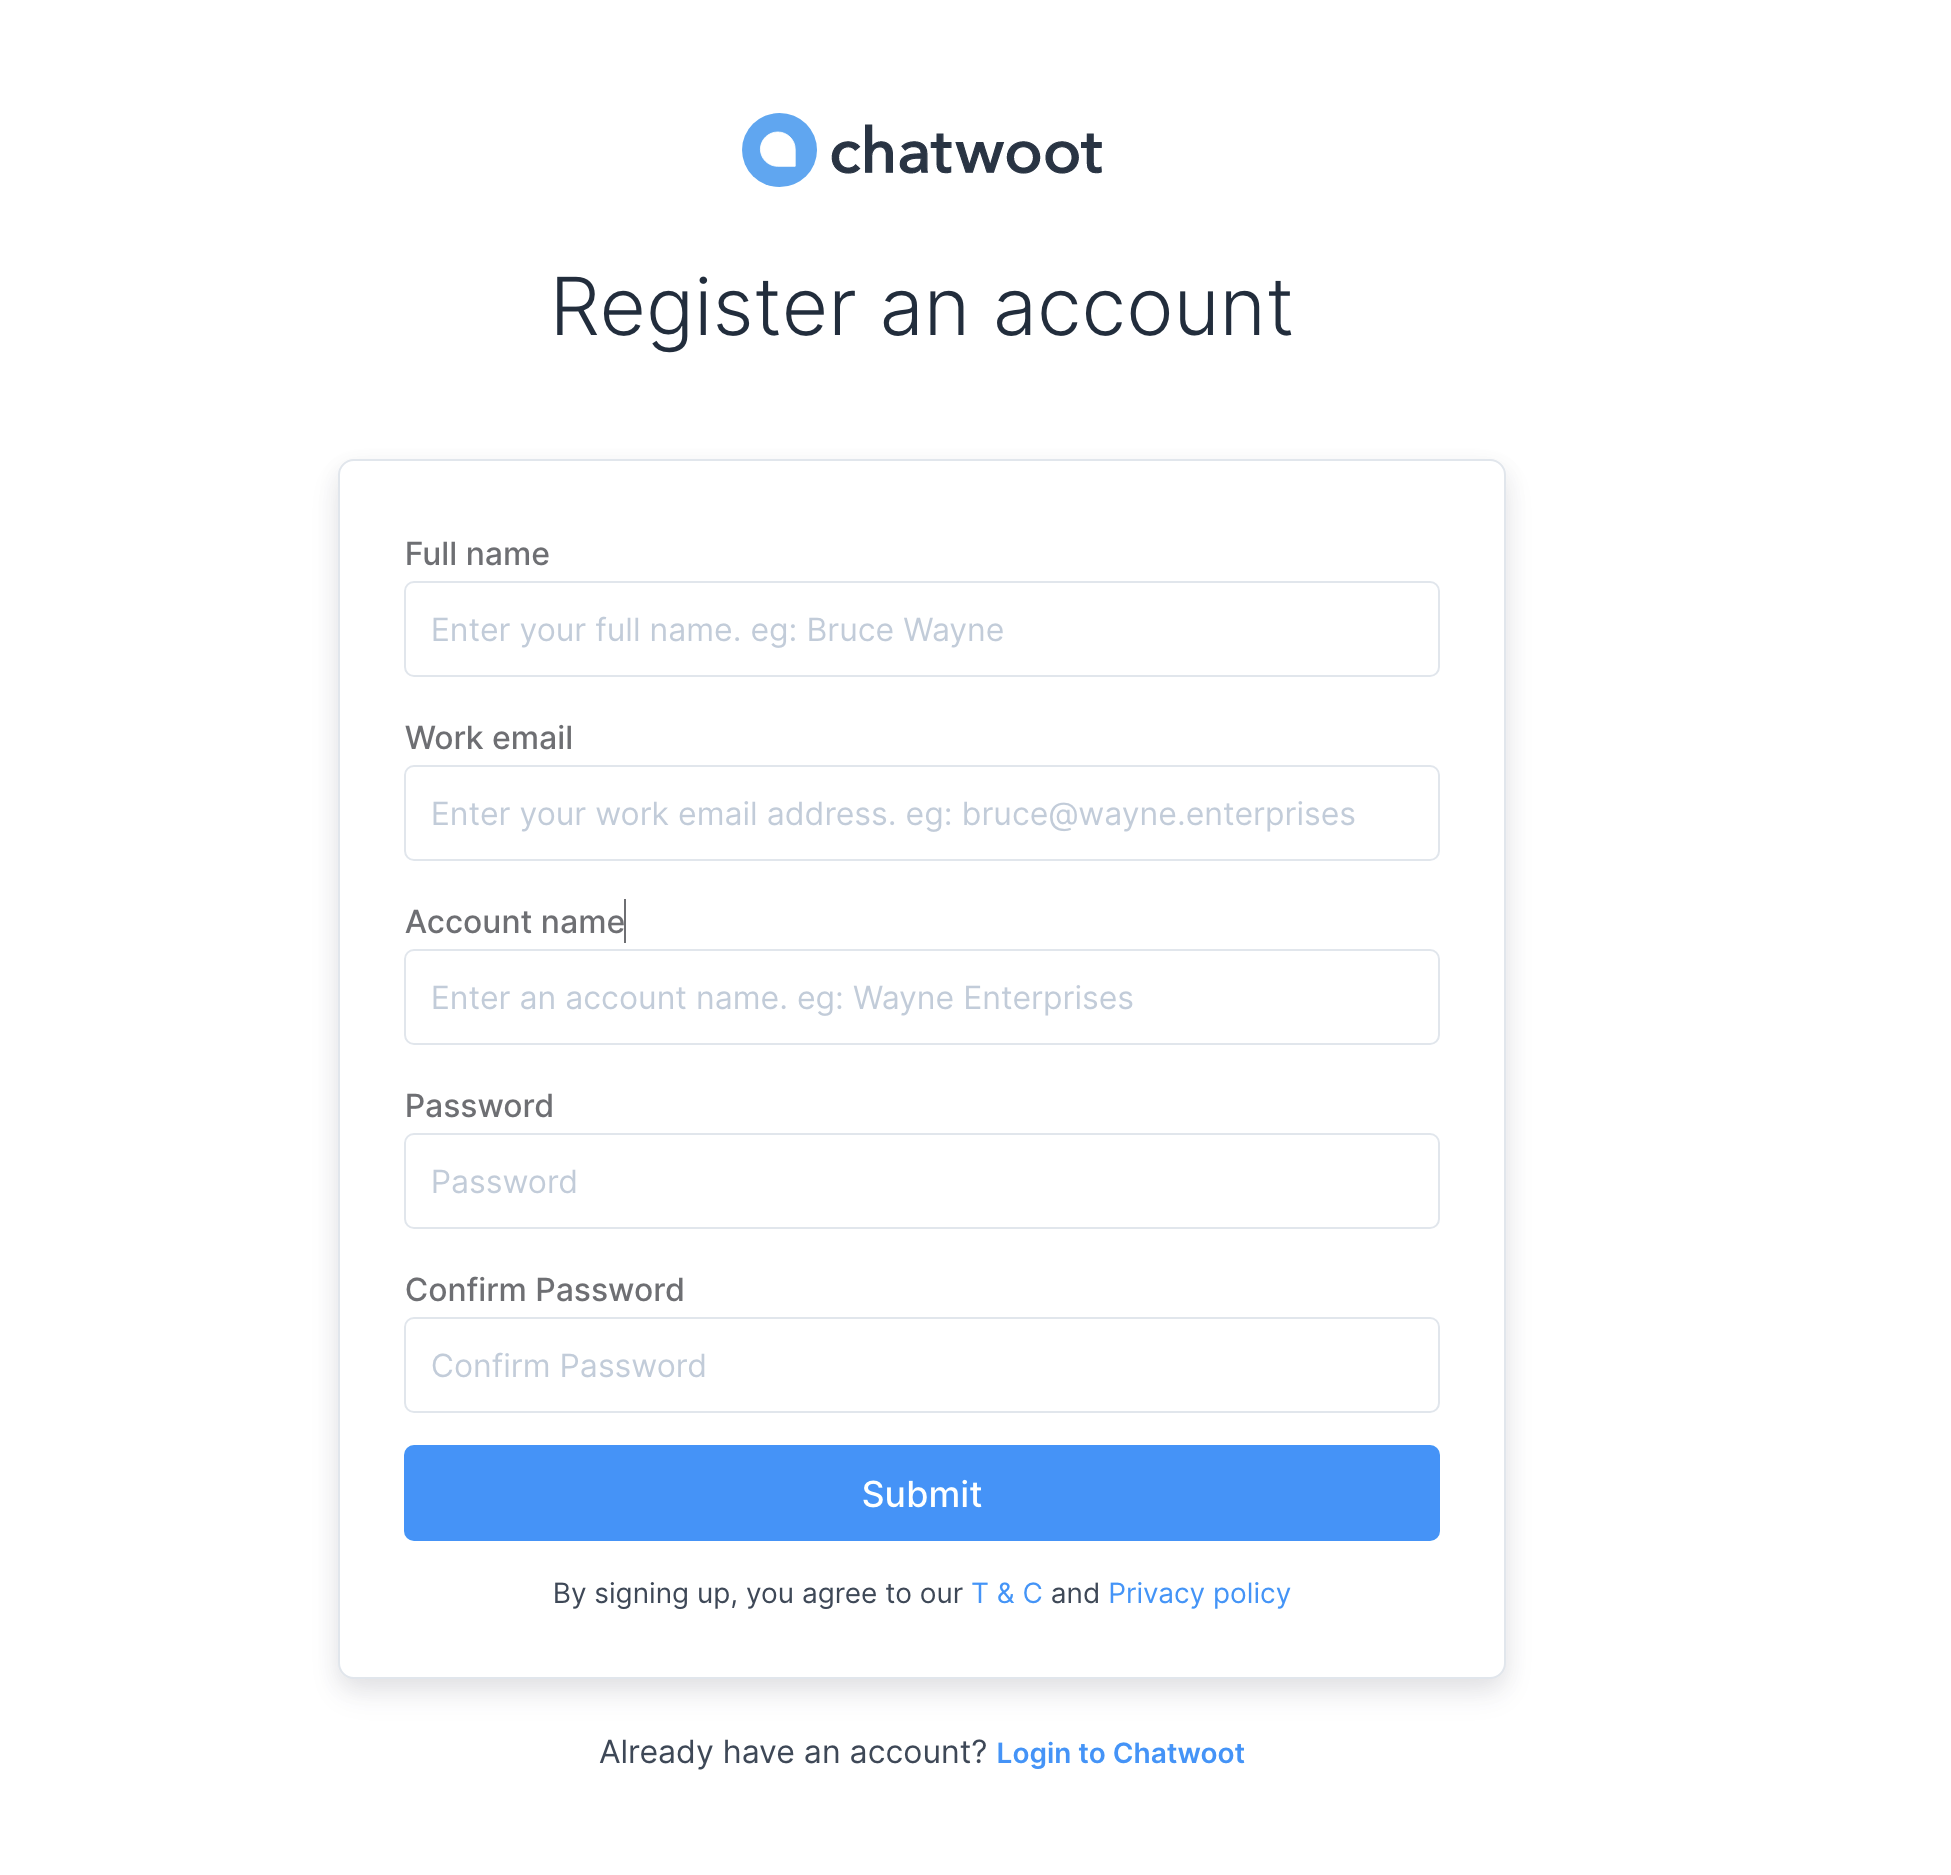
Let's head over to Chatwoot to create a new account.
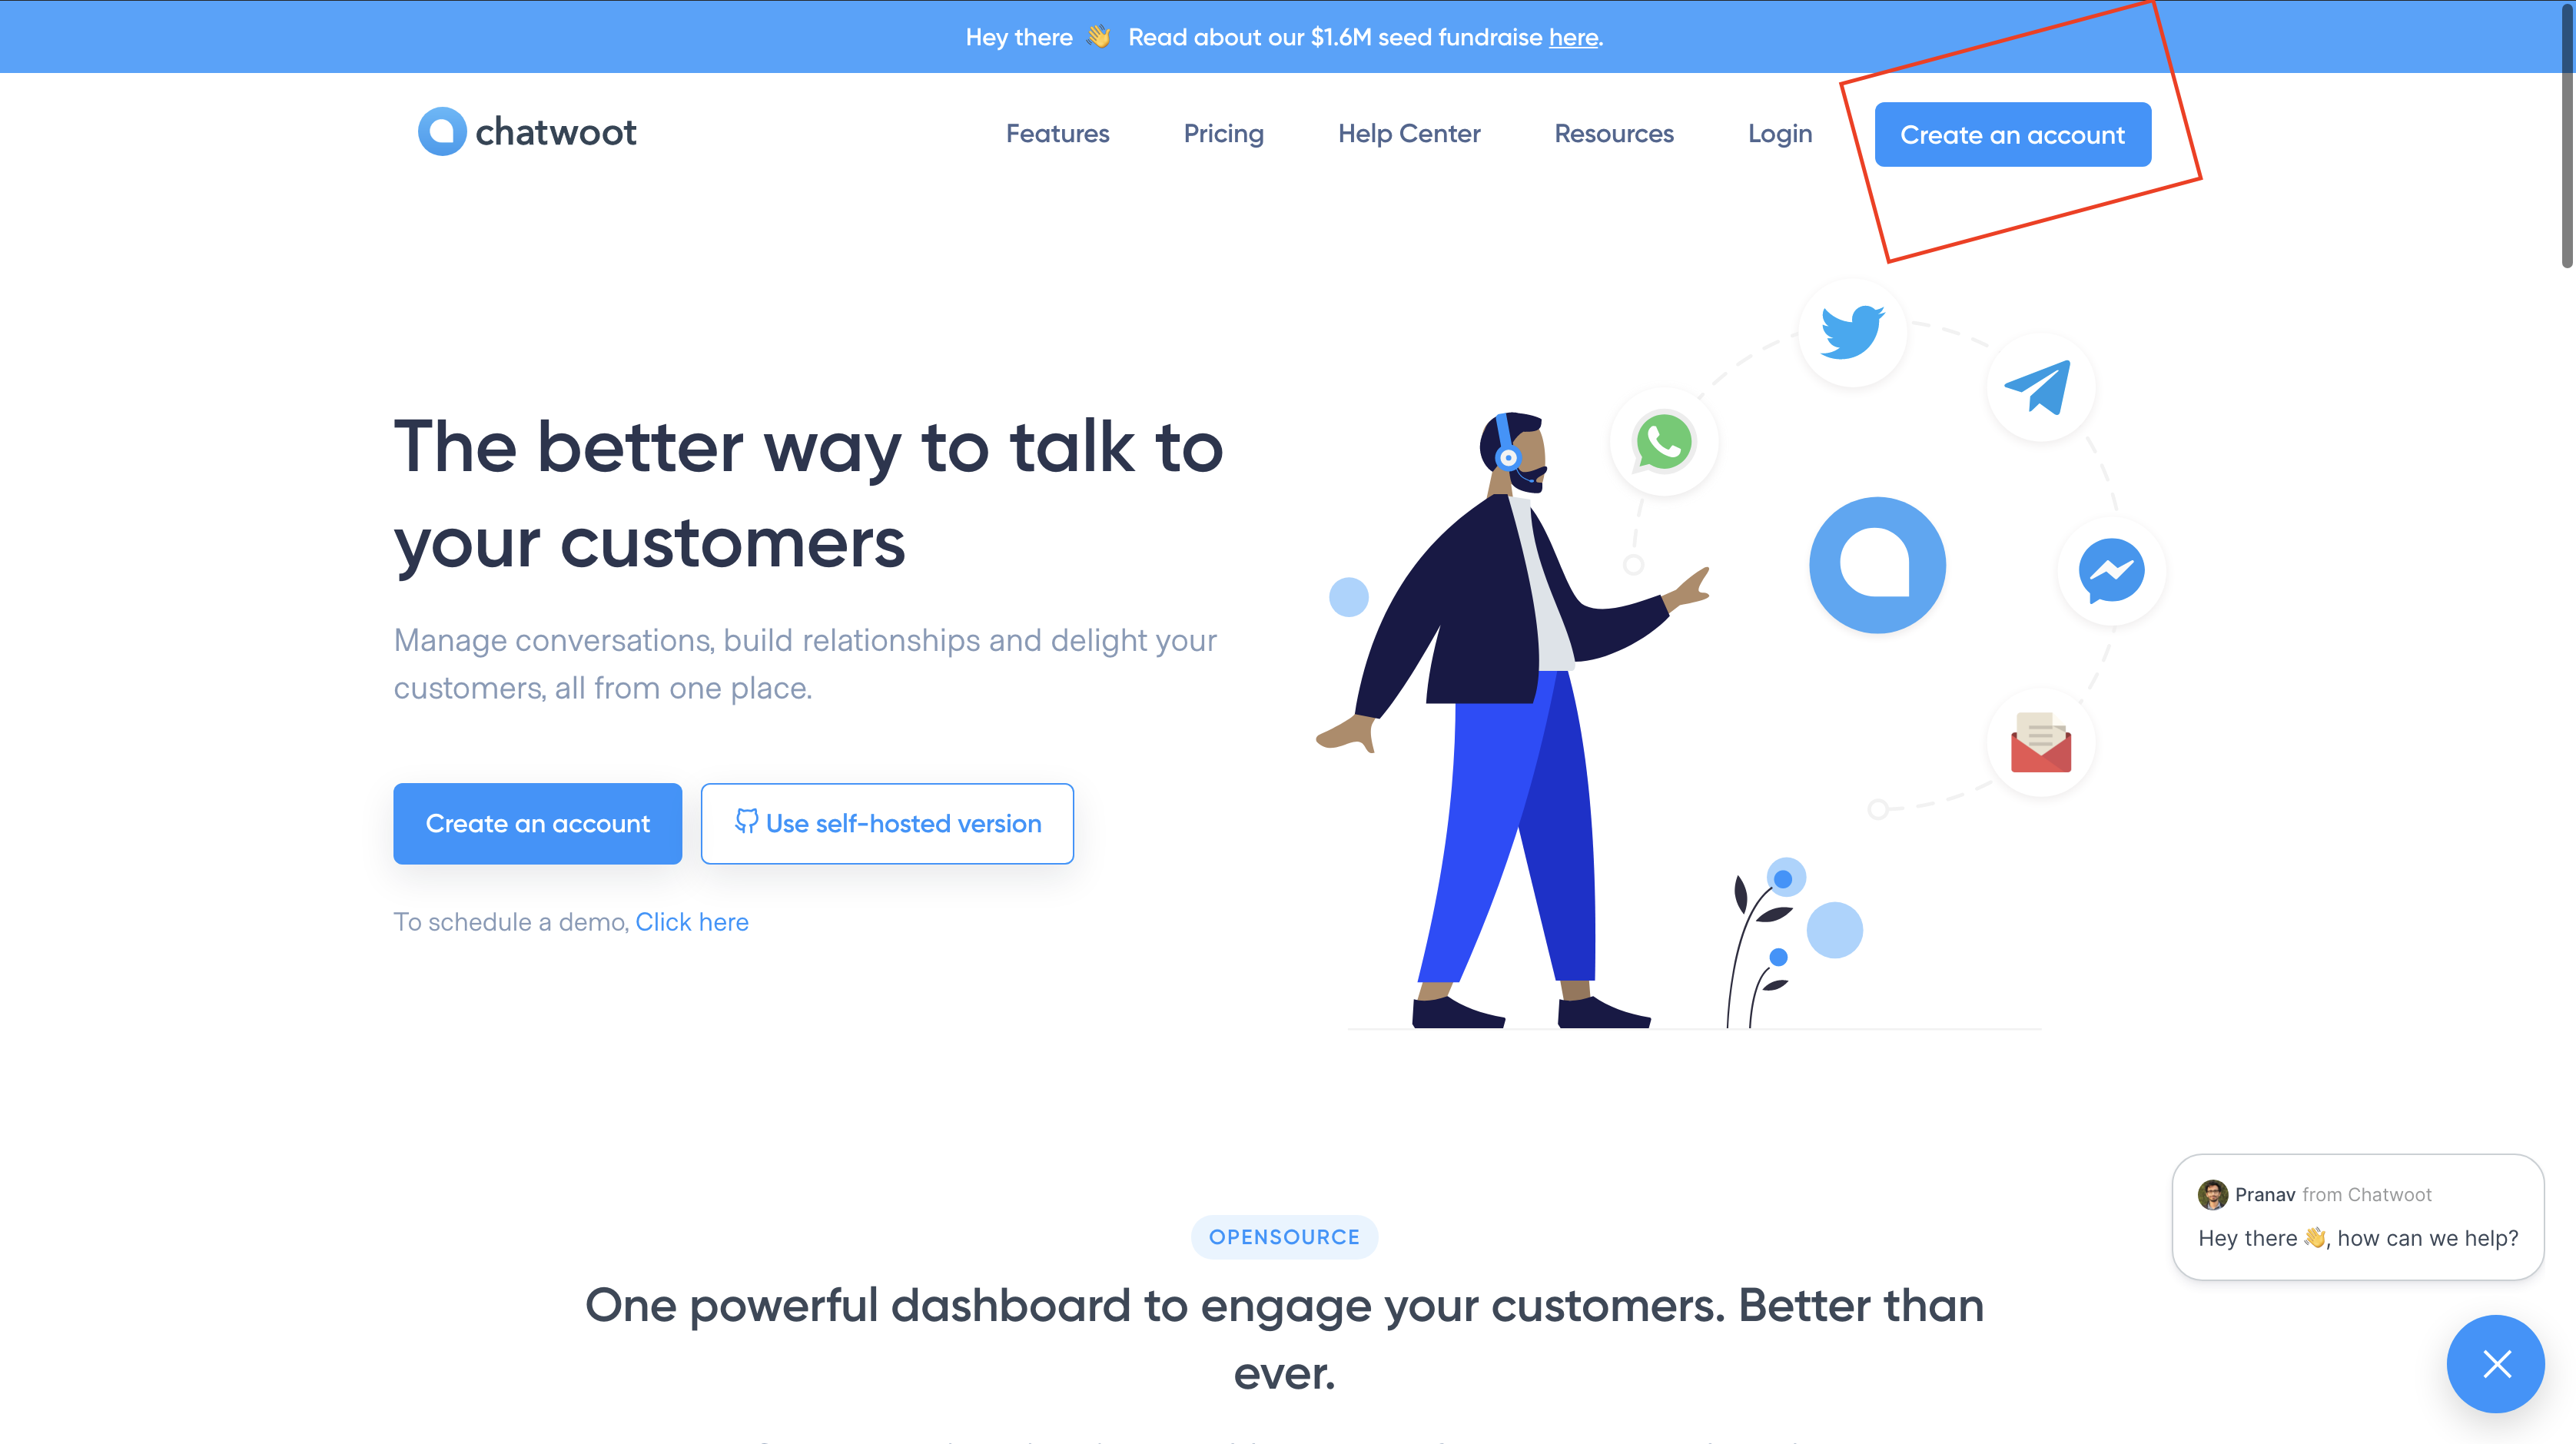
Create an account
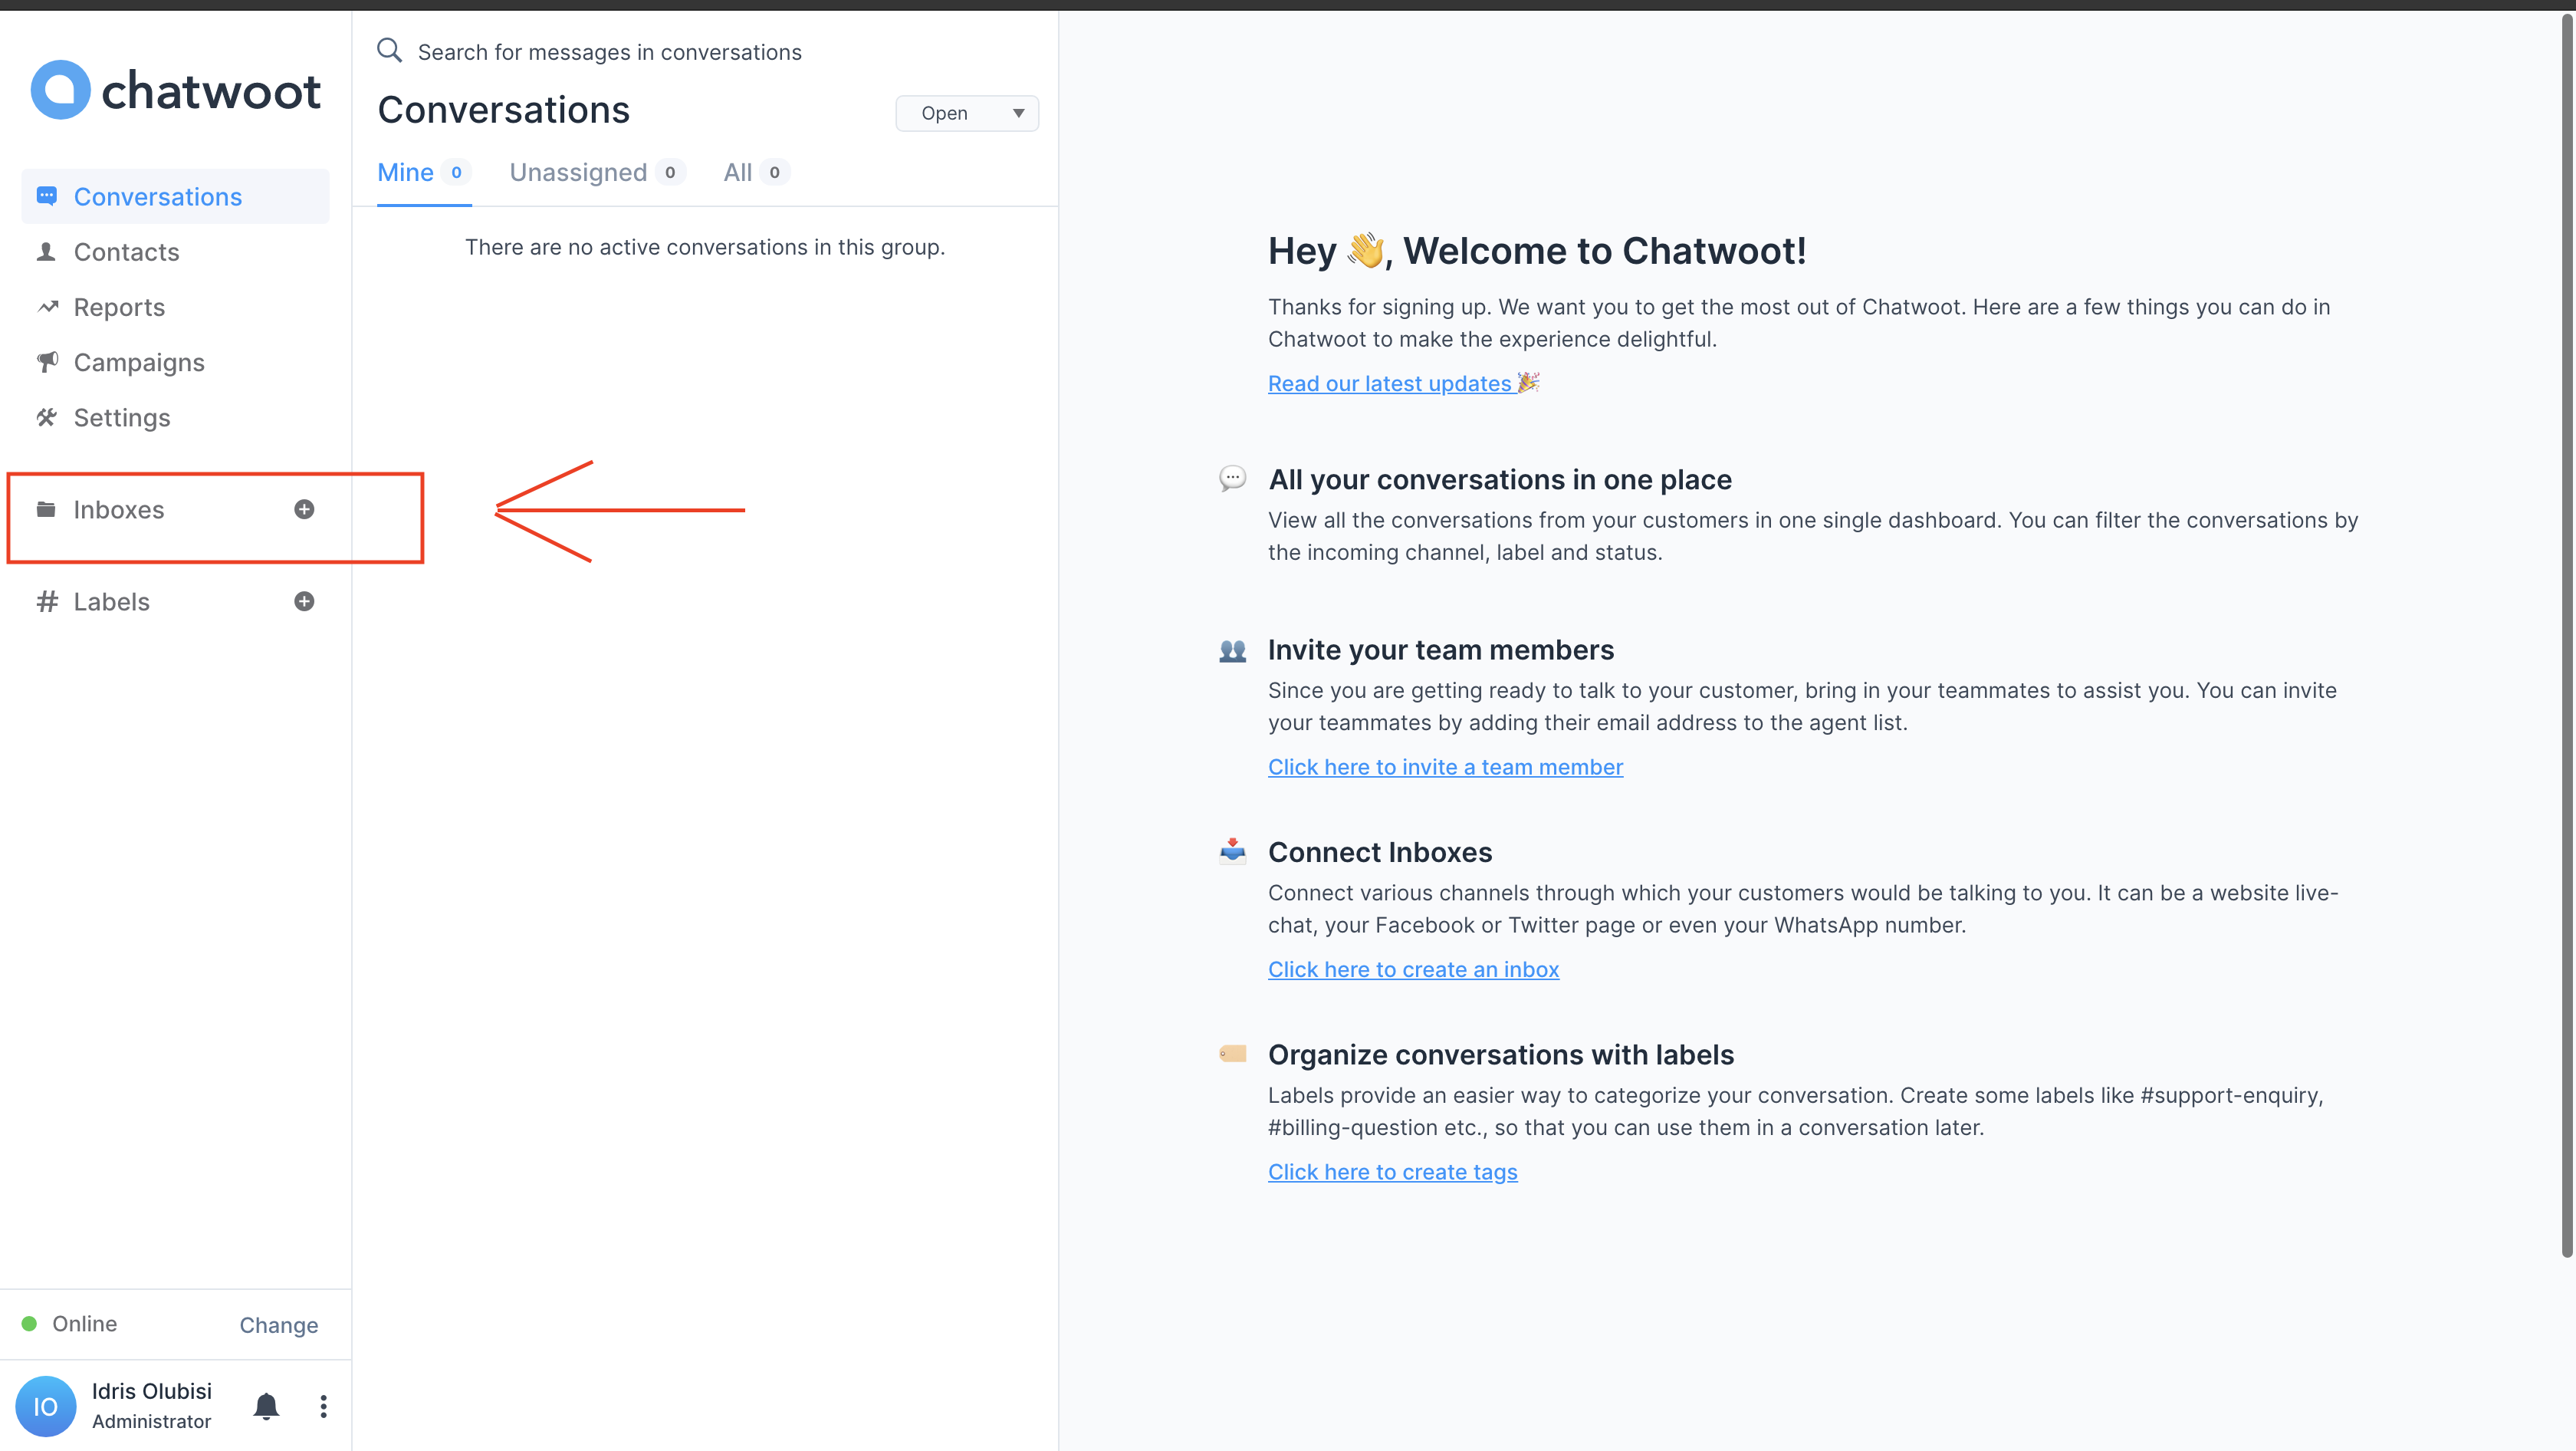
Here is what our dashboard looks like after successfully creating an account:
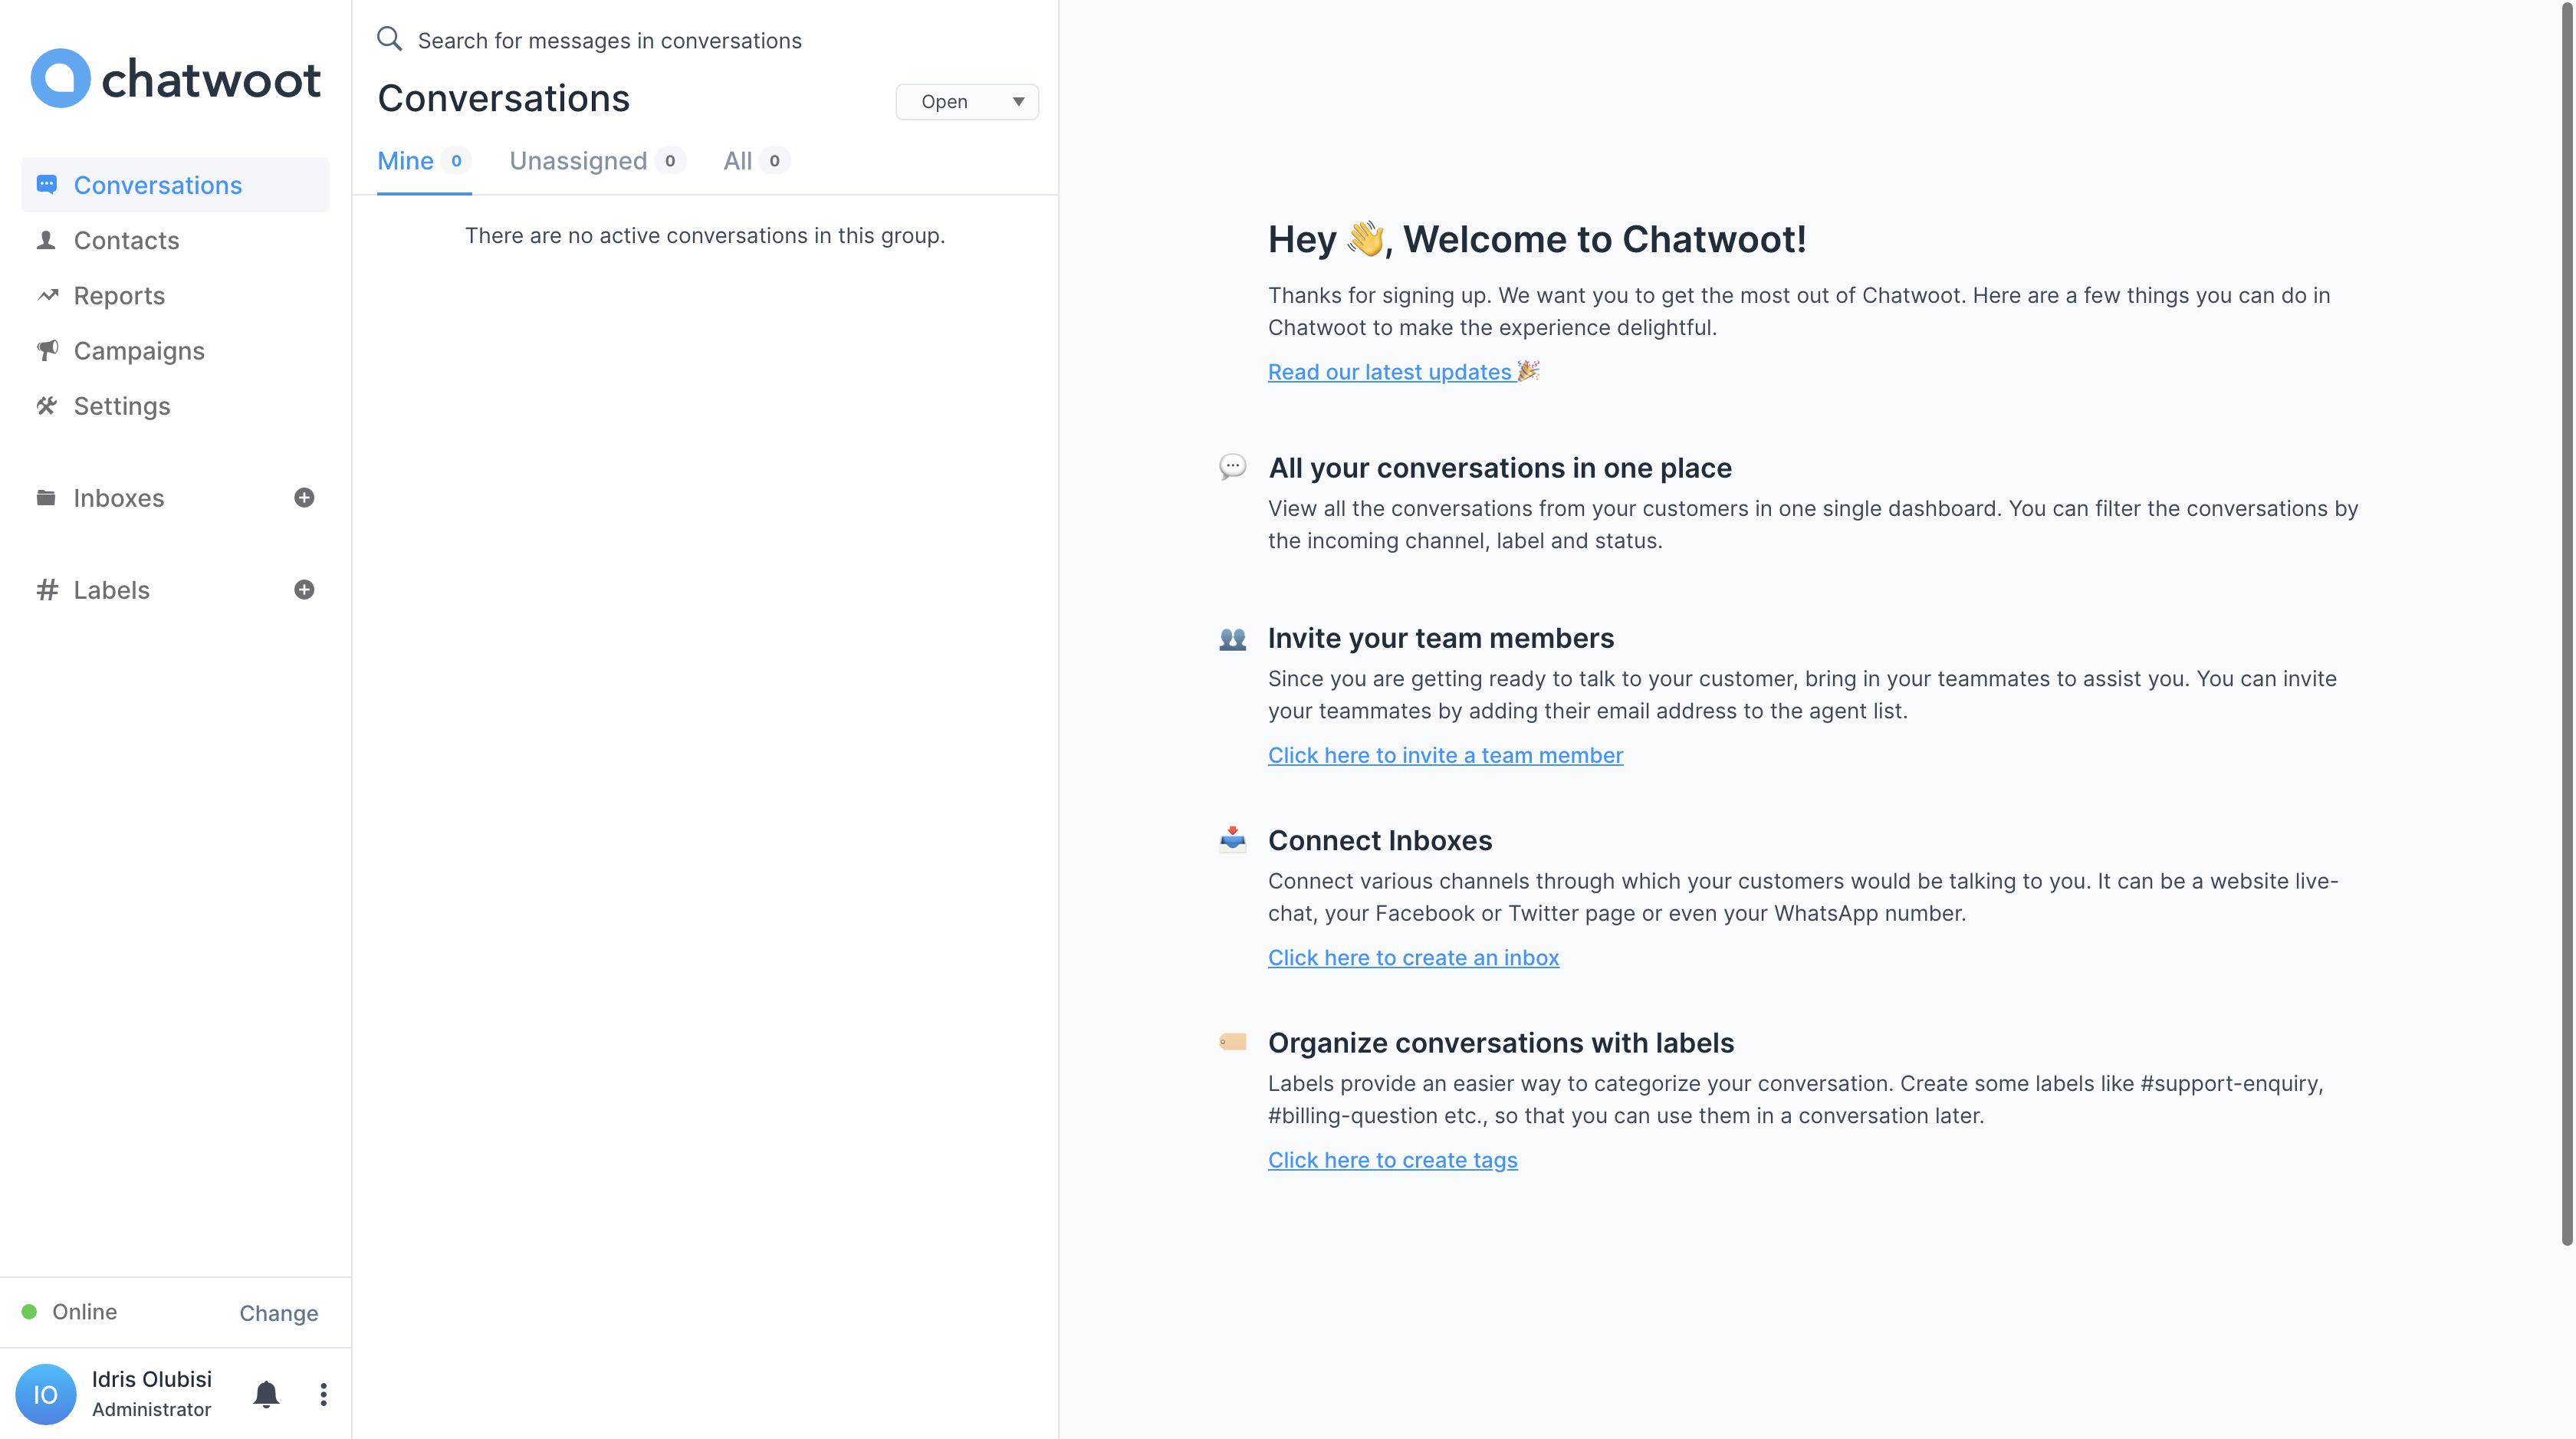
We'll start by creating an inbox, then choose which services you wish to add. For the time being, we'll stick with the website.
Click the highlighted area as shown in the image below to create an inbox and specify the service:
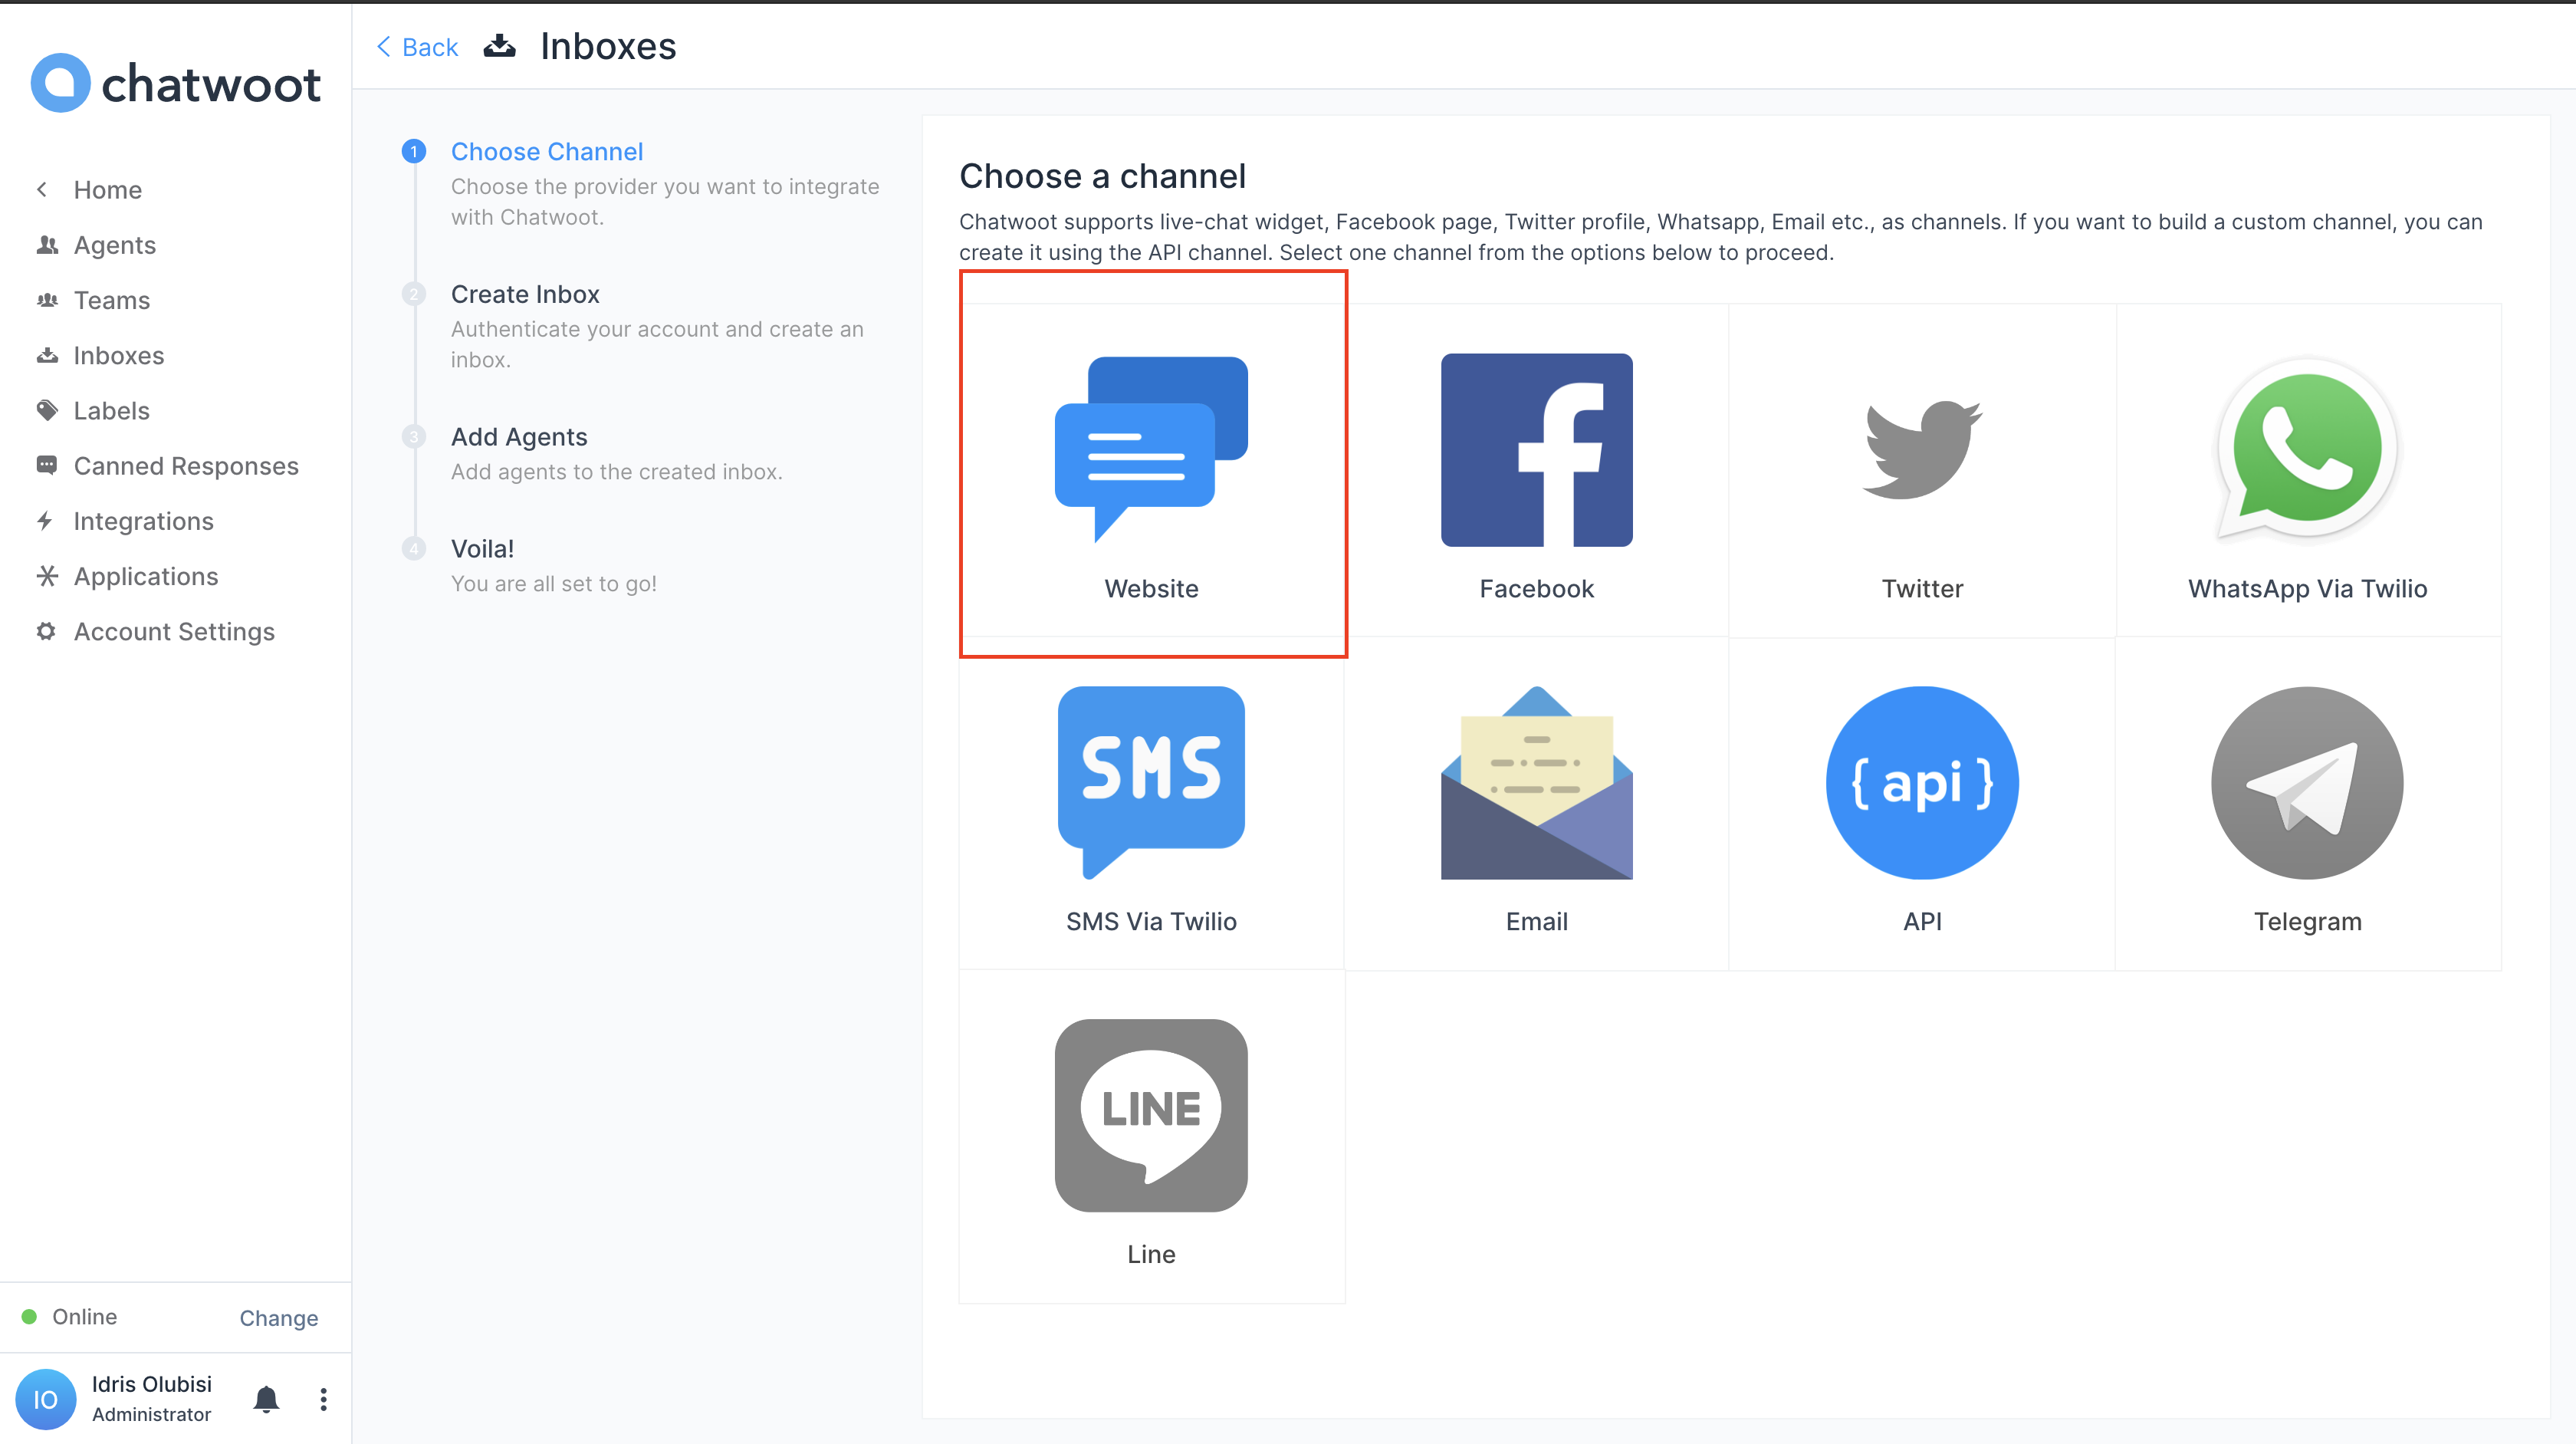
We need to set up our inbox and get the embedded code for the seamless integration of Chat woot in our application.
We'll select website from the option below:
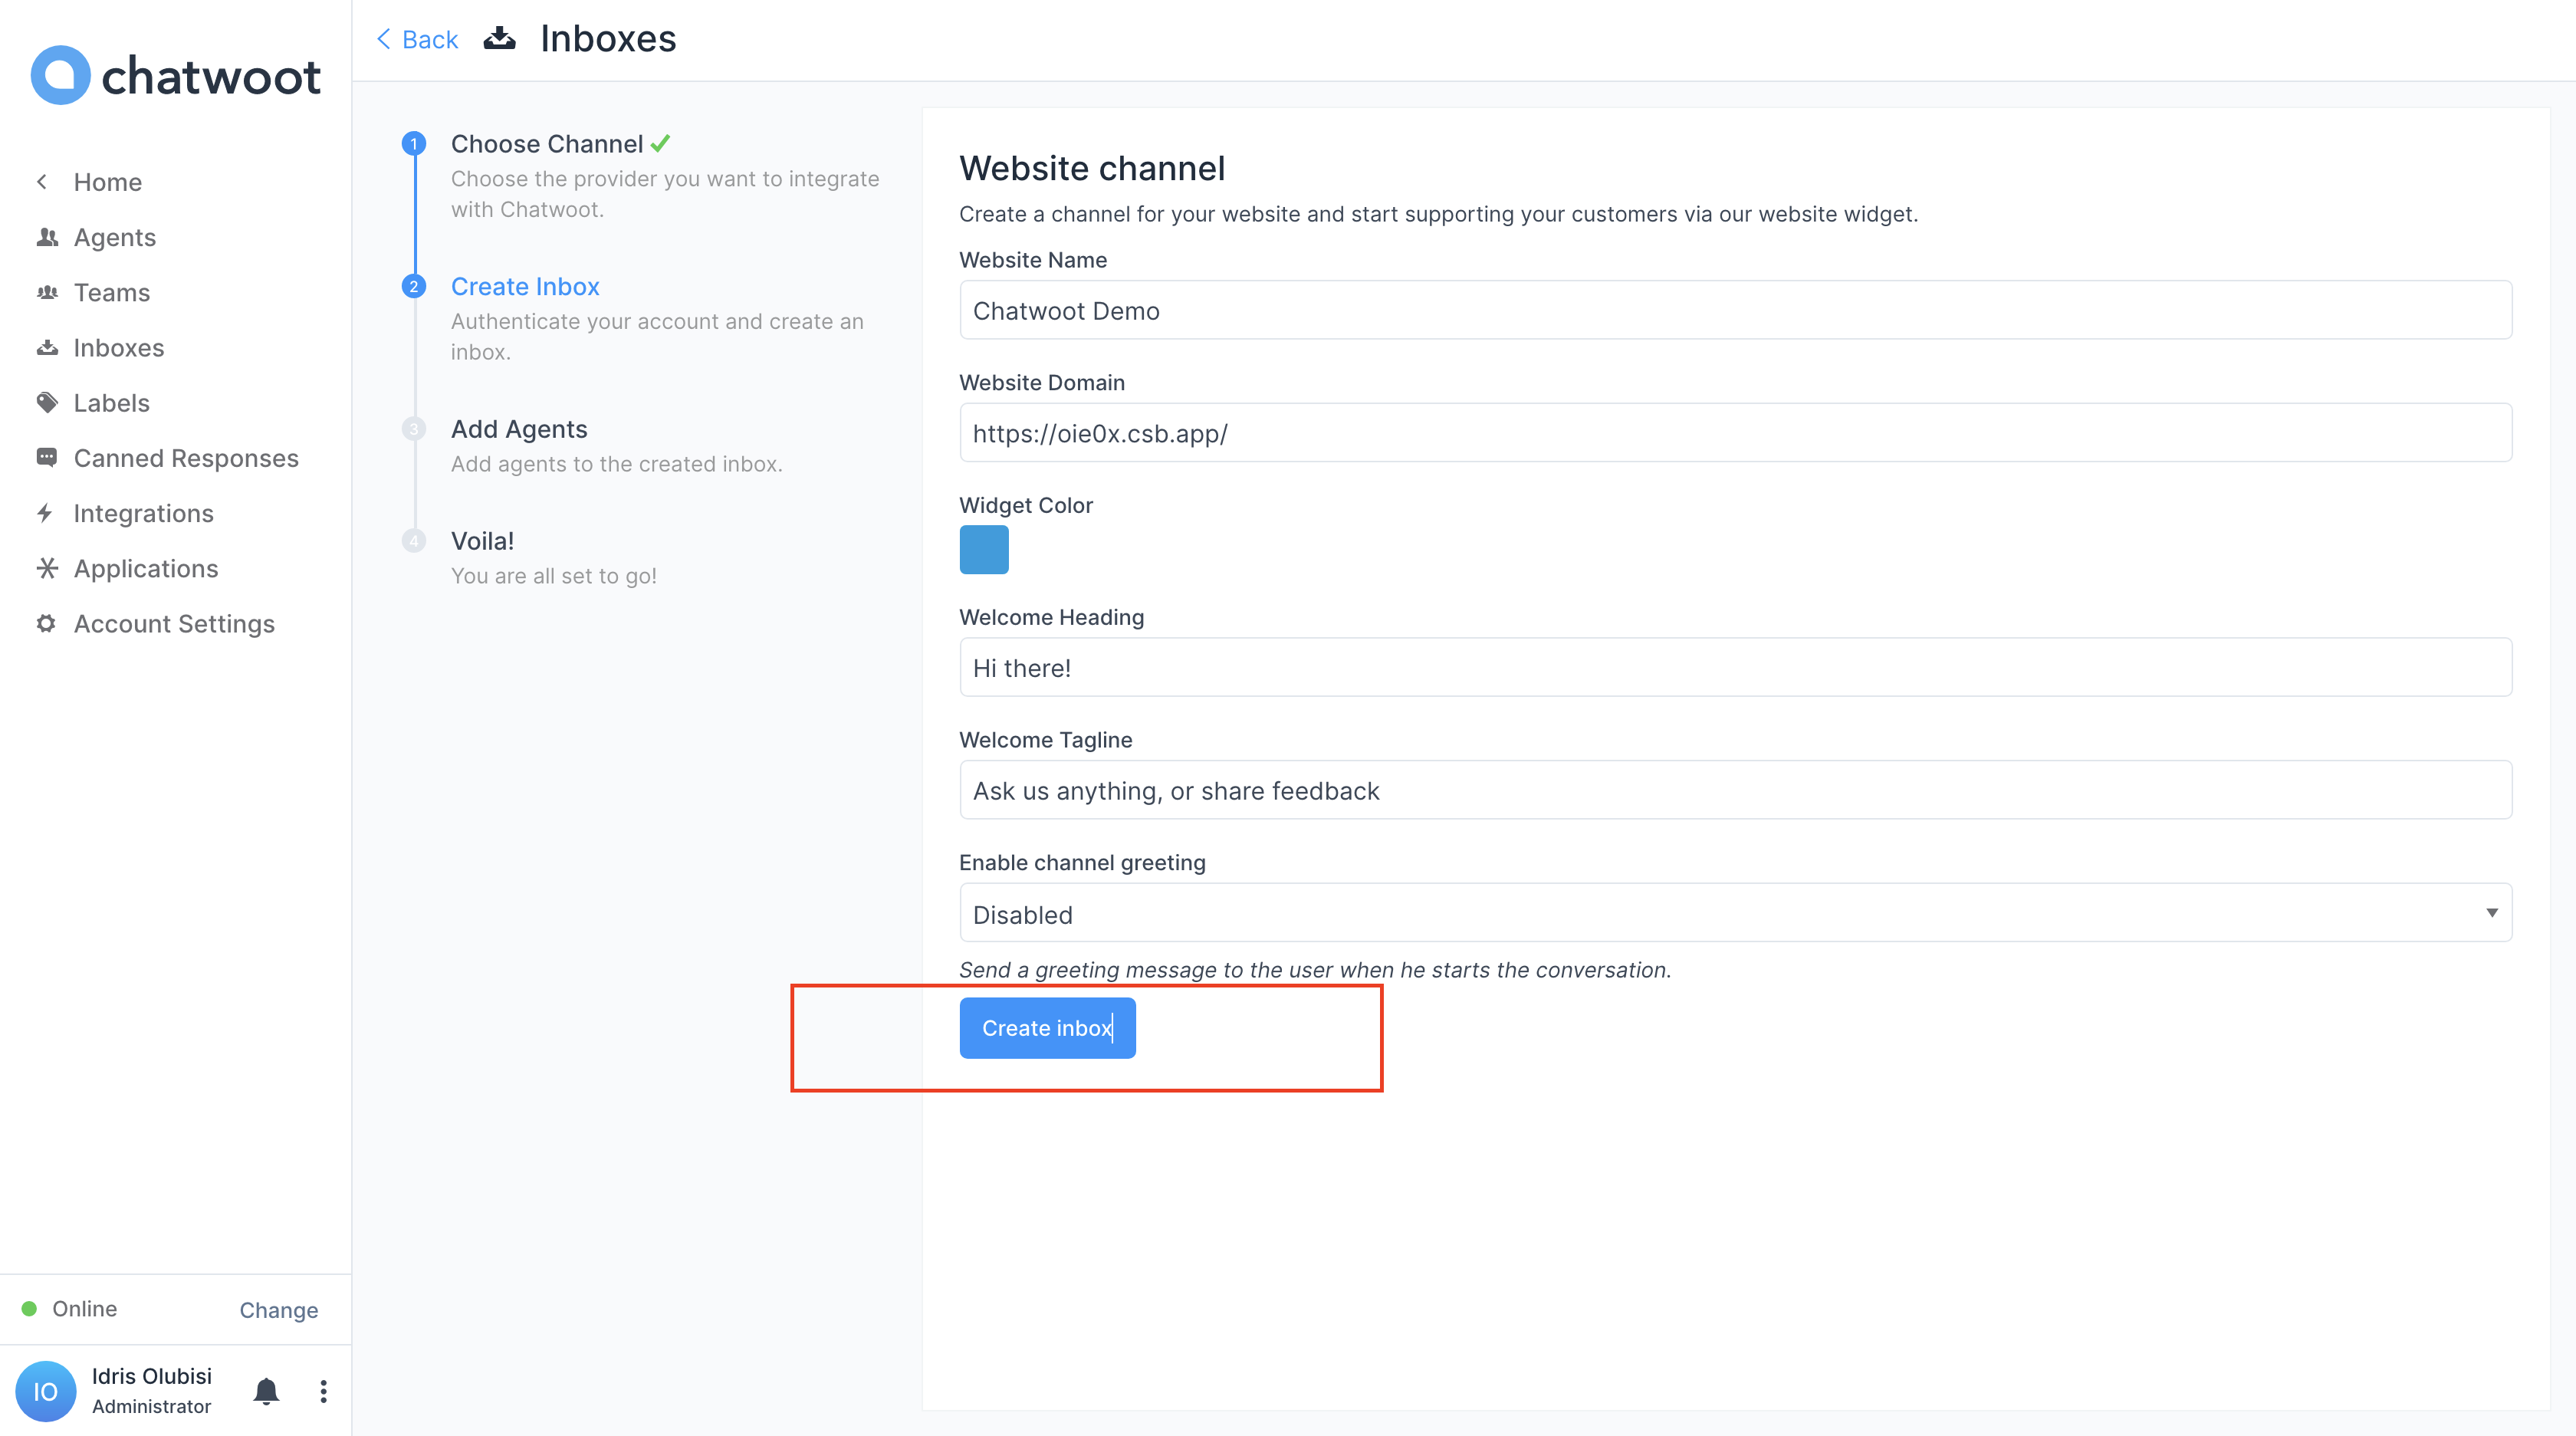
Now let's add our website information and URL.
Kindly ensure you have your website URL available
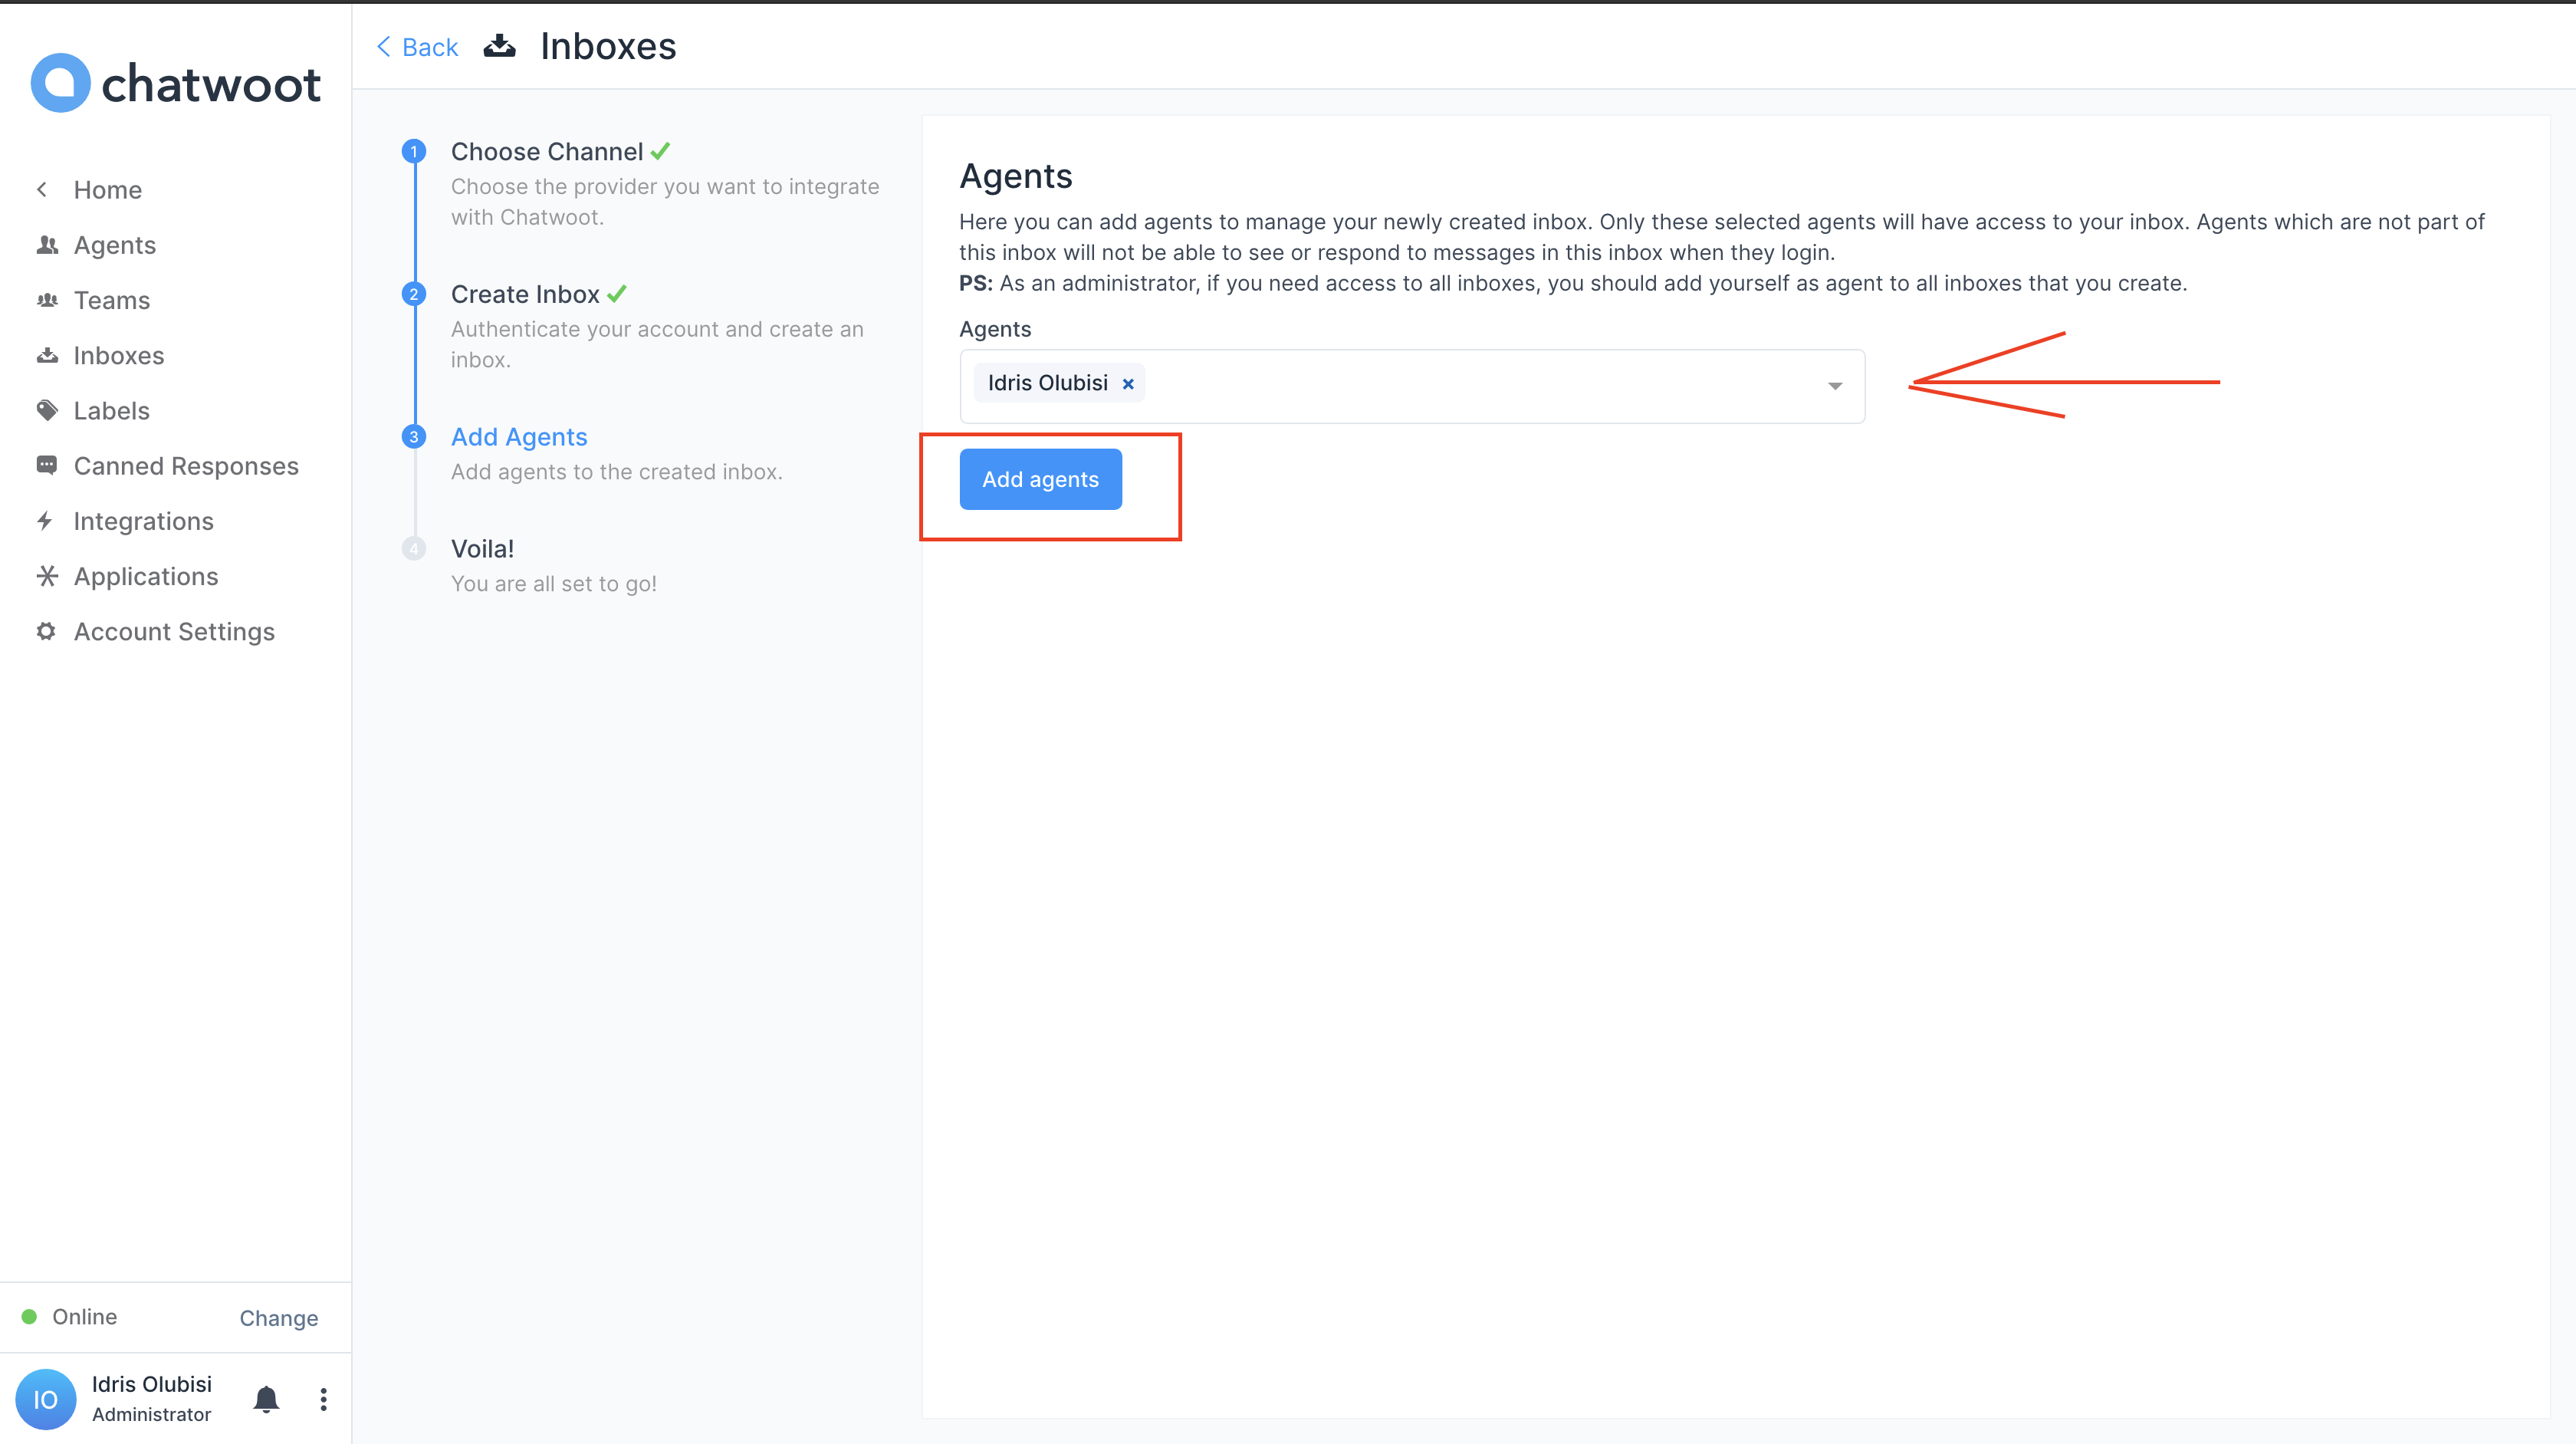
Let's add an agent. In this case, the agent refers to a member of our company's support staff who we'd like to enlist as a site responder.
Voila 🥳🥳🥳 our inbox is ready!
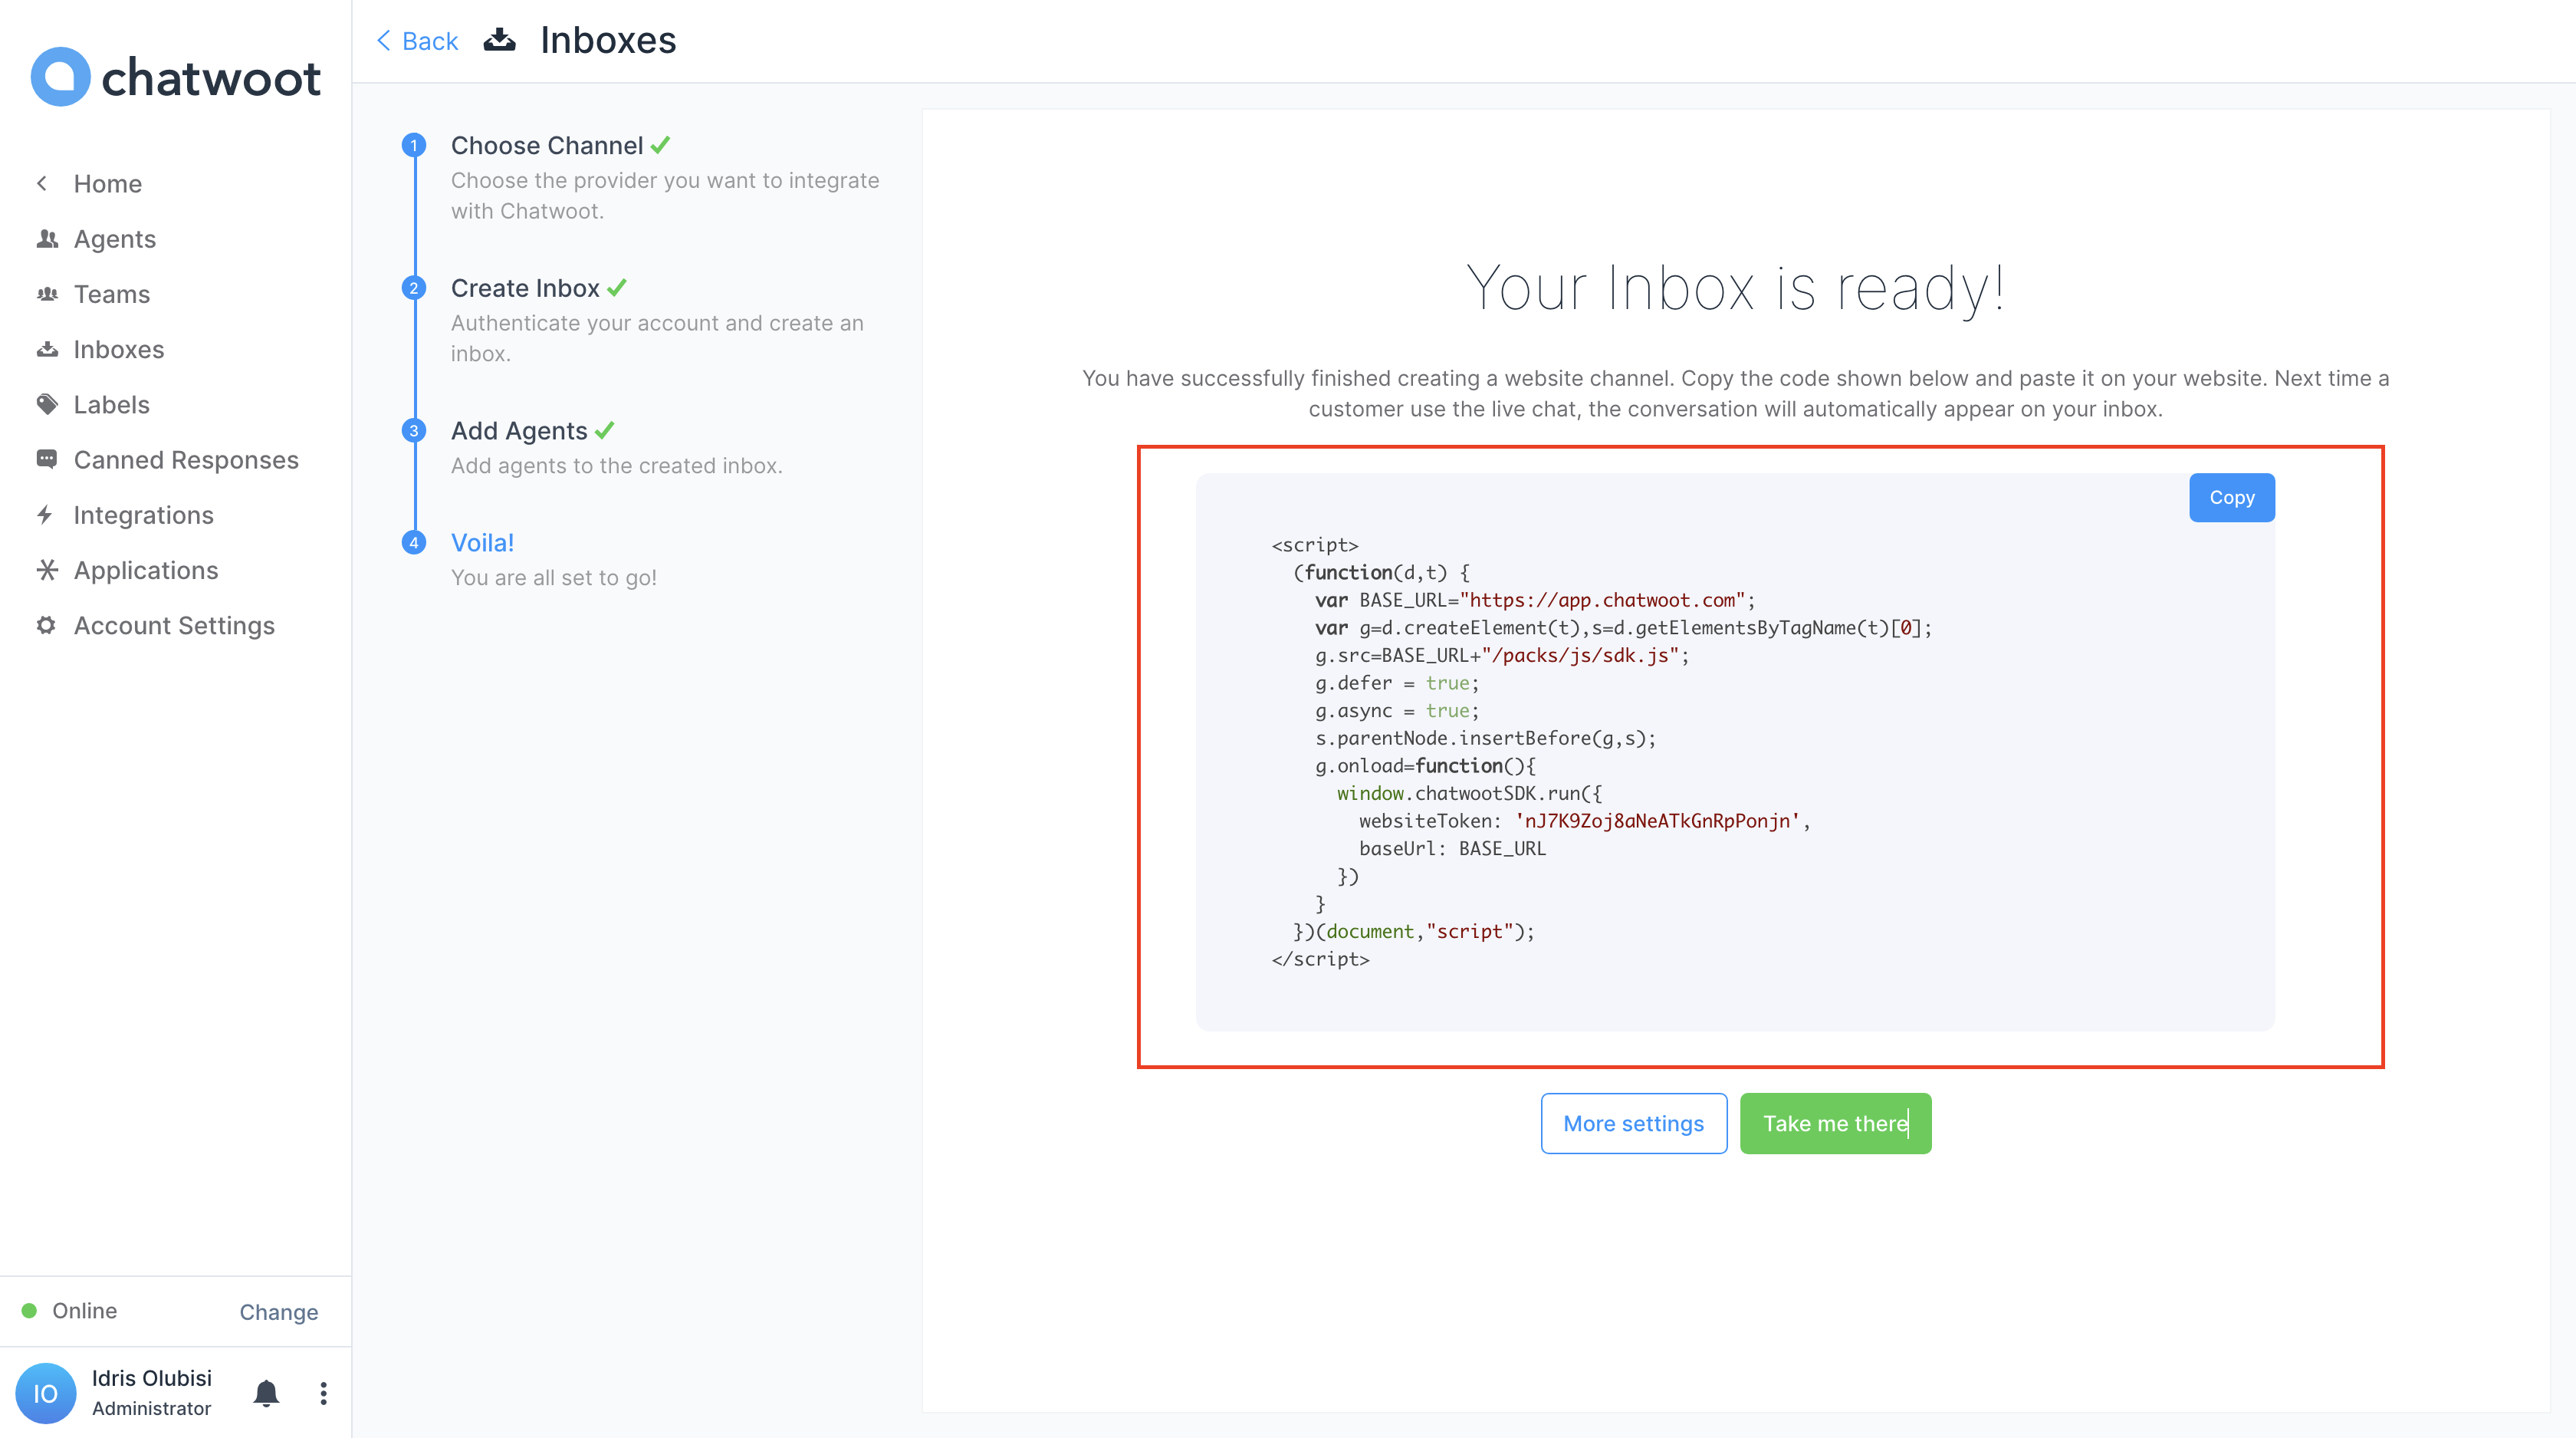
We have successfully finished creating a website channel. Would you please copy the code shown above and paste it on your website?
The conversation will immediately appear in your inbox the next time a consumer uses live chat.
Since we have our inbox setup already, let's head over to our application and paste the required code for the live chat integration.
We will create a chatwoot.js file inside the components folder. Inside chatwoot.js, kindly add the snippet below:
import React from "react";

class ChatwootWidget extends React.Component {
  componentDidMount() {
    // Add Chatwoot Settings
    window.chatwootSettings = {
      hideMessageBubble: false,
      position: "right", // This can be left or right
      locale: "en", // Language to be set
      type: "standard" // [standard, expanded_bubble]
    };

    // Paste the script from inbox settings except the <script> tag


  render() {
    return null;
  }
}

export default ChatwootWidget;
In the snippet above, we created a class component with a componentDidMount() method to add chatwoot settings into our application.
Let's paste the snippet we copied earlier from our dashboard on the chatwoot site in the chatwoot.js file under the comment // Paste the script from inbox settings except for the <script> tag as shown below:
import React from "react";

class ChatwootWidget extends React.Component {

  componentDidMount() {

    // Add Chatwoot Settings
    window.chatwootSettings = {
      hideMessageBubble: false,
      position: "right", // This can be left or right
      locale: "en", // Language to be set
      type: "standard" // [standard, expanded_bubble]
    };


    // Paste the script from inbox settings except the <script> tag

      (function(d,t) {
        var BASE_URL="https://app.chatwoot.com";
        var g=d.createElement(t),s=d.getElementsByTagName(t)[0];
        g.src=BASE_URL+"/packs/js/sdk.js";
        g.defer = true;
        g.async = true;
        s.parentNode.insertBefore(g,s);
        g.onload=function(){
          window.chatwootSDK.run({
            websiteToken: 'nJ7K9Zoj8aNeATkGnRpPonjn',
            baseUrl: BASE_URL
          })
        }
      })(document,"script");

  render() {
    return null;
  }
}

export default ChatwootWidget;
Let's import it into our app.js as shown below.
import ChatwootWidget from "../components/chatwoot.js";
import "./styles.css";

export default function App() {
  return (
    <div className="App">
      <ChatwootWidget />
    </div>
  );
}
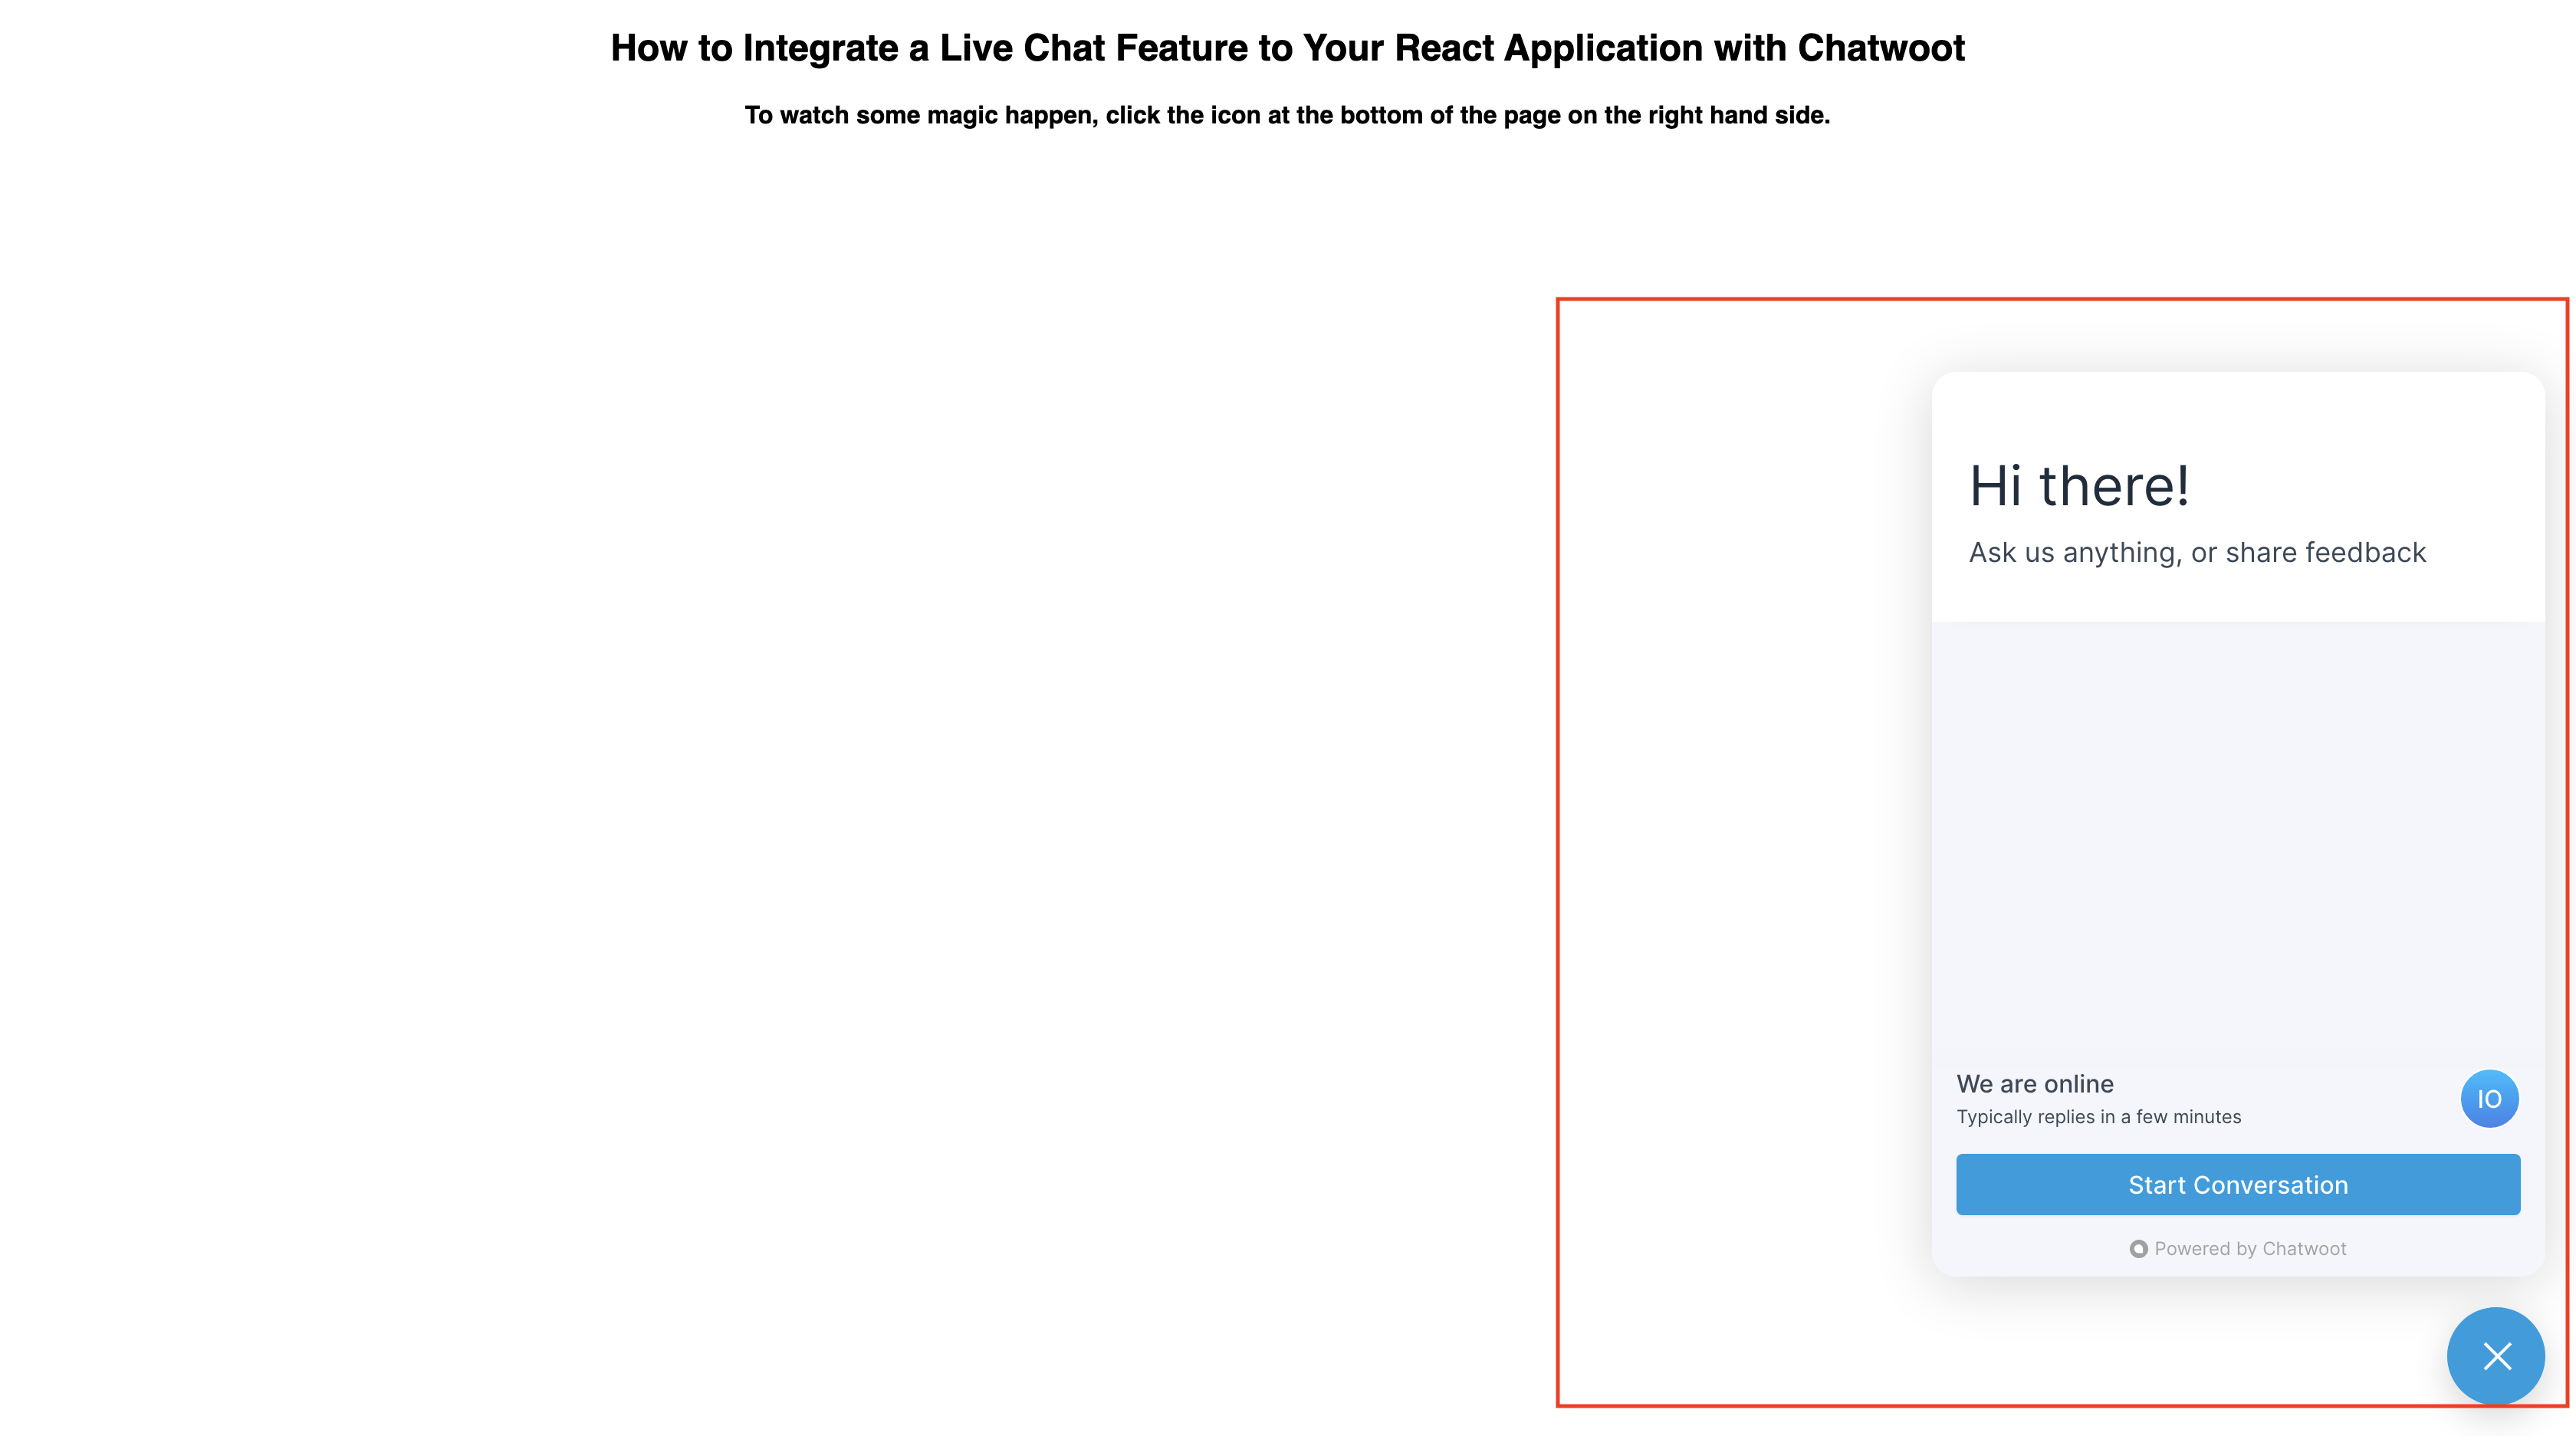
We are done with implementation now; let's test the live chat on our application, Yeah that's how easy its to integrate Chatwoot into our application.
We already have our live chat appearing on our site, as shown below.
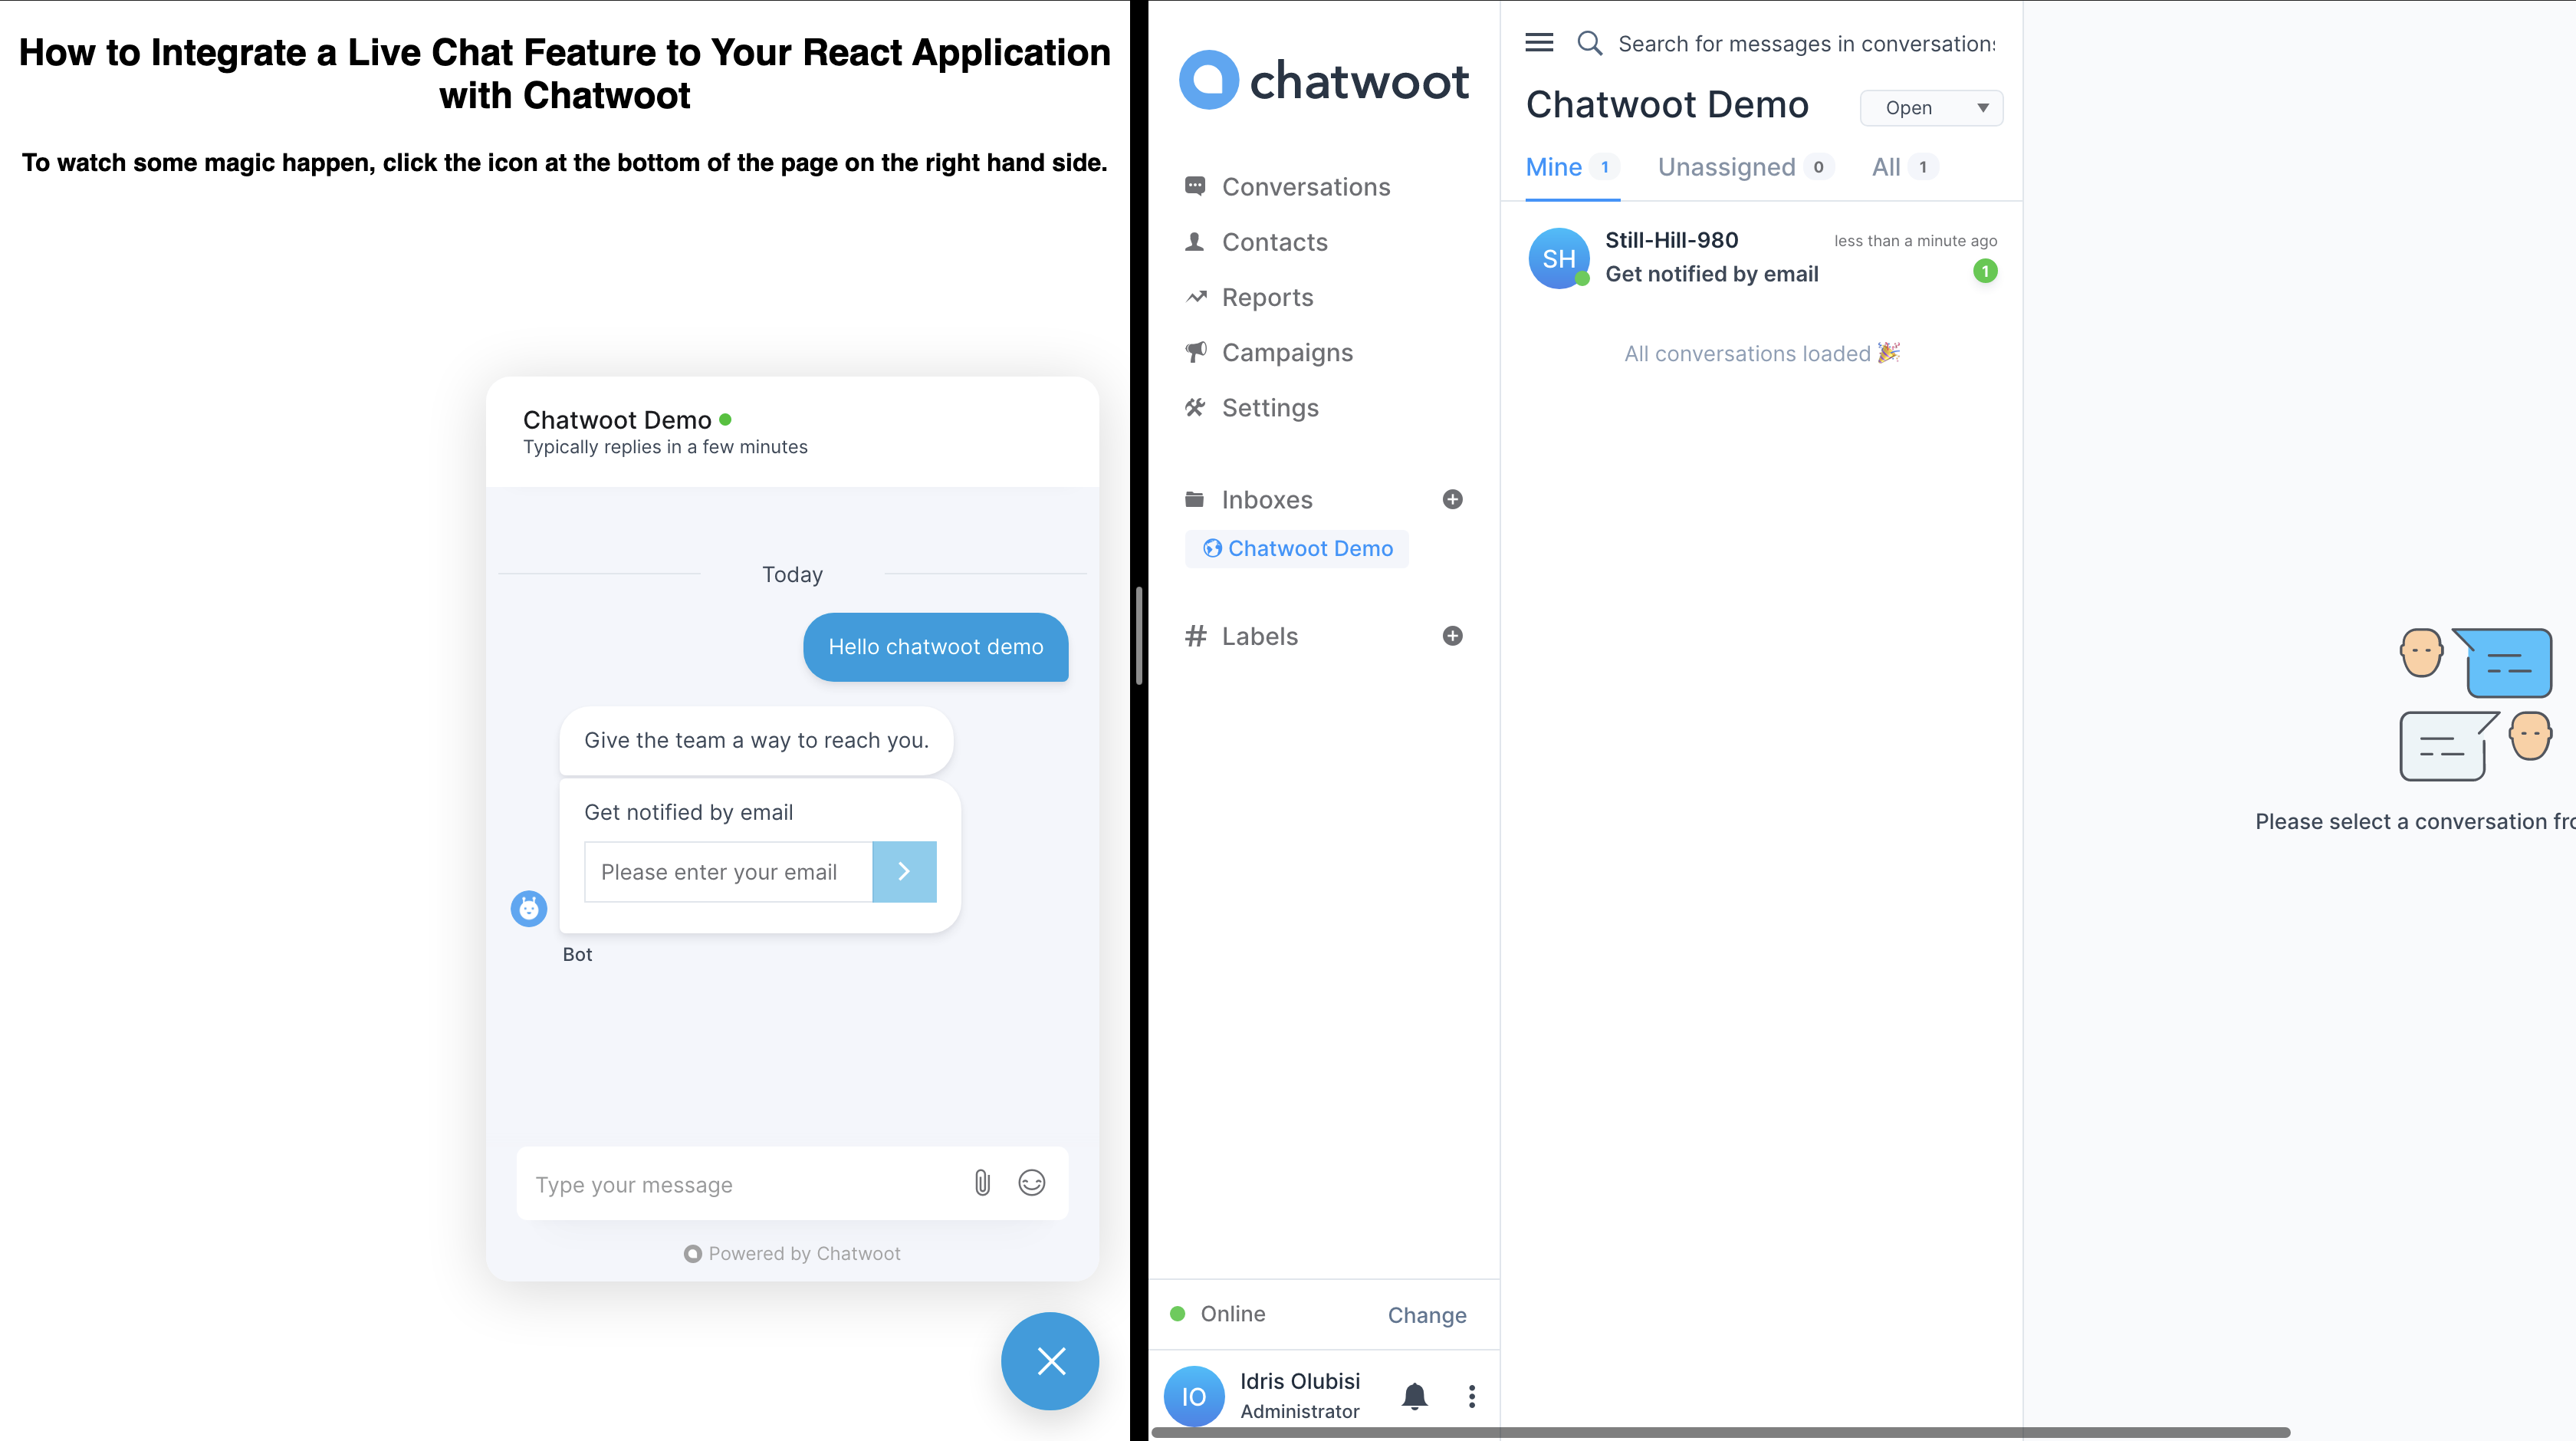
The image below shows the first conversation between the support staff on the right-hand side and the customer's left-hand side.
Afterward, we can now continue our chat successfully.
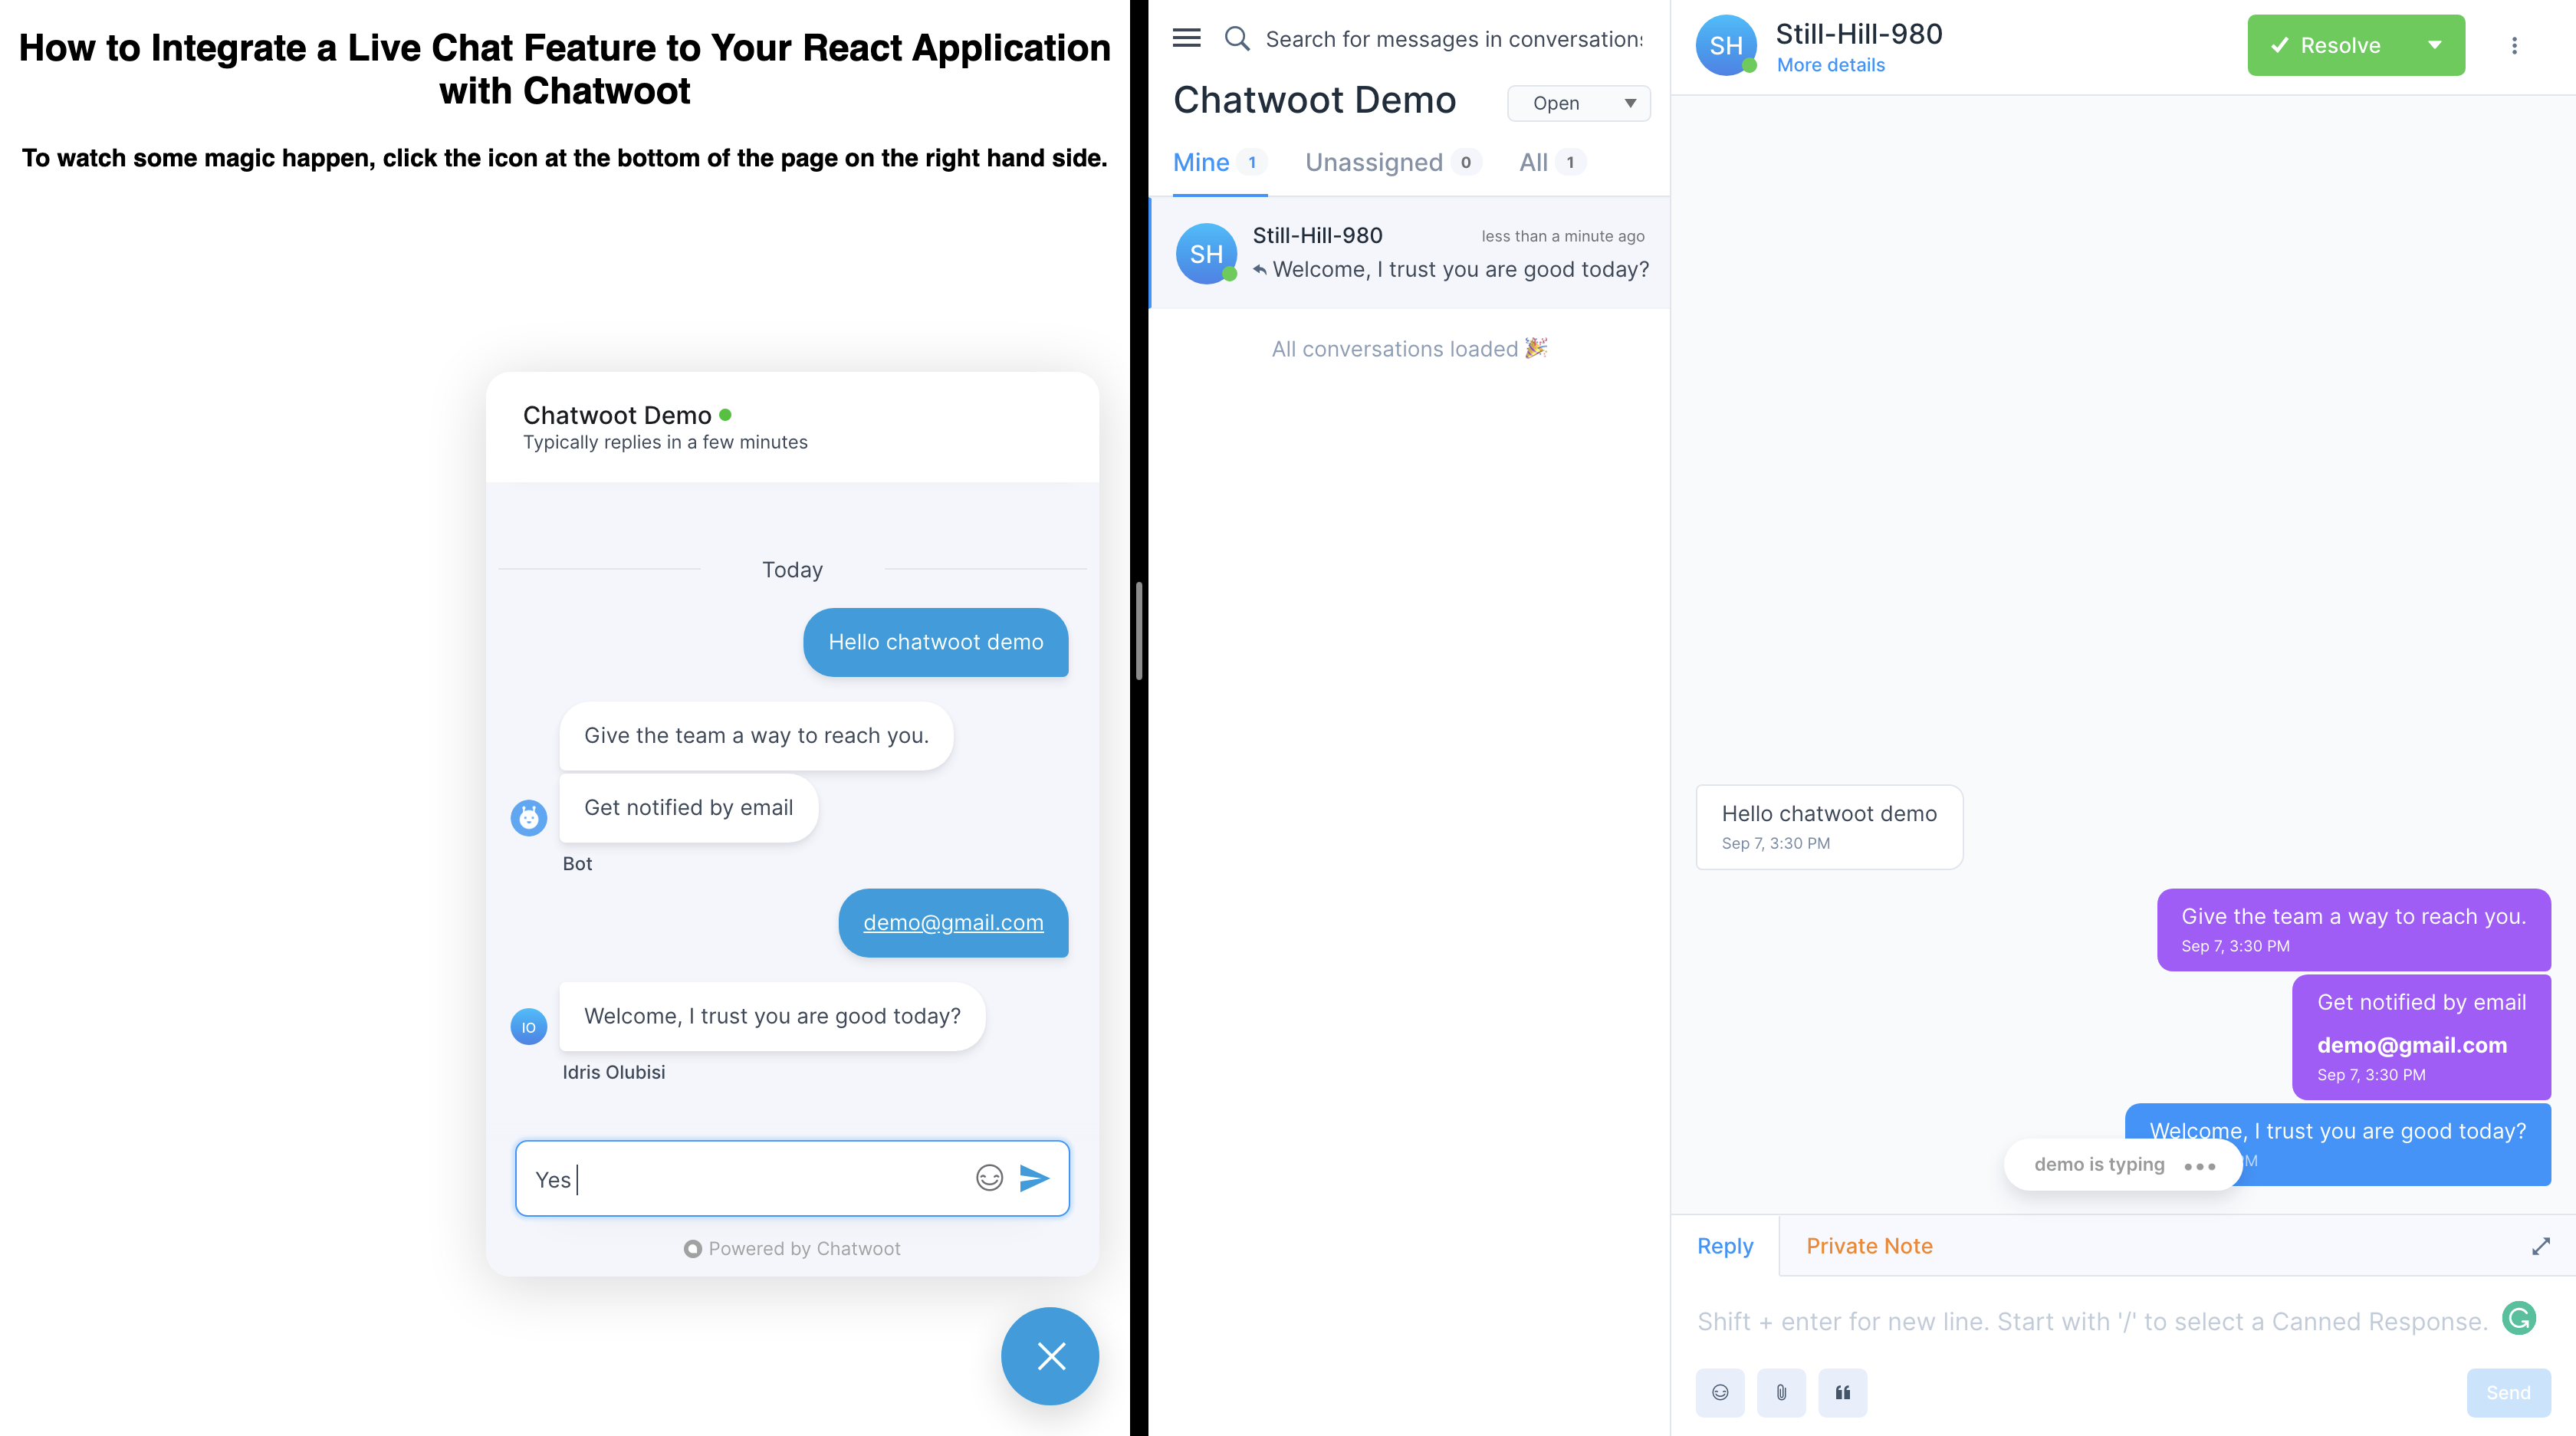
Chatwoot also have a mobile app where support staff can quickly respond to customers chat anywhere in the world.
Conclusion
Using Chatwoot, we learned what live chat is, why it's useful, and how to integrate it into our application.
Moreover, Aviyel is partnering with Chatwoot to democratize open source. We are embarking on a journey to build a developers-driven community with a constant flow of knowledge, ideas, and goals.
Resources
I'd love to connect with you at Twitter | LinkedIn | GitHub | Portfolio
This article was first published on Aviyel. If you are a project maintainer, contributor, or just an Open Source enthusiast, follow @aviyelHQ or join up for early access for everything Open Source.