Build a Decentralized Social Network with Reactjs, TailwindCSS & Lens Protocol

Software Engineer | Developer Advocate | Technical Writer | Content Creator
One of the most important advantages of social networks is the potential for real human connections. Websites and applications that emphasize collaboration, sharing of content, engagement, and community-based feedback are collectively referred to as social media.
Web3 social appears to have enormous potential for consumers, leveraging Lens Protocol to restore faith in what social media may be while also giving us the power to manage how our content is utilized.
This post will teach us how to build a decentralized social network with Reactjs, Tailwindcss, and Lens protocol.
Live Project: Decentralized Social Network
GitHub Repository: Decentralized Social Network GitHub
Prerequisite
Make sure to have Node.js or npm installed on your computer. If you don't, click here.
Project Setup and Installation
To quickly get started with the project setup and installation, we will clone this project on GitHub and ensure we are on the starter branch.
Next, we will launch the project locally after cloning it using the following command on our terminal.
Project installation using yarn.
cd decentralize-social-media-app-with-lens-protocol && yarn && yarn start
Project installation using npm.
cd decentralize-social-media-app-with-lens-protocol && npm install && npm start
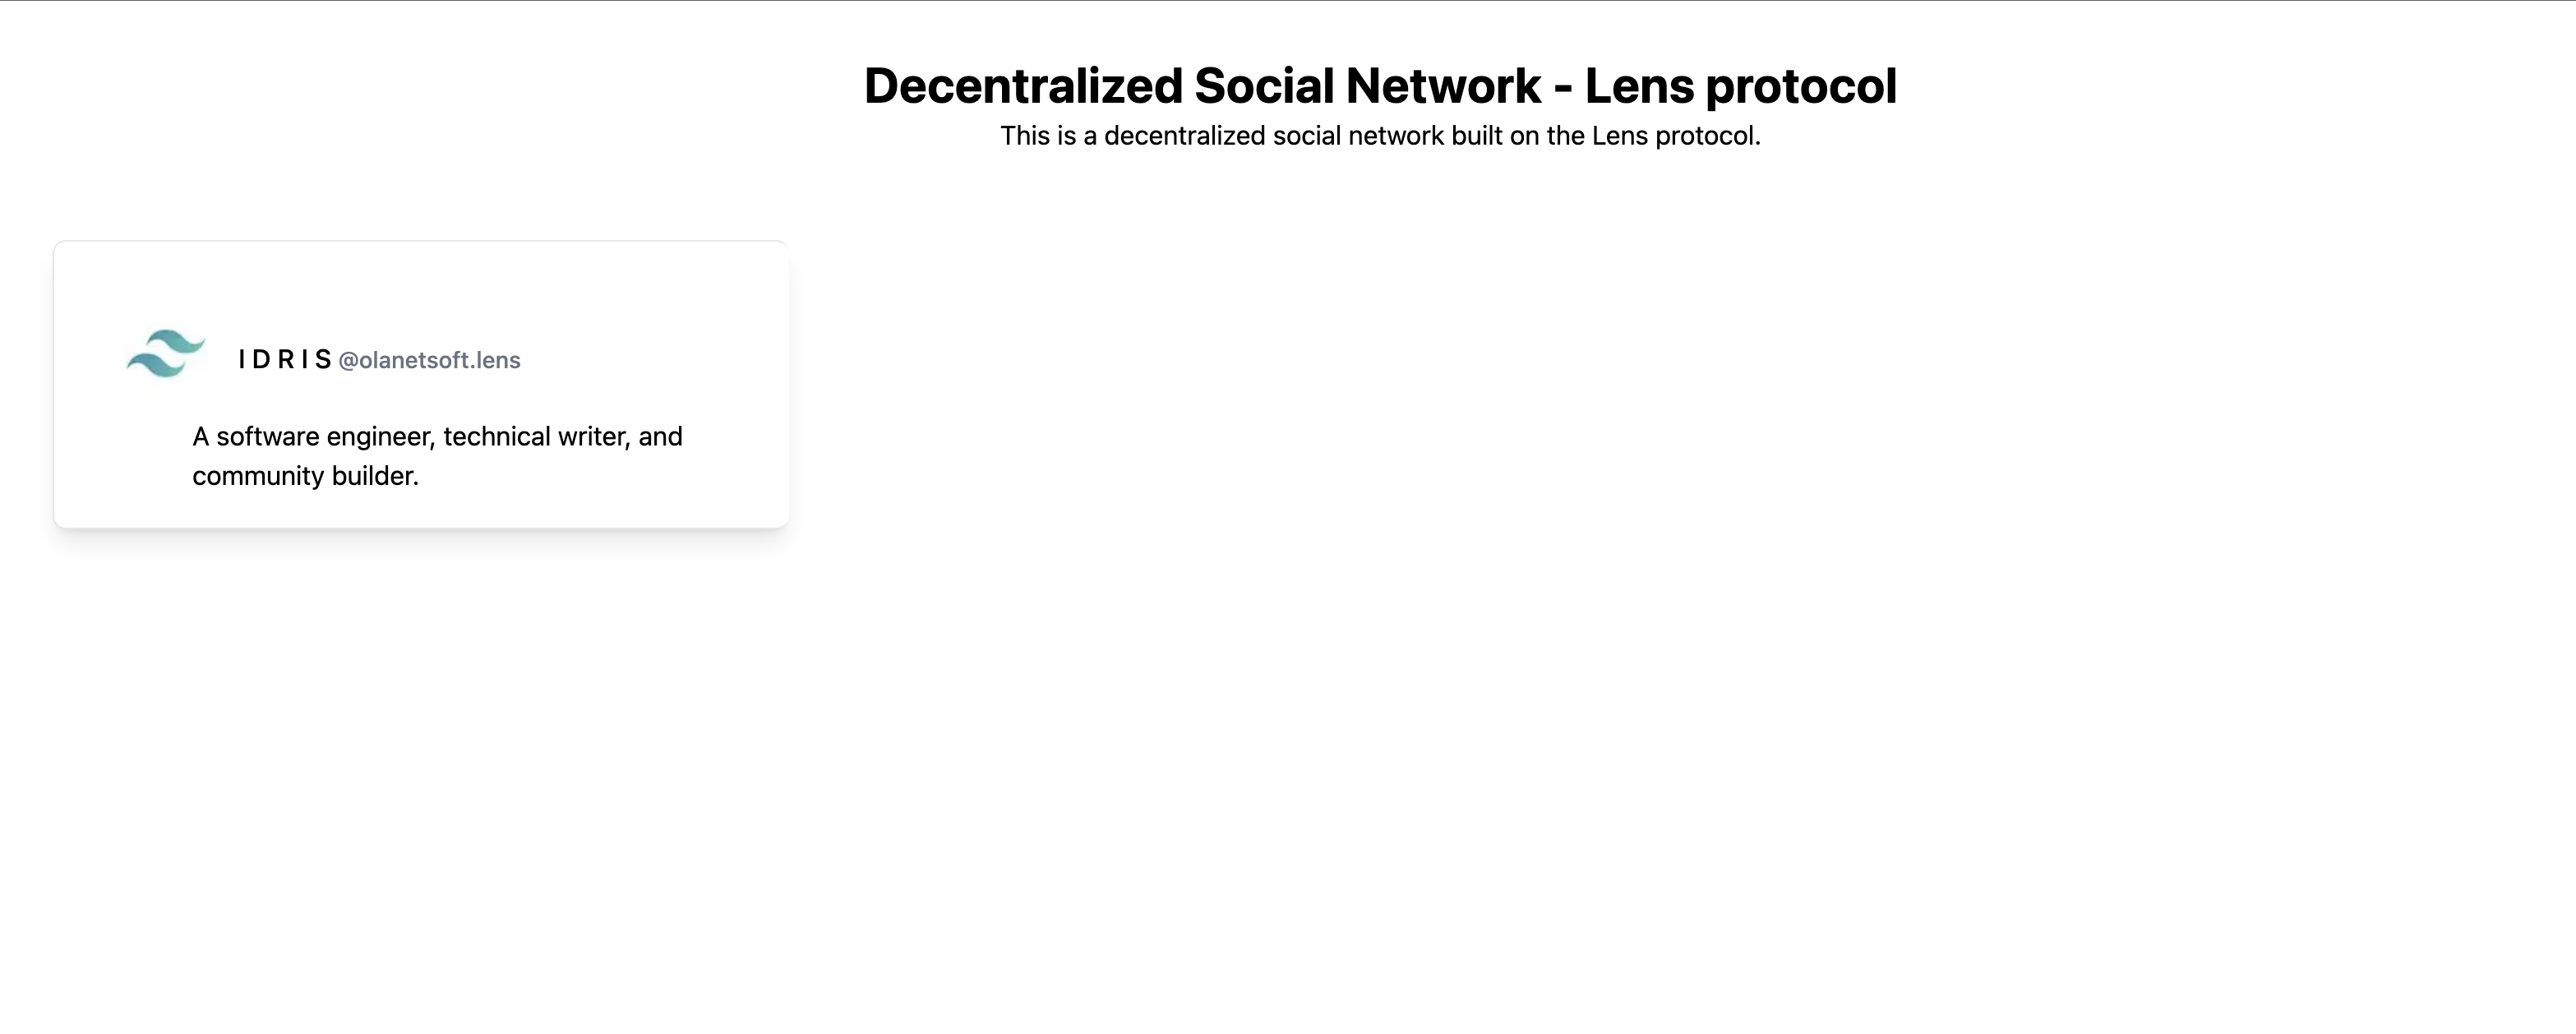
After cloning and installing the project, we should have something similar to what we have below:
Before implementing all profile retrieval, let's discuss the Lens Protocol in the following section.
What is Lens Protocol?
The Lens Protocol is a smart contract-based social graph on the Polygon Proof-of-Stake blockchain. It enables developers to build composable, user-owned social graphs by allowing them to own the links between themselves and their community.
Learn more about Lens protocol.
Building Social Network dApp
In this section, we will build a decentralized social network that implements all profile and single profile retrieval and publications.
Fetching all Profiles
After cloning the repository successfully, we can now build the feature to fetch all profiles using the Lens protocol API.
To set up a graphQL call to the Lens protocol API, we can now go to the api.js file inside the pages/api/ directory and edit it with the following code snippet.
import { createClient } from "urql";

const API_URL = "https://api.lens.dev";

// Setup the client to use the API_URL as the base URL
export const client = createClient({
  url: API_URL,
});

// Get the recommended profiles
export const getProfiles = `
  query RecommendedProfiles {
    recommendedProfiles {
          id
        name
        bio
        attributes {
          displayType
          traitType
          key
          value
        }
          followNftAddress
        metadata
        isDefault
        picture {
          ... on NftImage {
        contractAddress
        tokenId
        uri
        verified
          }
          ... on MediaSet {
        original {
          url
          mimeType
        }
          }
          __typename
        }
        handle
        coverPicture {
          ... on NftImage {
        contractAddress
        tokenId
        uri
        verified
          }
          ... on MediaSet {
        original {
          url
          mimeType
        }
          }
          __typename
        }
        ownedBy
        dispatcher {
          address
          canUseRelay
        }
        stats {
          totalFollowers
          totalFollowing
          totalPosts
          totalComments
          totalMirrors
          totalPublications
          totalCollects
        }
        followModule {
          ... on FeeFollowModuleSettings {
        type
        amount {
          asset {
            symbol
            name
            decimals
            address
          }
          value
        }
        recipient
          }
          ... on ProfileFollowModuleSettings {
           type
          }
          ... on RevertFollowModuleSettings {
           type
          }
        }
    }
      }
`;
In the code snippet above, we:
- Imported a
createClientfromurqlto help send GraphQL requests to our API - Set up a client making a request to Lens protocol domain
- Setup the
getProfilesendpoint to help retrieve recommended profiles. To learn more, check the official Lens protocol documentation
Next, we will import the client and getProfiles in the index.js file and update the file with the following code snippet.
import Head from "next/head";
import Profiles from "../components/profiles";

import { useState, useEffect } from "react";

import { client, getProfiles } from "../pages/api/api";

export default function Home() {

  // Setup the state for the profiles
  const [profiles, setProfiles] = useState([]);

  // Get the recommended profiles
  const fetchProfiles = async () => {
    try {
      const response = await client.query(getProfiles).toPromise();

      setProfiles(response.data.recommendedProfiles);

      console.log(response.data.recommendedProfiles);
    } catch (e) {
      console.log(e);
    }
  };

  // Run the fetchProfiles function when the component is mounted
  useEffect(() => {
    fetchProfiles();
  }, []);

  // Render the component
  return (
    <div className="grid grid-cols-3 divide-x">
      <Head>
        <title>Decentralize Social Media App - Lens protocol</title>
        <meta name="description" content="Decentralize Social Media App" />
        <link rel="icon" href="/favicon.ico" />
      </Head>
      <div className="col-span-3">
        <div className="px-4 py-8">
          <h1 className="text-3xl font-bold leading-tight text-center">
            Decentralize Social Media App - Lens protocol
          </h1>
          <p className="text-center">
            This is a decentralized social media app built on the Lens protocol.
          </p>
        </div>
      </div>
      {profiles && profiles.length > 0 ? (
        <Profiles profiles={profiles} />
      ) : (
        <div className="text-center text-gray-500 p-5 font-medium text-xl tracking-tight leading-tight">
          <p>Loading...</p>
        </div>
      )}
    </div>
  );
}
In the code snippet above, we:
- Created a state variable
profilesto save the profile retrieved from the API request - Created a function
fetchProfilesto get recommended profiles from the API using the client we created earlier and the recommended profile request endpoint - Reference the
fetchProfilesfunction when the component is mounted - Validated if the
profilesvariable length is greater than0, we then render theProfilescomponent we imported in the earlier step; otherwise, we return theLoading...while the API request is in progress
At the moment, the Profiles component is empty. Let us work on that in the next step.
Inside the profiles.js file in the components directory, we will update it with the following code snippet to iterate over profile records and retrieve and render individual profiles in a card layout.
import React from "react";
import Image from "next/image";
import Link from "next/link";

export default function Profiles({ profiles }) {
  return (
    <>
      {profiles.length > 0 &&
        profiles.map((profile, index) => (
          <Link href={`/profile/${profile.id}`} key={index}>
            <div className="max-w-md rounded-lg shadow-lg bg-white mt-5 mb-5 p-5 border border-radius-8 cursor-pointer hover:bg-gray-100 hover:shadow-lg ml-8">
              <div className="flex flex-shrink-0 p-4 pb-0">
                <div className="flex items-center">
                  <div>
                    {profile &&
                    profile.picture &&
                    profile.picture.original &&
                    profile.picture.original.url ? (
                      <Image
                        src={`${profile.picture.original.url}`}
                        alt={profile.name}
                        width={64}
                        height={64}
                        className="rounded-full"
                      />
                    ) : (
                      <div className="rounded-full bg-gray-500 h-12 w-12"></div>
                    )}
                  </div>
                  <div className="ml-3">
                    <p className="text-base leading-6 font-medium ">
                      {profile.name}{" "}
                      <span className="text-sm leading-5 font-medium text-gray-500 group-hover:text-gray-400 transition ease-in-out duration-150">
                        @{profile.handle}
                      </span>
                    </p>
                  </div>
                </div>
              </div>
              <div className="pl-16">
                <p className="text-base width-auto font-small flex-shrink">
                  {profile.bio ? profile.bio : "No bio available 😢"}
                </p>
              </div>
            </div>
          </Link>
        ))}
    </>
  );
}
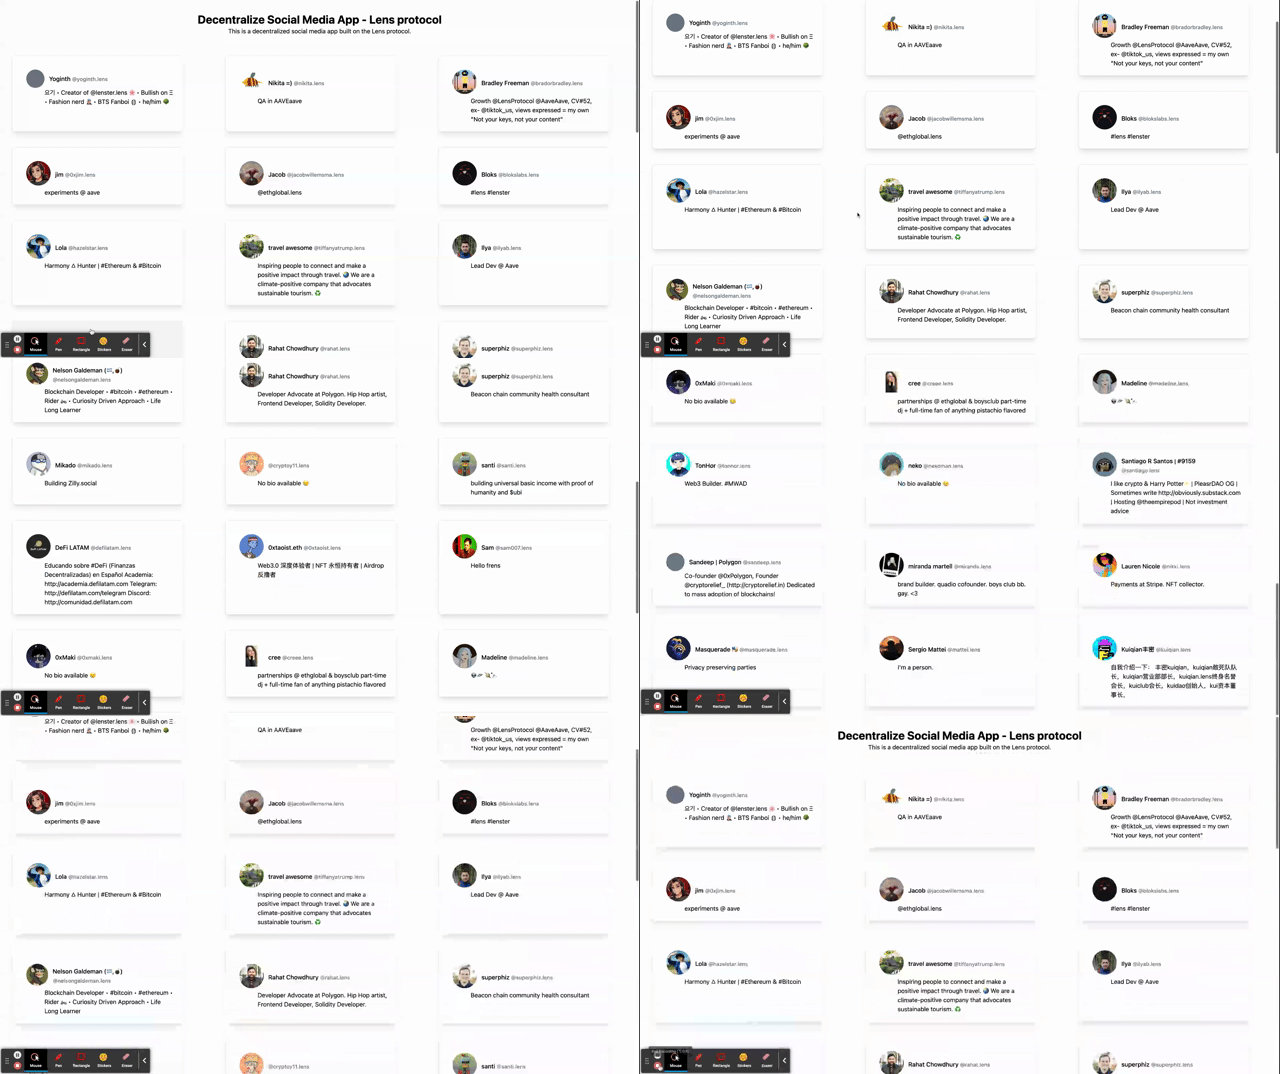
Next, we will start the server in development mode using the command below;
yarn dev
When we open our browser, we should see something similar to what is shown below.
Implementing Single Profile Functionality
Using the Lens protocol API, we will create a single profile retrieval functionality in this section. As we may have seen, when we click on any card, we see a 404 page, which means the route does not exist, but let's rectify that immediately.
Let's update the api.js in the pages/api/ directory with the following code snippet.
//...

export const getProfile = `
  query Profiles($id: ProfileId!) {
    profiles(request: { profileIds: [$id], limit: 25 }) {
      items {
        id
        name
        bio
        attributes {
          displayType
          traitType
          key
          value
        }
        metadata
        isDefault
        picture {
          ... on NftImage {
        contractAddress
        tokenId
        uri
        verified
          }
          ... on MediaSet {
        original {
          url
          mimeType
        }
          }
          __typename
        }
        handle
        coverPicture {
          ... on NftImage {
        contractAddress
        tokenId
        uri
        verified
          }
          ... on MediaSet {
        original {
          url
          mimeType
        }
          }
          __typename
        }
        ownedBy
        dispatcher {
          address
          canUseRelay
        }
        stats {
          totalFollowers
          totalFollowing
          totalPosts
          totalComments
          totalMirrors
          totalPublications
          totalCollects
        }
      }
      pageInfo {
        prev
        next
        totalCount
      }
    }
      }
`;
In the code snippet above, we added the endpoint to get a single profile using the provided by the Lens protocol in their docs.
Next, we will update the [id].js file in the profile folder under the pages directory with the following code snippet.
In this code snippet above, we:
- Imported
clientandgetProfilefrom theapi.jsfile - Created a state variable
profileto save the profile retrieved - Used the
useRouterhook to access the profileid. - Created
fetchProfileto retrieve a single profile using the client and API endpoint - Fetched the profile when the component is mounted using the
useEffecthook - Rendered individual data on the UI returned
Let's head to our browser to view what we have. We should have something similar to what is shown below.
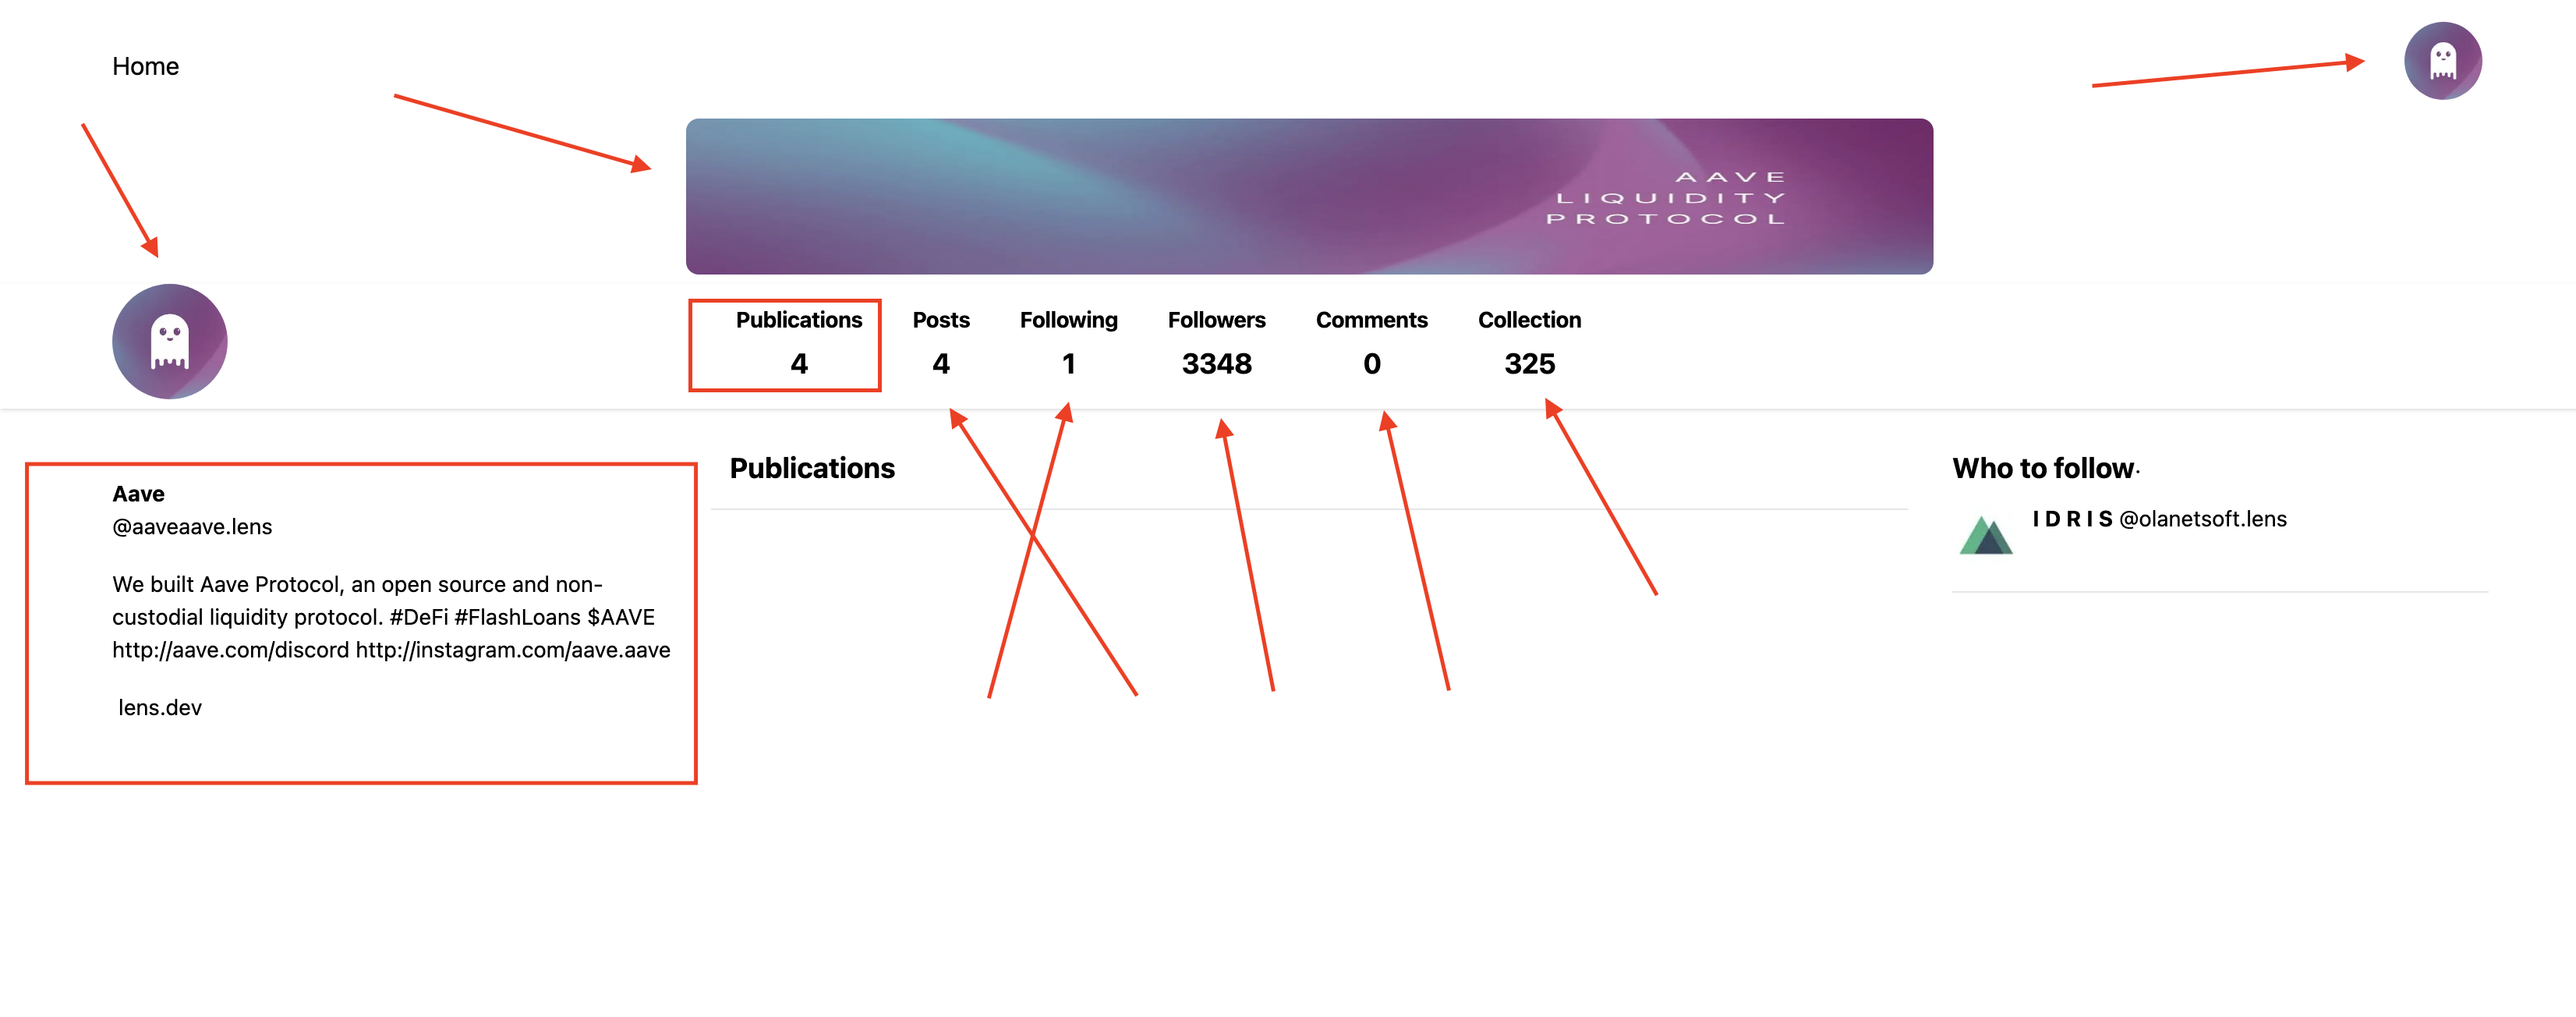
As highlighted in the image above, those are dynamic data retrieved from the API associated with the account.
Next, we will implement fetching profile publications in the following section.
Fetching Profile Publications
A profile's posts, comments, and mirrors are considered publications. Learn more about the publication's endpoints here.
Let's update the api.js in the pages/api/ directory with the following code snippet.
//...

export const getPublications = `
  query Publications($id: ProfileId!, $limit: LimitScalar) {
    publications(request: {
      profileId: $id,
      publicationTypes: [POST],
      limit: $limit
    }) {
      items {
        __typename
        ... on Post {
          ...PostFields
        }
      }
    }
  }
  fragment PostFields on Post {
    id
    metadata {
      ...MetadataOutputFields
    }
    createdAt
  }
  fragment MetadataOutputFields on MetadataOutput {
    name
    description
    content
    media {
      original {
        ...MediaFields
      }
    }
    attributes {
      displayType
      traitType
      value
    }
  }
  fragment MediaFields on Media {
    url
    mimeType
  }
`;
Next, we will update the [id].js file in the profile folder under the pages directory with the following code snippet to retrieve profile publications.
//...
import { client, getProfile, getPublications } from "../api/api";
export default function Profile() {
//...
const [publications, setPublications] = useState();
async function getProfilePublications() {
try {
const returnedPublications = await client
.query(getPublications, { id, limit: 10 })
.toPromise();
const publicationsData = returnedPublications.data.publications.items;
console.log("publicationsData", publicationsData);
setPublications(publicationsData);
} catch (err) {
console.log("error fetching publications...", err);
}
}
useEffect(() => {
if (id) {
//...
getProfilePublications();
}
}, [id]);
return (
<div>
//...
<div className="container mx-auto flex flex-col lg:flex-row mt-3 text-sm leading-normal">
//...
<div className="w-full lg:w-1/2 bg-white mb-4">
<div className="p-3 text-lg font-bold border-b border-solid border-grey-light">
Publications
</div>
{publications &&
publications.map((publication) => (
<div key={publication.id}>
<div className="flex border-b border-solid border-grey-light">
<div className="w-1/8 text-right pl-3 pt-3">
<div>
<i className="fa fa-thumb-tack text-teal mr-2"></i>
</div>
<div>
<a href="#">
{profile &&
profile.picture &&
profile.picture.original &&
profile.picture.original.url ? (
<Image
src={profile.picture.original.url}
alt="avatar"
className="rounded-full h-12 w-12 mr-2"
width={50}
height={50}
/>
) : (
<div className="rounded-full bg-gray-500 h-12 w-12"></div>
)}
</a>
</div>
</div>
<div className="w-7/8 p-3 pl-0 ml-4">
<div className="flex justify-between">
<div>
<span className="font-bold">
<a href="#" className="text-black">
{profile && profile.name}
</a>
</span>
<span className="text-grey-dark">
@{profile && profile.handle}
</span>
<span className="text-grey-dark">·</span>
</div>
</div>
<div className="mb-4">
<p className="mb-6 text-grey-dark mt-2">
{publication.metadata.content}
</p>
<p>
<a href="#">
{publication.metadata.media > 0 &&
publication.metadata.media[0].original.mimetype ===
"video/mp4" ? (
<video
controls
style={{ width: "700", height: "400" }}
>
<source
src={publication.metadata.media[0].original.url}
type="video/mp4"
/>
</video>
) : null}
</a>
</p>
</div>
</div>
</div>
</div>
))}
</div>
//...
</div>
</div>
);
}
In this code snippet above, we:
- Imported
getPublicationsfrom theapi.jsfile - Created a state variable
publicationsto save the publications retrieved - Created
getProfilePublicationsto retrieve profile publication using the client and API endpoint - Fetched the profile publications when the component is mounted using the
useEffecthook - Rendered individual profile publication on the UI returned
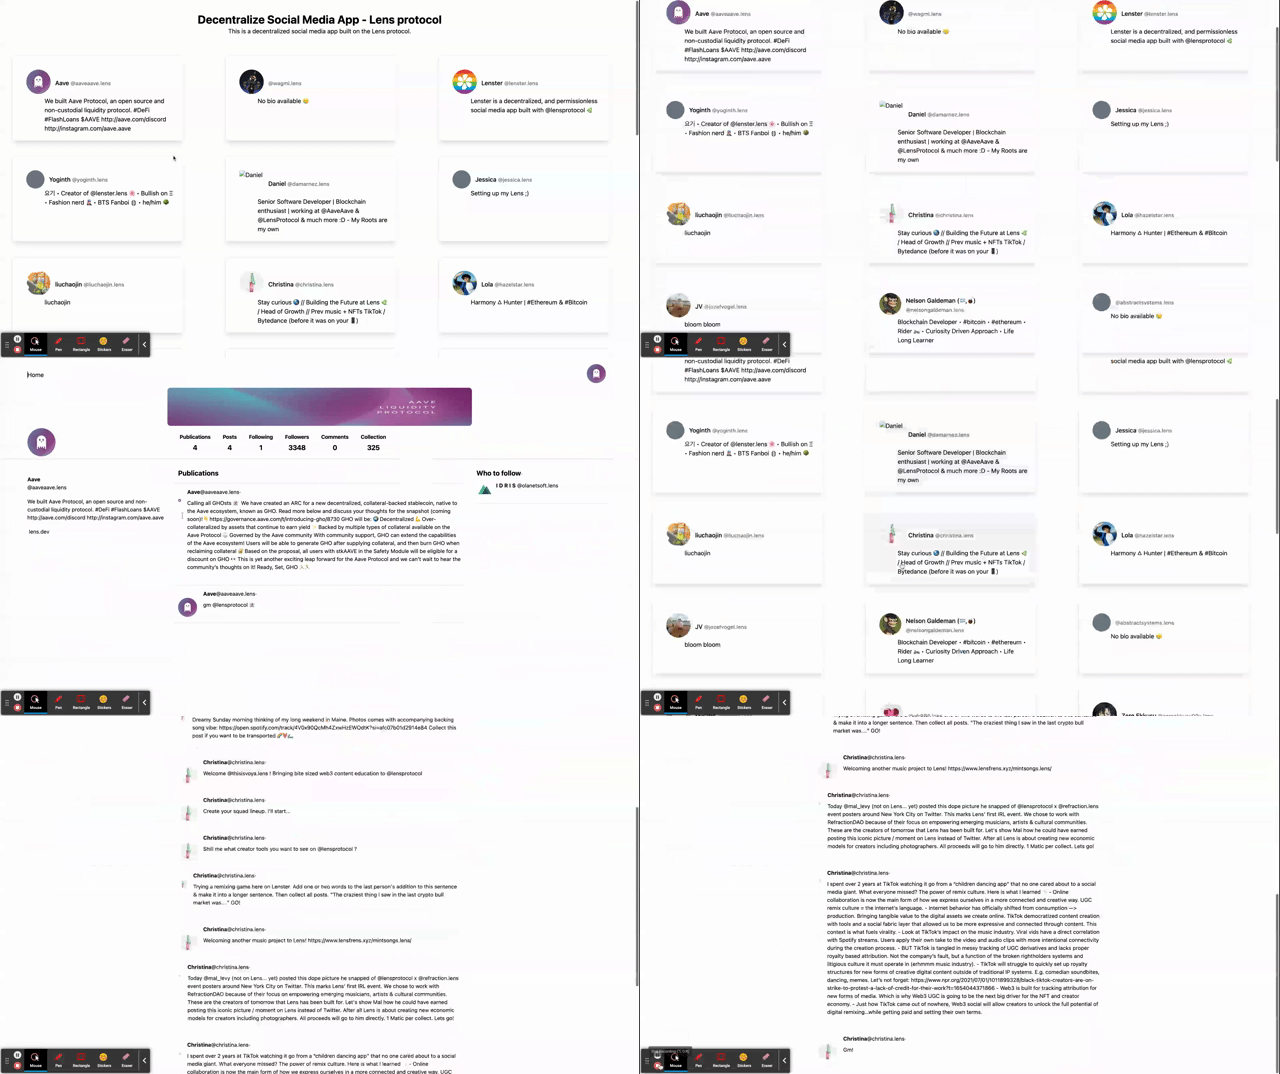
Next, we can test our application by navigating to our browser.
What Next?
This post covers a few endpoints provided by Lens protocol. We can always play around with endpoints and functionality like Follow, Create Profile, Comment, Mirror, etc.
I strongly advise looking over the Lens API documentation and the Lens apps for some ideas.
Conclusion
This post teaches us how to build a decentralized social network with Reactjs, TailwindCSS & Lens protocol.
References
- Lens Protocol Documentation
- Full Stack Web3 with Lens Protocol, Next.js, and GraphQL
- Web3 Social
- Getting Started With Lens Protocol As A Frontend Developer
I'd love to connect with you at Twitter | LinkedIn | GitHub | Portfolio
See you in my next blog article. Take care!!!